During the reconnaissance phase, penetration testers will eventually need to directly engage the target by performing an active information gathering technique known as scanning. Scanning is a technique that’s used to discover live systems on a network, identify the open service ports on a system, and discover vulnerabilities on host machines and even their operating system architecture. The information that’s gathered from scanning helps the penetration tester gain a clearer view of their targets compared to passive information gathering.
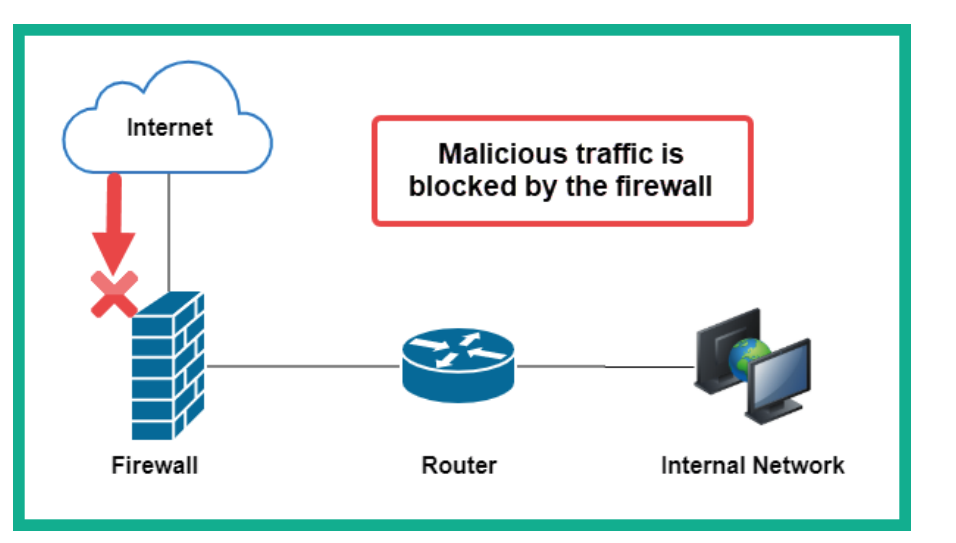
When we perform this type of scans, chances are that we will get blocked most of the times because of the firewalls
MAC address spoofing:
When connecting to a wired or wireless network, your Network Interface Card (NIC) contains a burned-in address known as a Media Access Control (MAC) address, which is unique to each device. When your NIC sends traffic out on a network, your MAC address is also inserted within the frame header, and this information can be used to identify your machine on a network. As an aspiring penetration tester, you can change the MAC address on both your Ethernet and wireless network adapters by using a pre-installed tool known as MAC Changer. Changing your MAC address allows you to pretend to be a different device, such as a network device, a printer, or a vendor-specific device on the network. This technique can be used to protect the identity of your attacker machine while on an organization’s network, and it can also trick the network administrators into thinking your attacker machine is one of their existing end devices.
- Identify your initial
MACaddress using the commandifconfig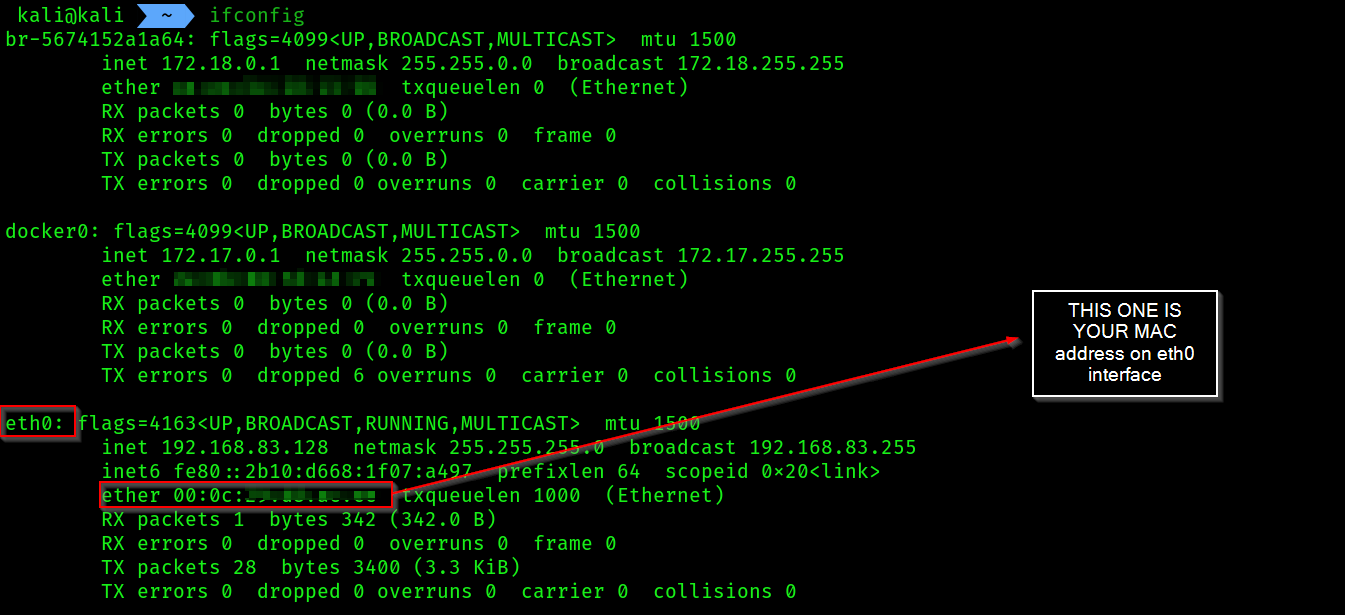
- Note down your initial address
- We will take the interface
eth0down
sudo ifconfig eth0 down
- Now we will use the tool
macchangerto spoof ourMAC address
sudo macchanger -A eth0
sudo ifconfig eth0 up

Notice the
MAC addresshas been changed by using the commandifconfigLastly, to further verify the vendor of the spoofed MAC address, go to Mac-vendors and enter the MAC address
Discovering live systems on a network:
Discovering live hosts on the network is an essential stage when performing a penetration test. Let’s imagine you’re an ethical hacker or a penetration tester; your target organization permits you to directly connect your attacker machine with Kali Linux on their network to perform security testing from their internal network. You’re eager to start discovering security vulnerabilities and hacking systems, but you’re not sure which systems are online, nor their host operating systems. GUIDELINES FOR PERFORMING LIVE SYSTEM SCANNING:
- Ensure you do not scan systems that you do not own or have been granted legal permission. Before all these stuffs we need to setup our target metasploitable 2 machine, we need to add it to the PENTEST-NET, it’s by-default is on NAT
Most likely in your case you have already added metasploitable 2 either on vmnet2(which is 172.30.1.0/24) network or on NAT. If so then you don’t need to do these manual steps. I forgot to do so, that’s why i had to enable it manually. If you are having issues still then you can follow these steps or troubleshoot in your own way.
TO DO THIS:
- Open the VM first and login using
msfadminas username and password both. - Then use the following commands:
sudo nano /etc/network/interfaces
- We need to add another interface like
eth2, write the following into the config file:
# The loopback network interface
auto lo
iface lo inet loopback

# The primary network interface (DHCP)
auto eth0
iface eth0 inet dhcp

# The secondary interface for the lab (Static)
auto eth2
iface eth2 inet static
    address 172.30.1.134
    netmask 255.255.255.0
- Save and Exit Nano: Press
Ctrl+X, thenY, andEnter. - Restart networking service:
sudo /etc/init.d/networking restart
- use
ip a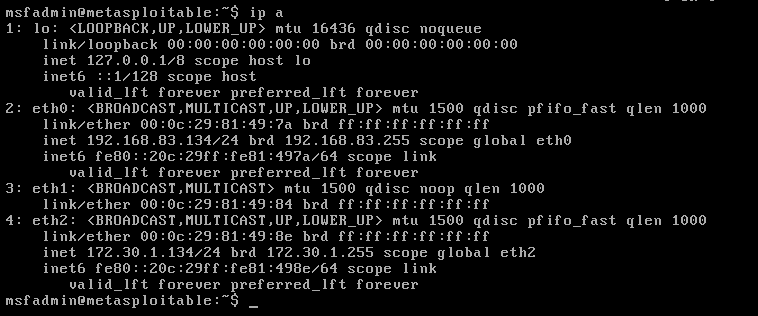 Now we can start our task
- Next, let’s use
Netdiscoverto perform an active scan of the entire network:
sudo netdiscover -r 172.30.1.0/24

- Picked up
metasploitable 2
- What is netdiscover? Netdiscover is a scanning tool that uses
Address Resolution Protocol (ARP)messages to identify live systems on a network. Using the–rsyntax allows you to specify a range when scanning.
You can perform a passive scan of the network using the –p syntax, which allows Netdiscover to listen passively for any messages that can be exchanged between hosts on the network.
- Next, let’s use
Network Mapper (Nmap)to scan the entire network while excluding our Kali Linux machine by using the following command:
nmap -sn 172.30.1.0/24 --exclude 172.30.1.130
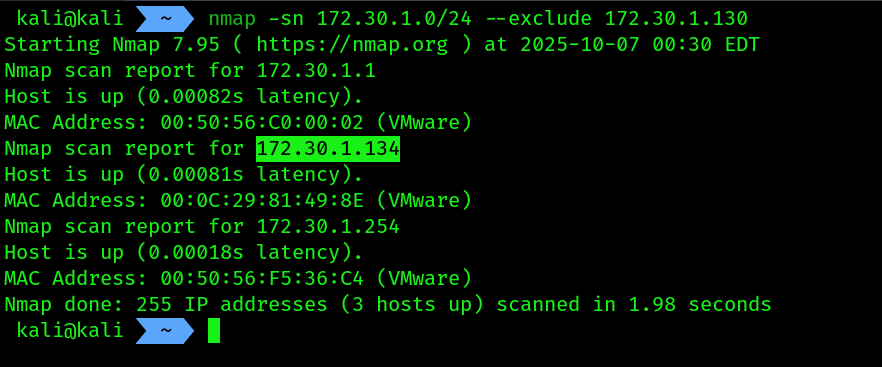 2. Using the
 –sn syntax ensures Nmap performs a ping sweep of the network. This means Nmap will send an Internet Control Message Protocol (ICMP) Echo Request message to all devices within the network range. Online devices will typically respond with an ICMP Echo Reply message.
3. Furthermore, using the --exclude command allows us to specify which IP addresses to exclude from scanning. This command is best used when you are restricted from scanning various IP addresses and subnetworks during a penetration test.
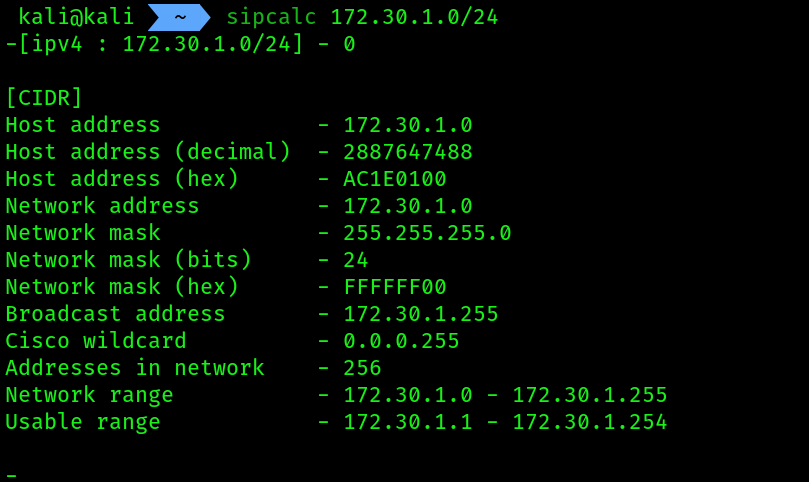
using sipcalc for live host discovery:
- Installation:
sudo apt install -y sipcalc
- usage:
sipcalc 172.30.1.0/24