Requirements:
- Kali linux
- Vmware workstation pro
- Windows 10 workstation
- windows server 2022
- Metasploitable Linux 2
- Linux mint(optional) You should have basic knowledge of setting up vms inside vmware, plus feel free to ommit any machine as your system needs.
Vmware workstation pro:
- Install by signing up from this site VMWARE
Kali linux:
- Install kali linux from this site KALI Linux
Install prebuilt vm images for vmware
Linux mint(optional):
- We will be using this distro for setting up basic blue team operations regarding detection of the attacks. It’s an optional setup. If you have limited resources skip this.
- Install linux mint from this site LINUX MINT , install the
xfceedition for lightweight usage.
Metasploitable-2-linux:
- Install from this site Metasploitable-2-linux
windows 10 enterprise iso:
- Install from this site Win 10 (link not working), i will provide a drive link later on ;)) You can use any windows workstation for testing!!
Windows server 2022 iso:
- Install from this site WINDOWS SERVER 2022 You can use any windows server for testing.
Network segmentation inside vmware:
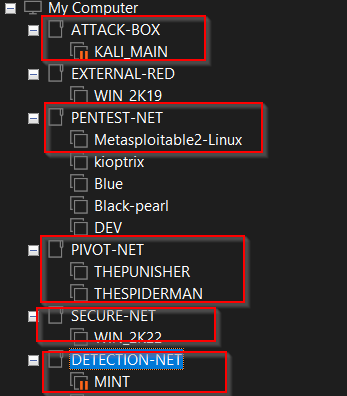
We will be making 5 different folders for our homelab inside vmware. First one which will be ATTACK-BOX: inside this kali linux will be present. Second one will be PENTEST-NET: inside this metasploitable-2-linux will be present. Third one will be PIVOT-NET: inside this 2 windows 10 workstations(name them THEPUNISHER, SPIDERMAN) will be present. Fourth one will be SECURE-NET: inside this windows server 2022 will be present. Fifth one will be DETECTION-NET: inside this our linux mint machine will be present.
You can make the folders by right clicking onto the empty space on vmware -> by selecting New folder option.
- Now after making and separating the machines, we need to segment the network.
- To do so follow the next steps:
- Open
vmware-> click onEdit-> thenvirtual network editor - You should see two network named
NATand another would be your host only connection. - We will add 2 more subnets
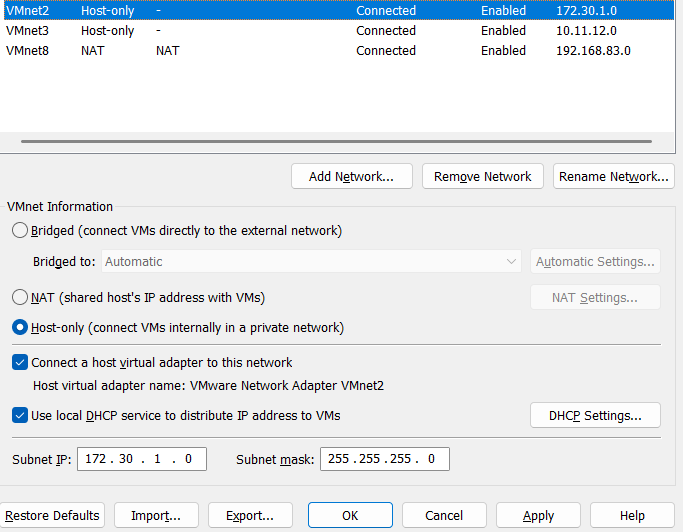
- click on
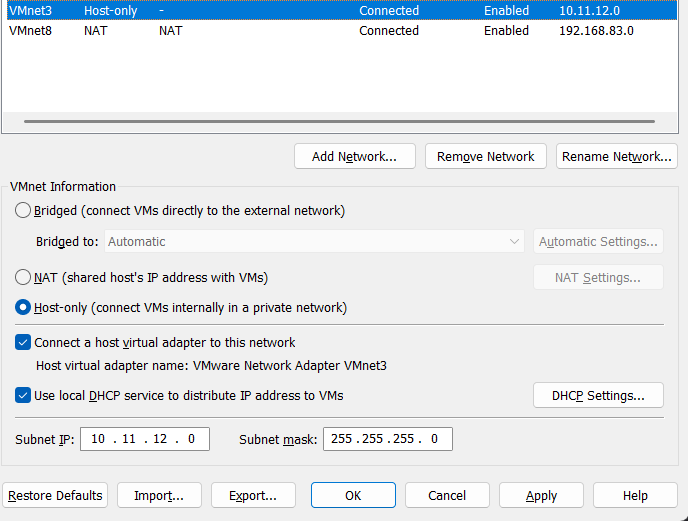
change settings-> click onAdd network-> select your preferredvmnetand clickadd - After adding we need to change some subnet settings on the left down corner.
- Follow the screenshots to give the same as mine:
- Open
If you don’t want to segment the network and make the lab with only NAT network, you can do so, for simpler setup use NAT(if inexperienced). For this whole Network pentesting guide i am going to use kali on 3 of the vmnets for ease of the audience.
- Now click on
Apply - Then come to
vmware-> click onkali linux->edit virtual machine-> add 2 extranetwork adaptersby clicking on theaddbutton and selectingNetwork adapter. - After that add your kali machine into
vmnet2,vmnet3(according to my subnet naming) - Then come to your Linux mint machine do the same as
kali - Add your
metasploitable 2 linuxmachine intovmnet2only. - For the
NATonly setup you will addmetasploitable 2inNAT.
Network segmentation summary:
- All devices in NAT: Just normal default importing of all the vms in vmware.

- Kali is on NAT, vmnet2 and vmnet3, used linux mint as a router for pivoting through machines inside the network segment so that all of the workstations under the forest can talk to each other:
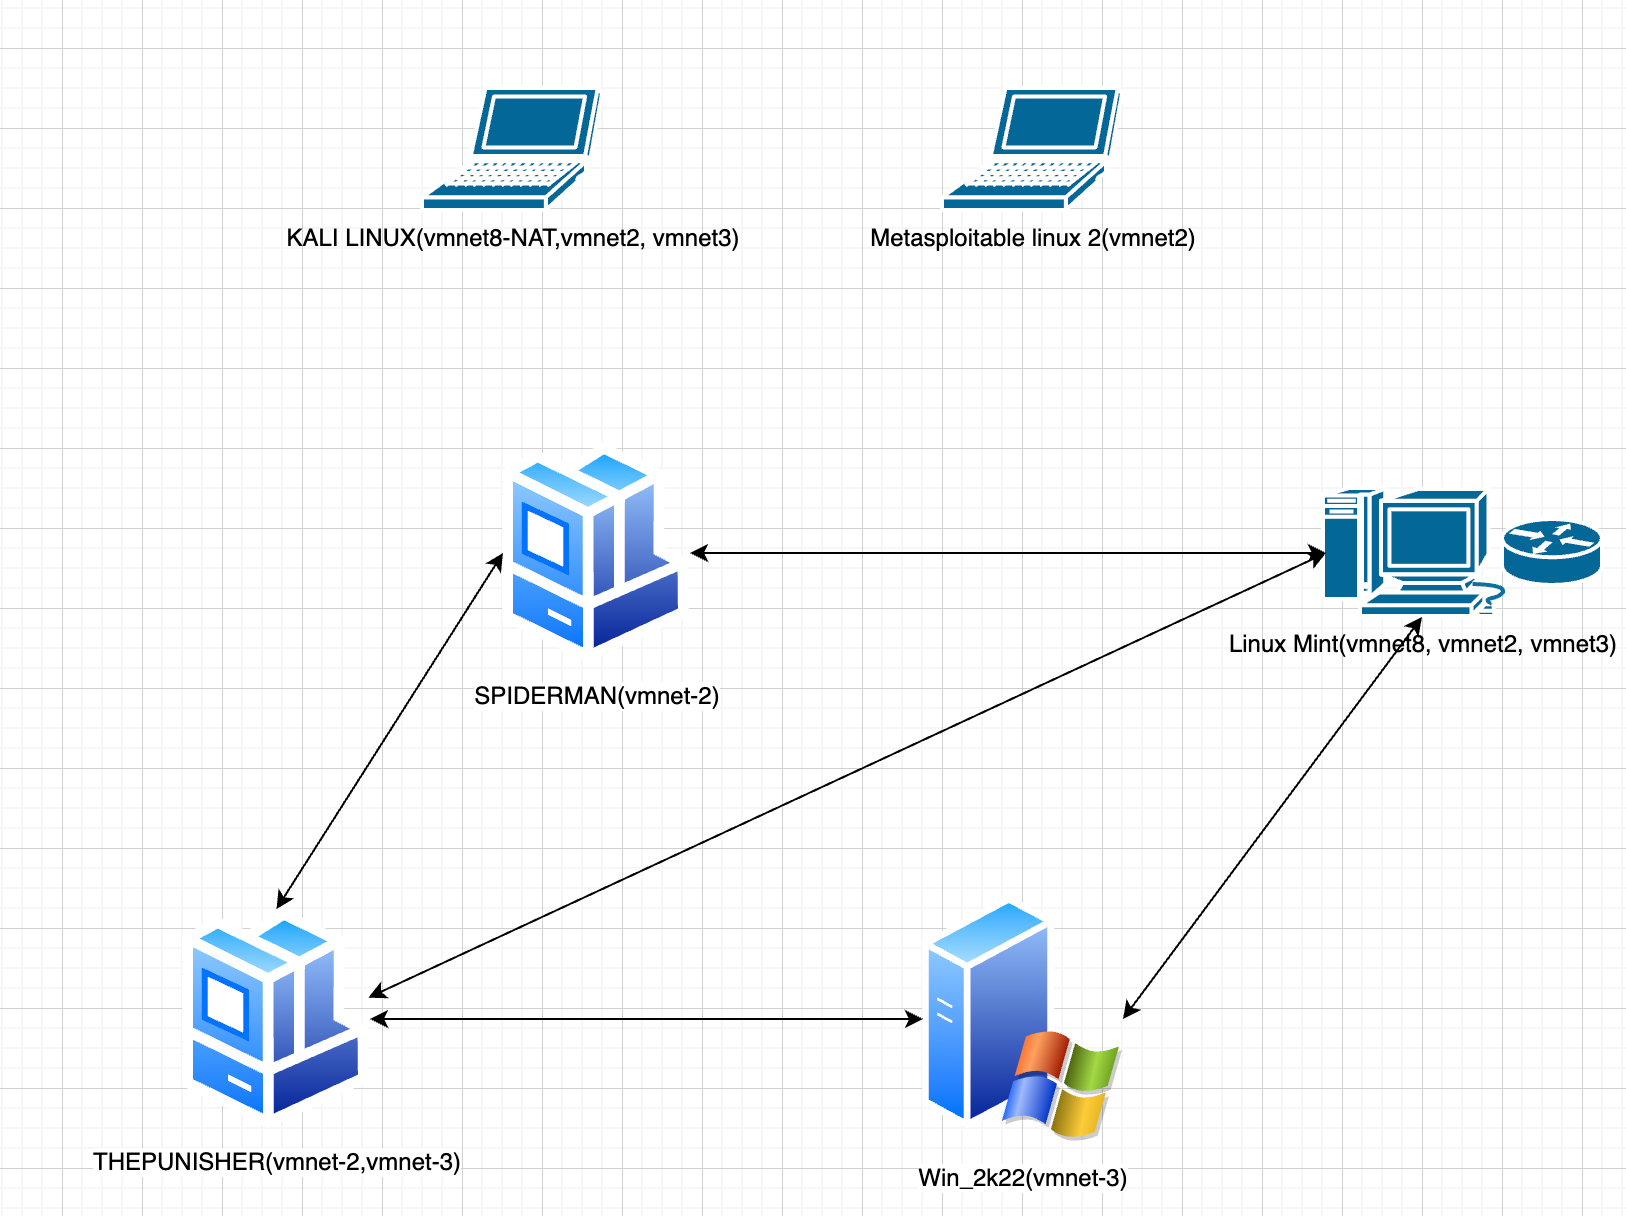
Later on for advanced level pivoting i will show how we can make the following type of network, where kali will be only on NAT with some added changes:
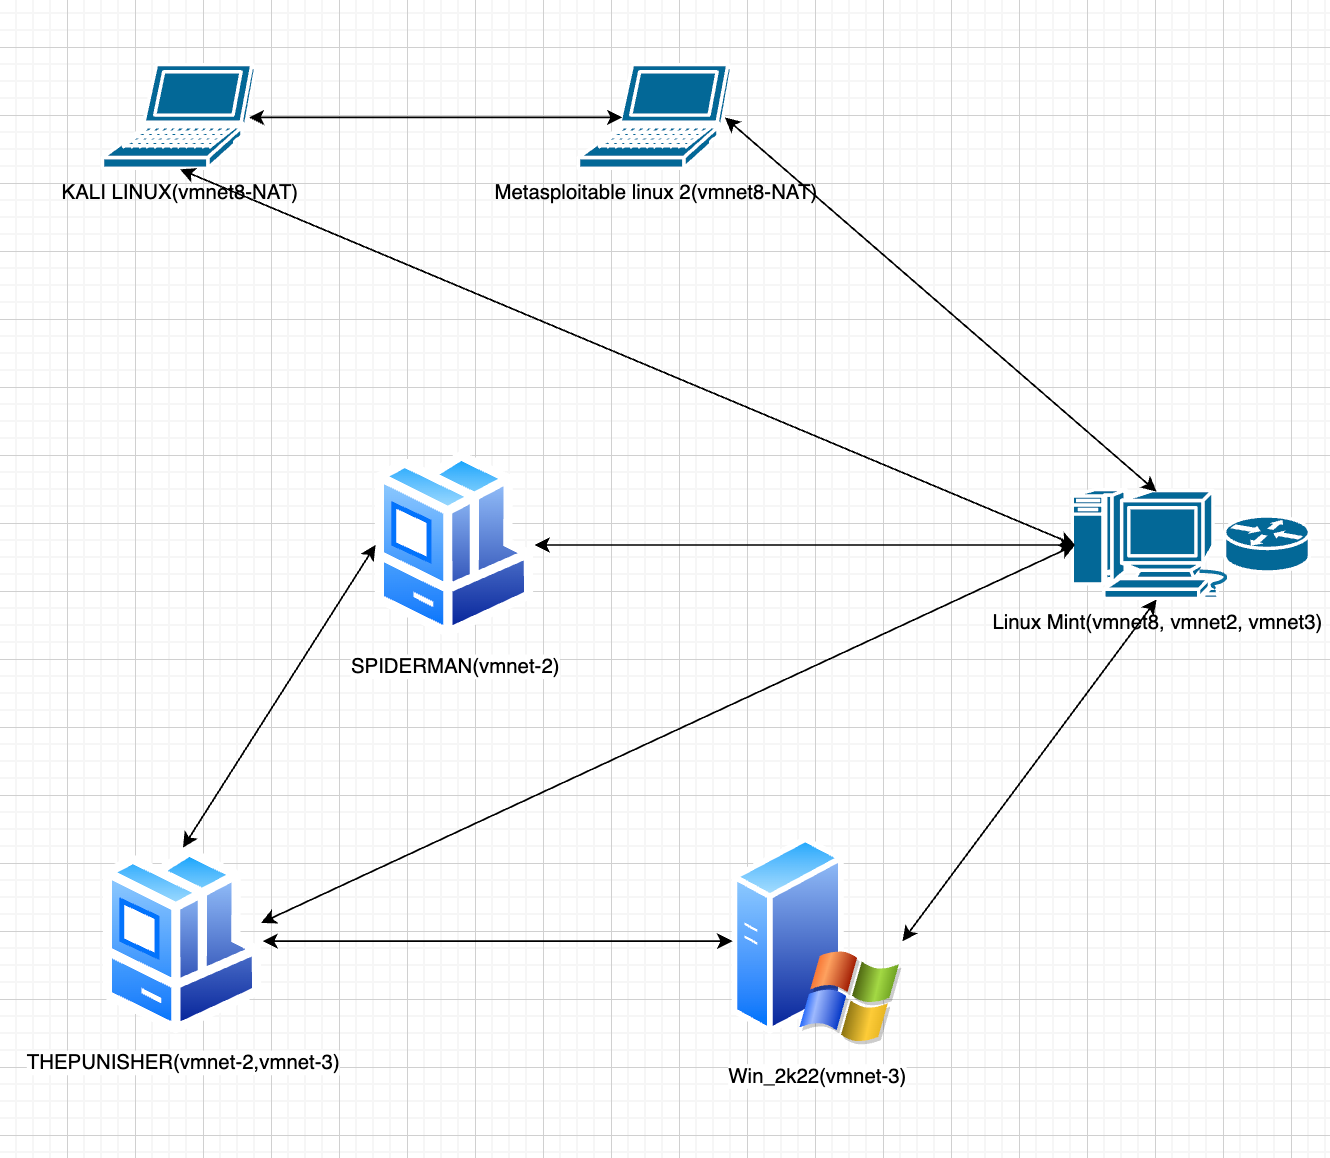 Feel free to use any of the architecture, but i would suggest you to make the first one for easy setup and rapid exploitation wihtout network failures plus less resources consumed. If you want to actually feel like more of a real world scenario use the second one.
I will be using the second one for this whole Network pentesting tutorial.For some practicals i have added new vulnerable machines which i will be providing later on throughout the course. Sometimes i have also used a different Domain controller like windows server 2019 for demo purposes, you can do all these works inside your own DC which we will be setting up.
Active Directory LAB setup:
- We will first setup the Domain controller
Setting up the Domain controller:
- Come to your windows server 2022 -> Add it into
vmnet3along withNATin case of internet related tasks like installations. - Boot your
windows server-> make sure you are at this stage: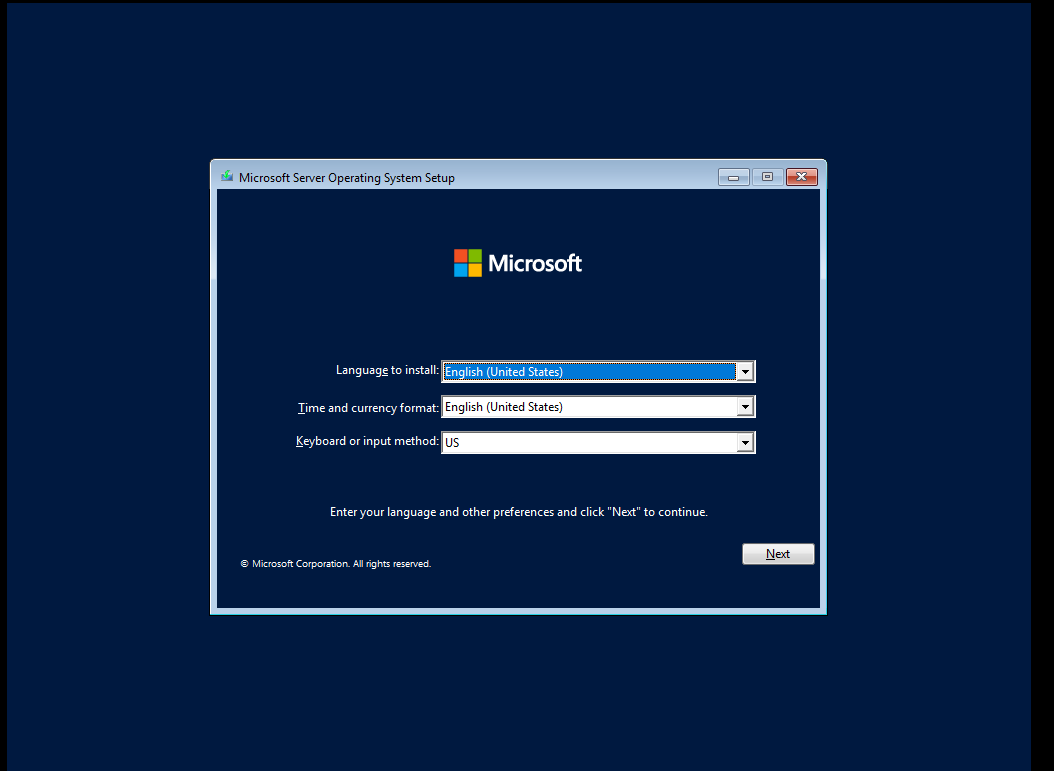
- Click on
next->Install Now - You should see a page like this :
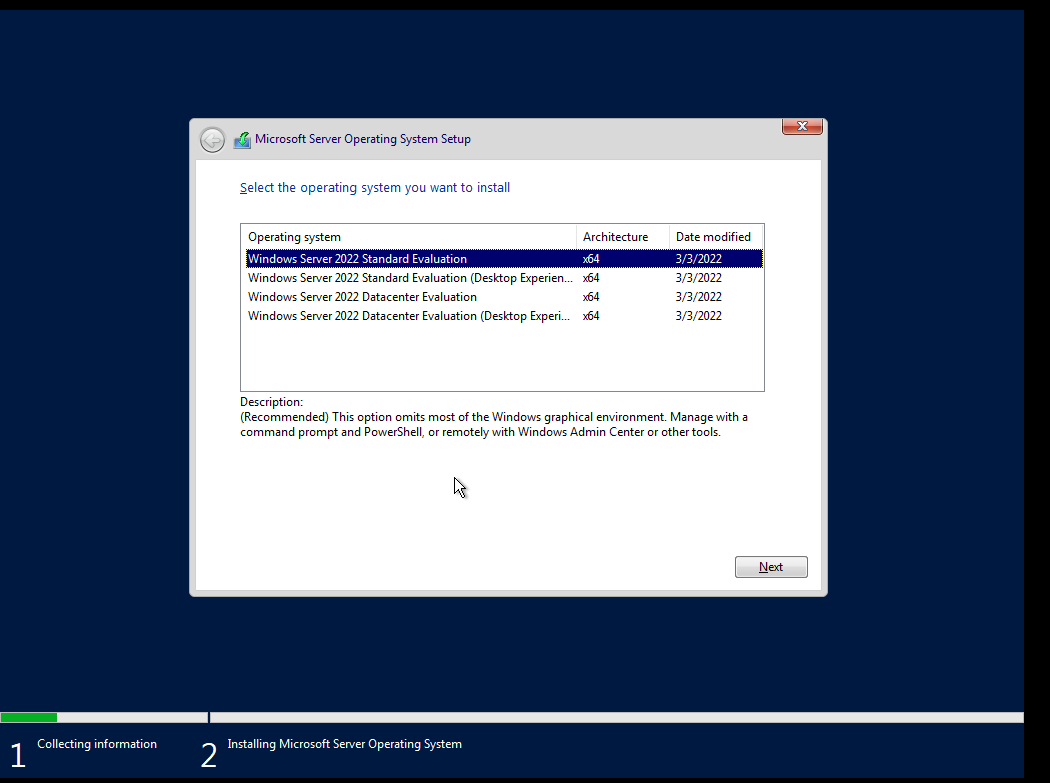
- Click on
windows server 2022 standard evaluation(Desktop Experience)-> then hit next - Check the box -> hit
next - Once you are at this page:
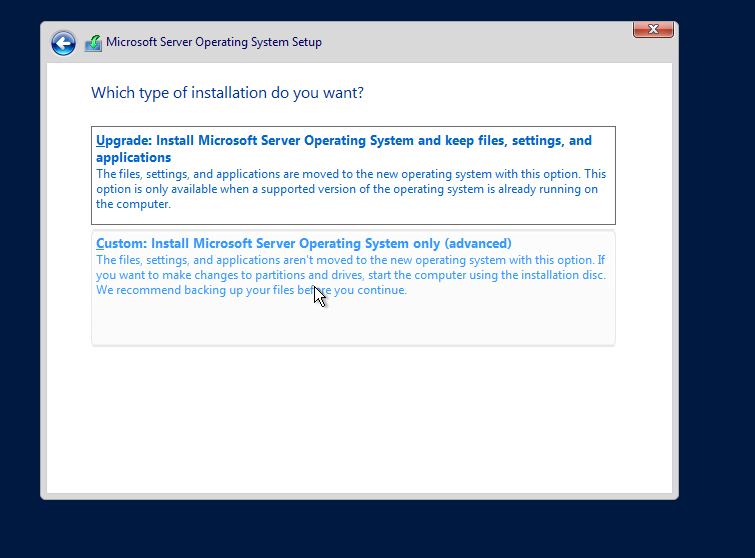
- Click on
custom install - Then on this page hit
New->Apply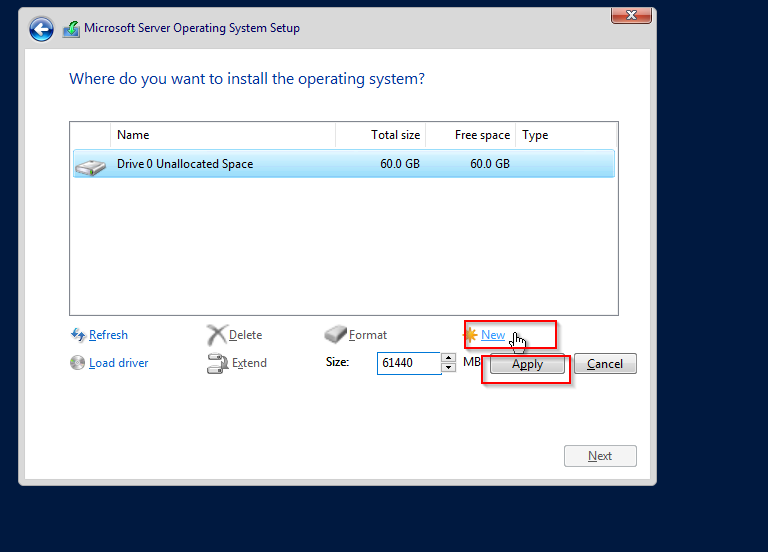
- Hit
okon the warning - Click
nextagain on this page: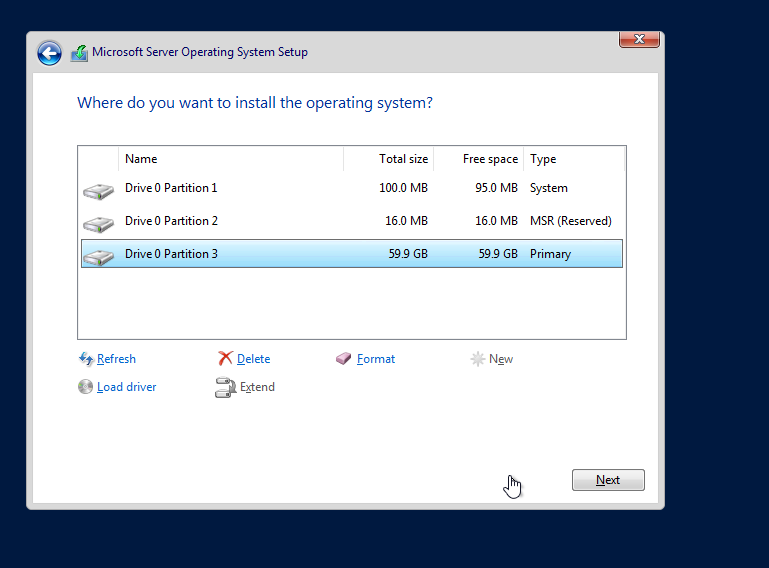
- Now let it install.
- After that you will come to this page:
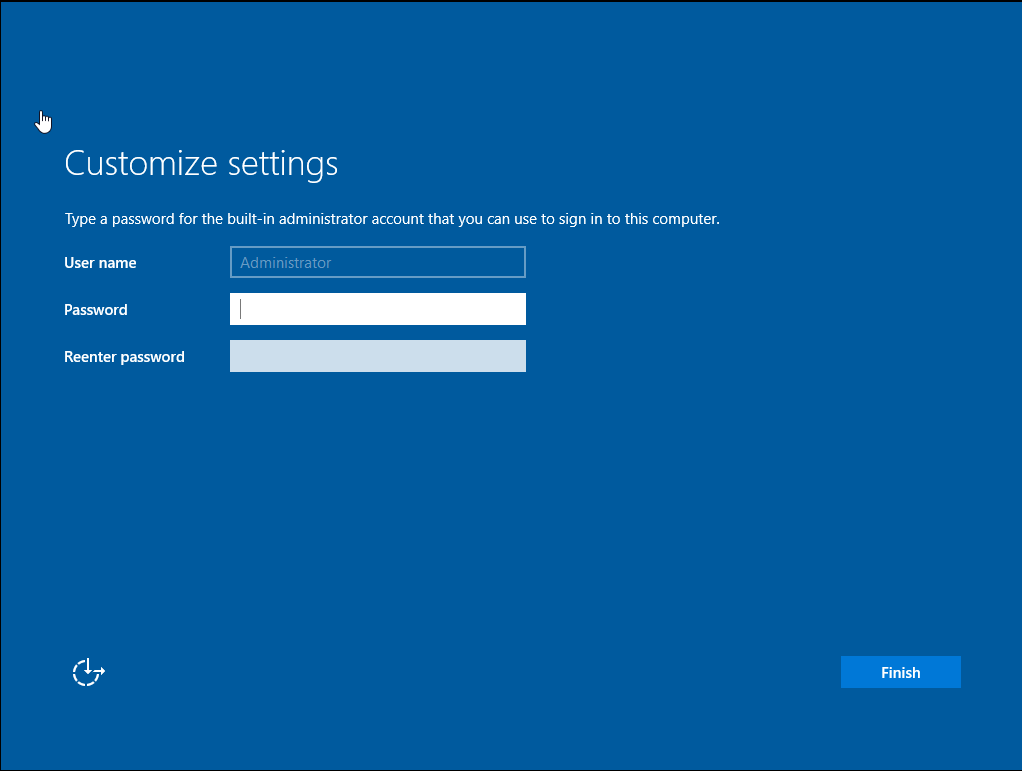
- Give the password
P@$$w0rd! - Now login using the creds.
- Install
vmware tools-> clickvm-> Install vmware tools -> opencmd-> run the commandD:\setup.exe-> After installing acompletevmware tools using the popped up wizard -> restart - Now we need to rename our windows server -> press on the
windowsbutton -> typename-> Then click on this option:
- After that click on
Rename PC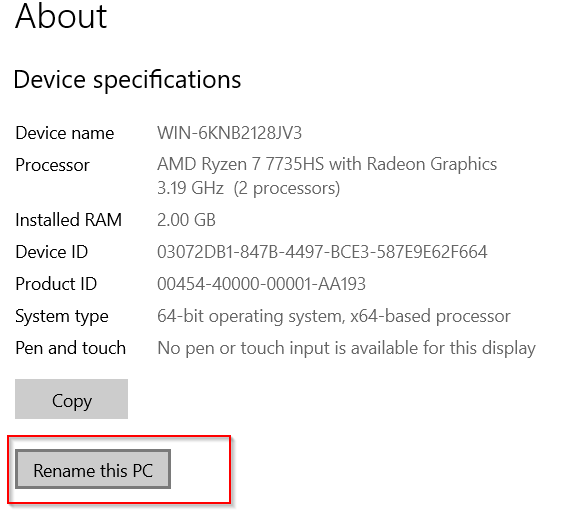
- We will be building this Lab as a
MARVELtheme, so i gave the nameHYDRA-DC-> then restart again.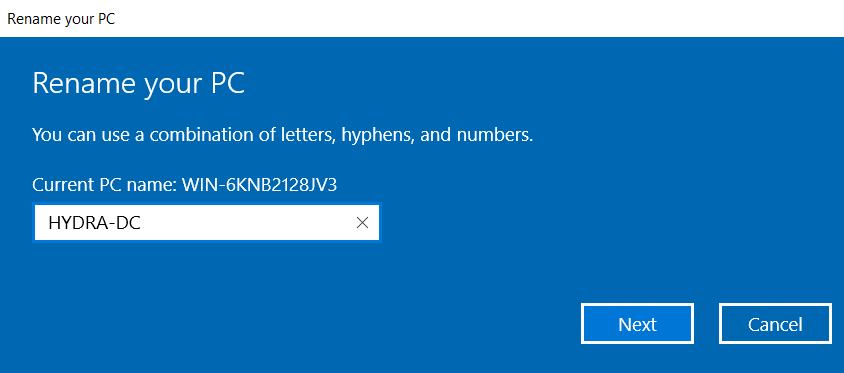
- Login again
- Now we will actually start setting our
windows serveras Domain controller. - Onto
server manager-> Click on theManagebutton -> ClickAdd roles and features
- A wizard will pop up, click 3 times next. On selection of
Server Roles, selectActive Directory Domain Services. This will allow us to have our domain.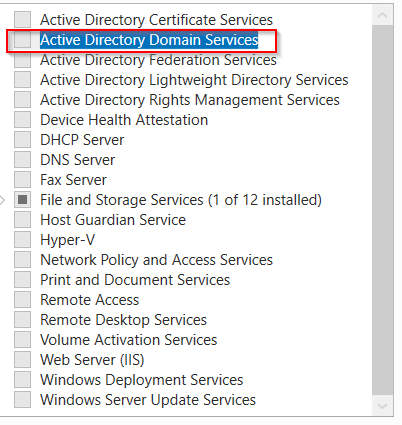
- Hit
Add featureson the next pop up. Then click3 times next againon the options given. - After coming to this page Check this option:
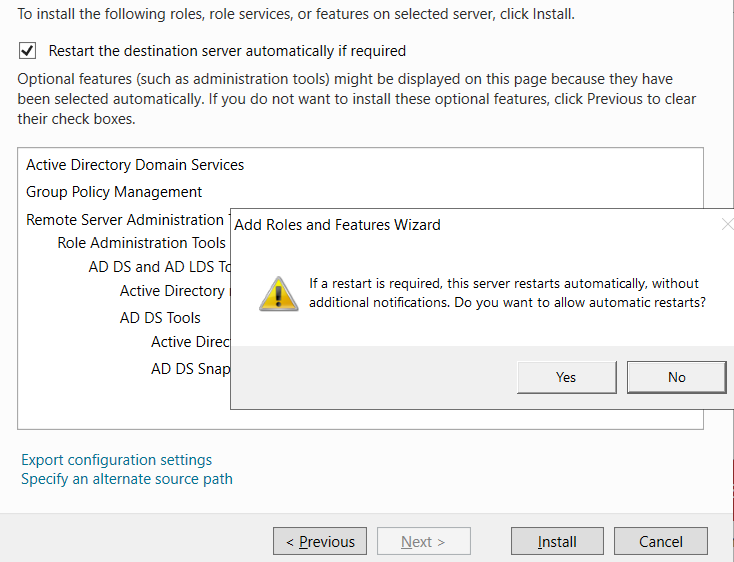
- Then hit
install. - After installation click on this option:
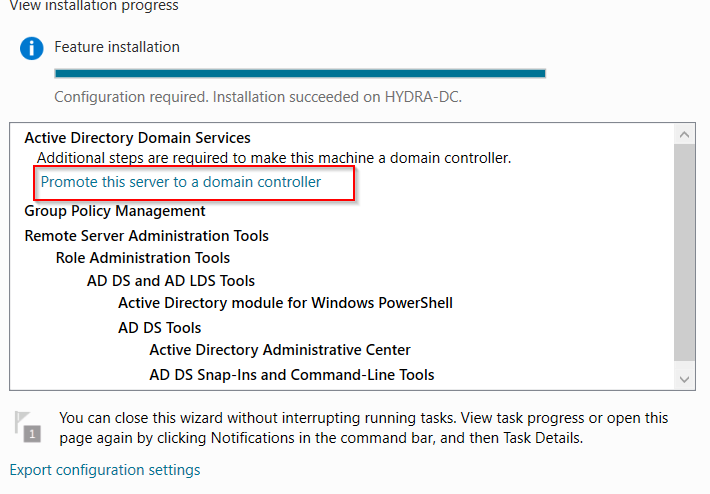
- A new wizard will pop up, click on these options, and give this domain name{you can give your unique domain name, but make sure you have added
.localat the end of the name}: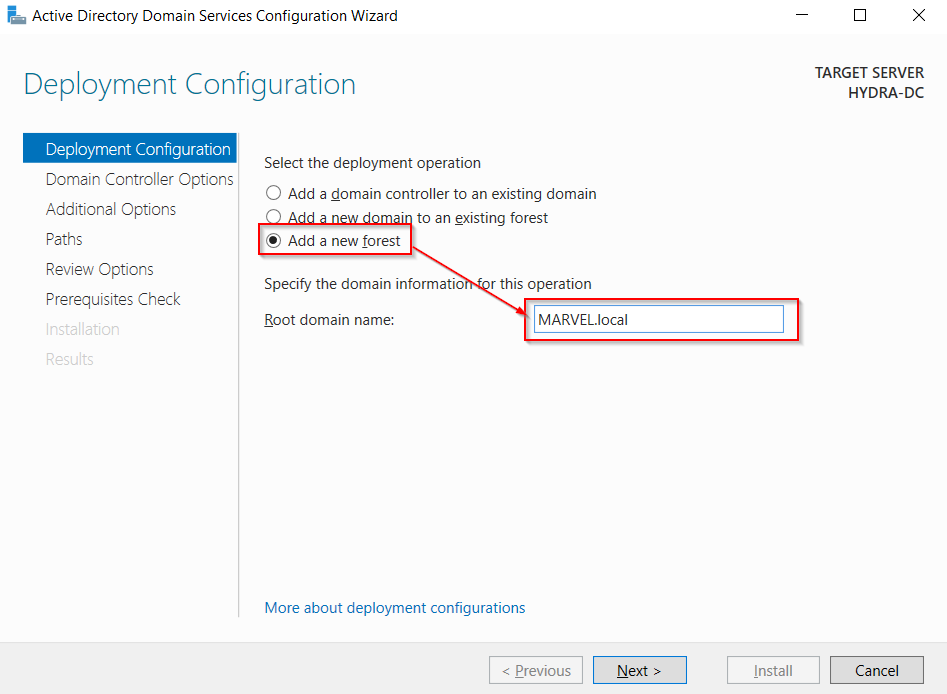
- Hit
next-> Give the sameadmin passwordinto this page also: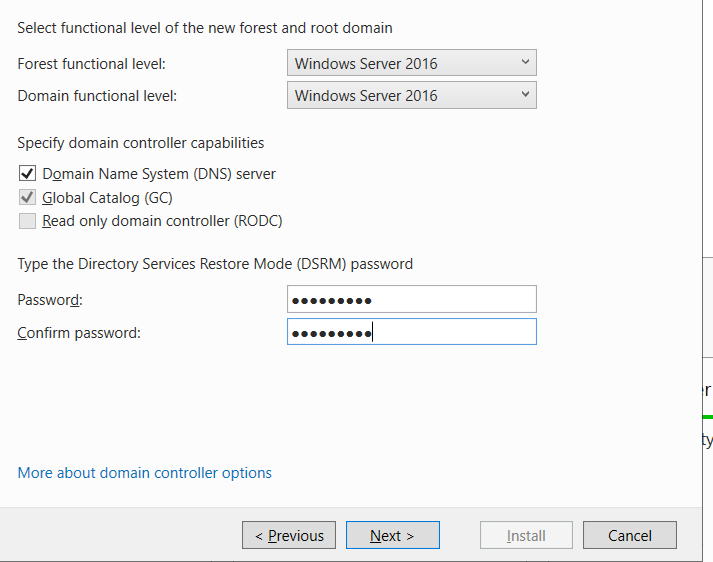
- Hit
next2 times including the previous step. - Populated the
NetBIOSdomain name successfully: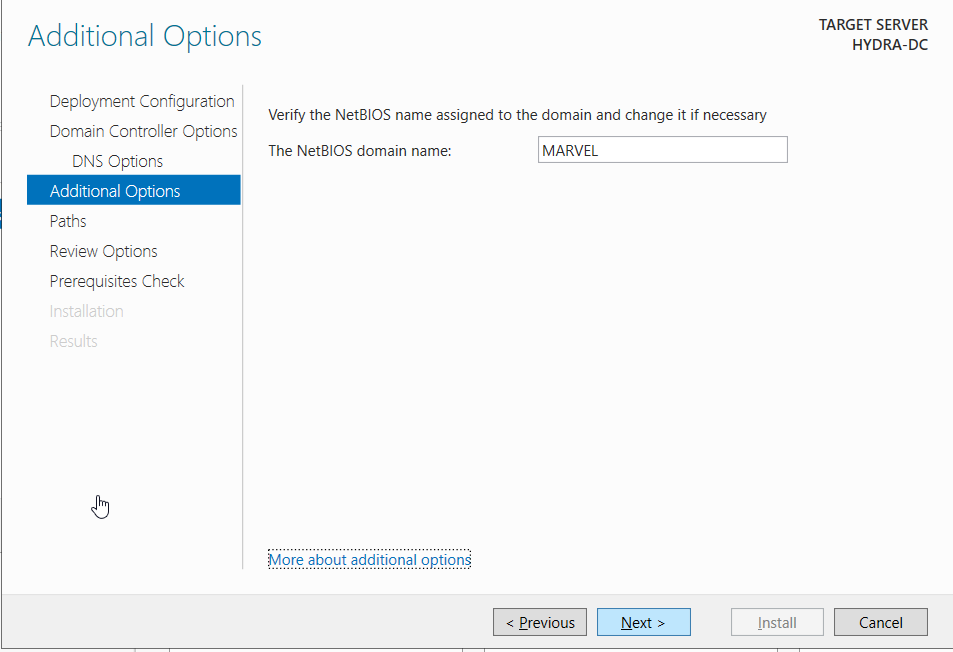
- Hit
nextagain. - Our pathways:
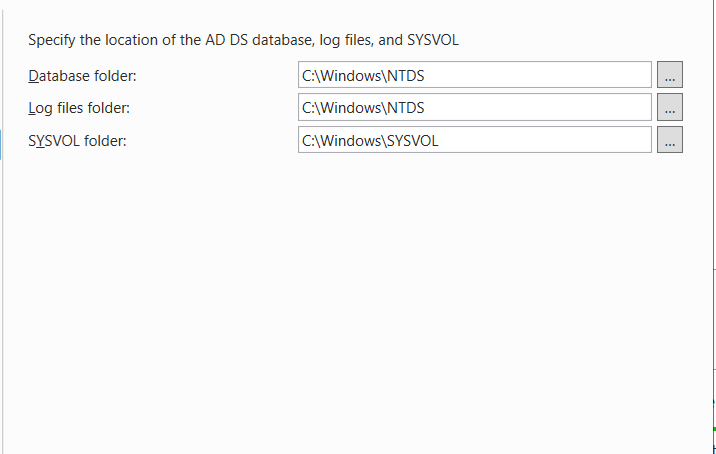
What is SYSVOL: SYSVOL is a shared folder on each domain controller (DC) in a Windows Server Active Directory (AD) domain that stores critical files for common access and replication across the domain. It contains a copy of Group Policy Objects (GPOs) and scripts, such as logon and startup scripts, which are essential for applying policies to member computers
What is NTDS: NTDS, or NT Directory Services, is the underlying technology and database that powers Microsoft’s Active Directory (AD). It is responsible for storing and managing all the information about network resources, such as user accounts, computer objects, groups, and security identifiers (SIDs).
The physical database file is named ntds.dit (Directory Information Tree) and is stored by default in the %SystemRoot%\NTDS folder on every domain controller.
- Hit
nextagain 2 times including this pathways page. - You should see a
prerequisitecheck running, and after some time it should saysuccessful-> then hitinstall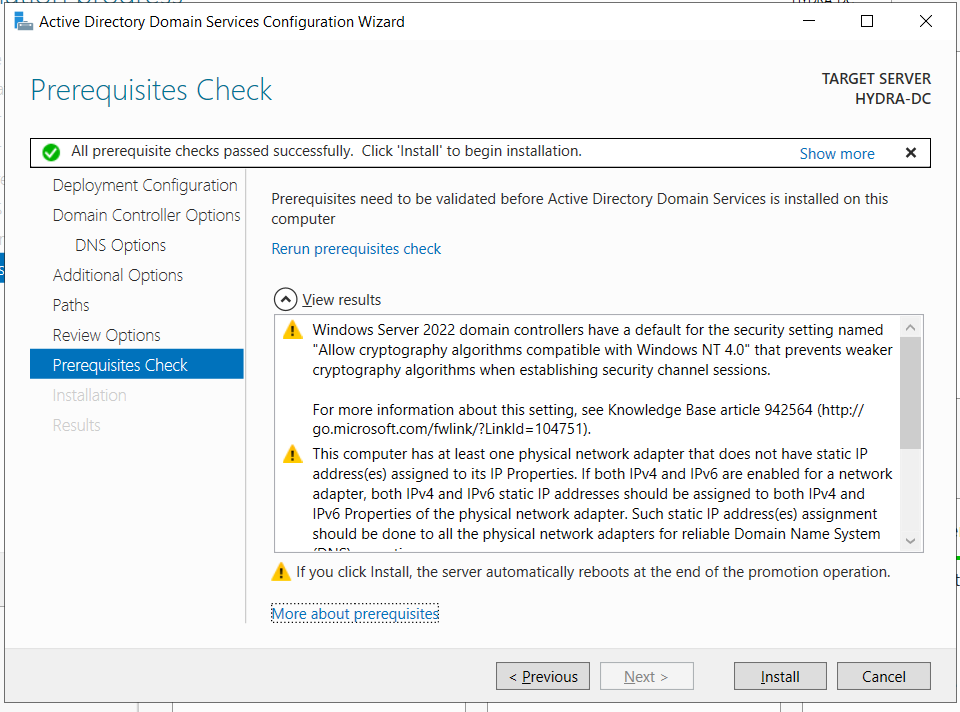
- Then on installation it should give a pop up like this -> click
close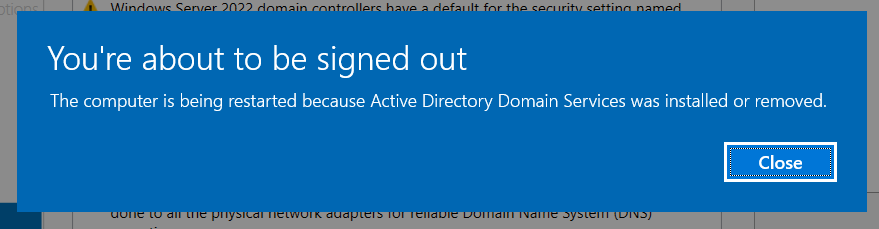
- You
DCwill be automatically restarted and bring you to the login screen. - Login . We will now install another feature called
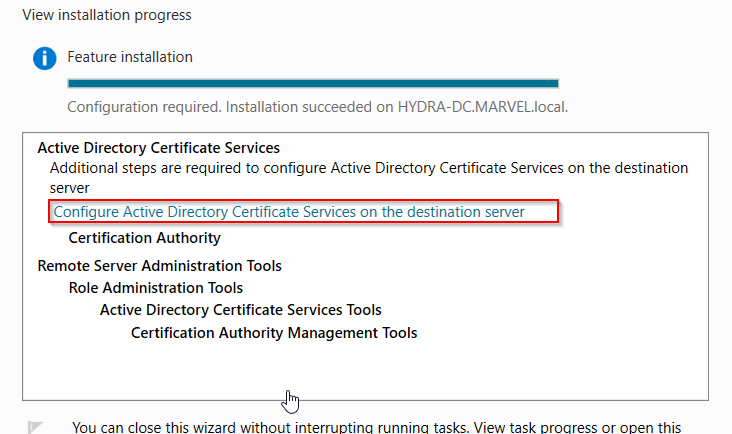
ADCS(active direcotry Certificate Services), this allows us to useLDAPSon our DC , and manages certificates for authentication purposes. - Again on
server manager-> clickmanage->add roles and features-> 3 times next -> Select ADCS -> add features -> 4 times next -> Check the restart box -> hit install - Then after installation -> click on this option:
- Hit
nexton the first option. Check the box ofCertificate auhorityand hitnext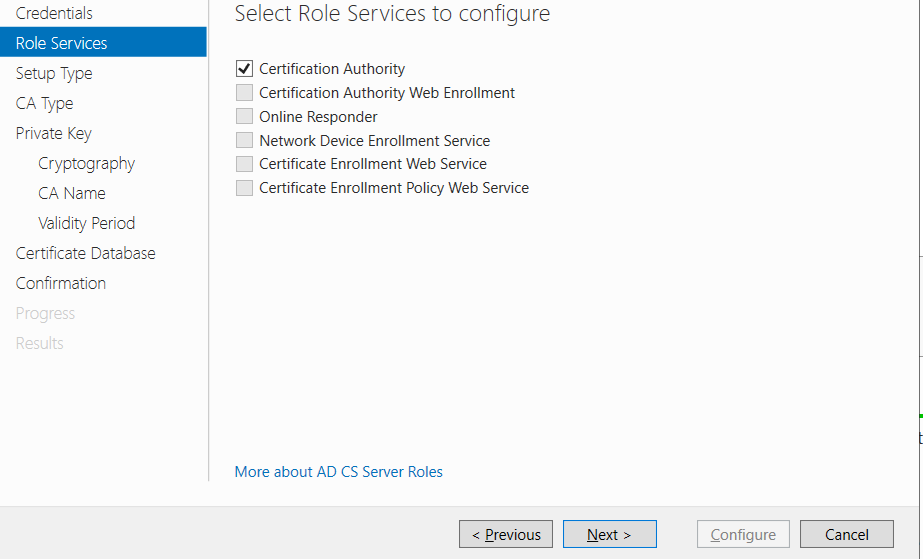
- Hit 5 times next again -> change the validity option to 99 years
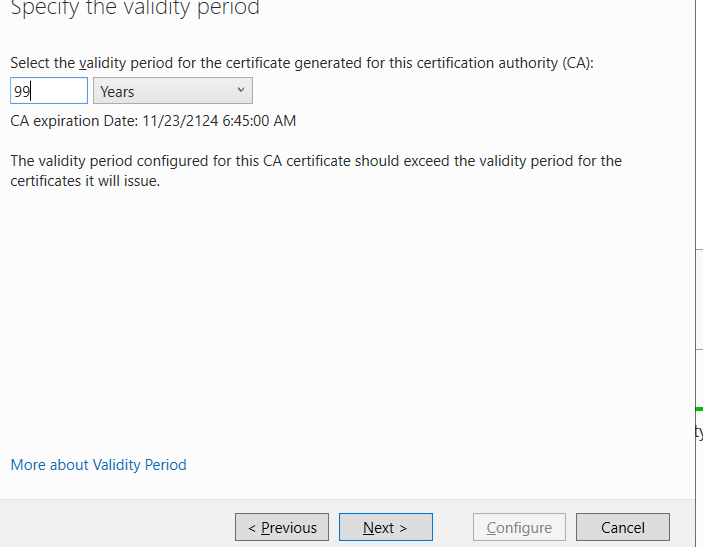
- Hit
nextand come to this page then clickconfigure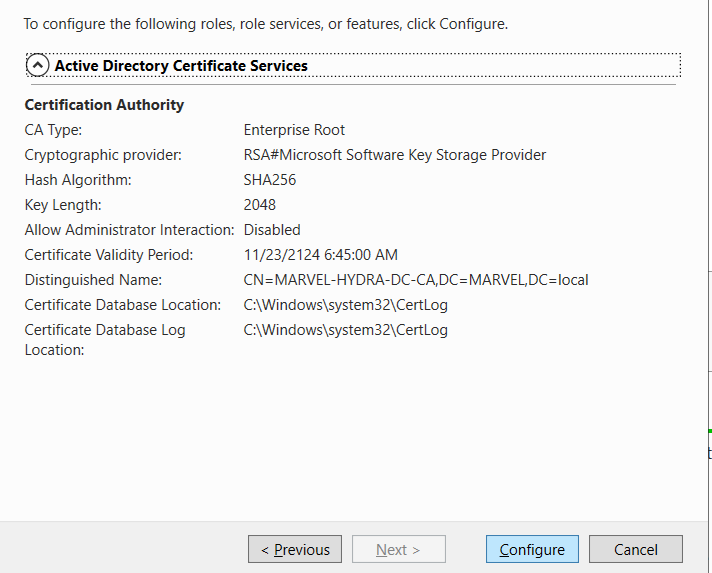
- Restart again after the completion.
Setting up the windows 10 machines:
- Boot up both the windows 10 machine now, i removed previous machines containing
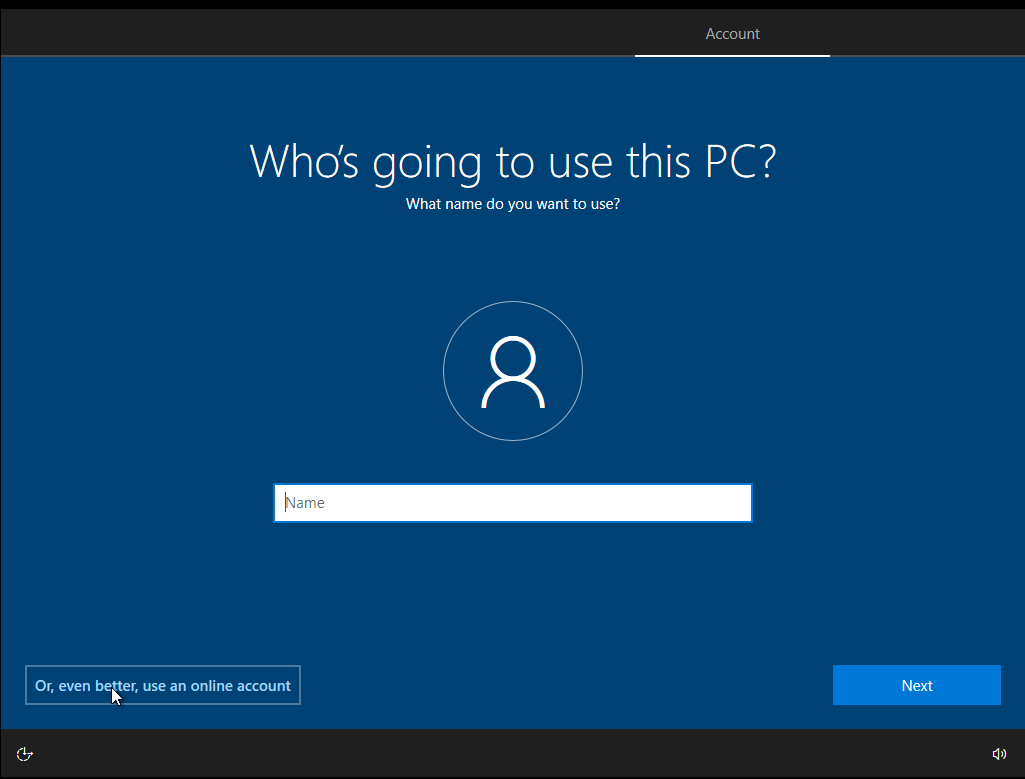
windows 10 enterprise iso.This time i am having normalwindows 10 iso, so we will be usingwindows 10 education. Remember while adding the vm you gave username and password , in my case then only the following pages came up. - Then setup the basic requirements on both the machines
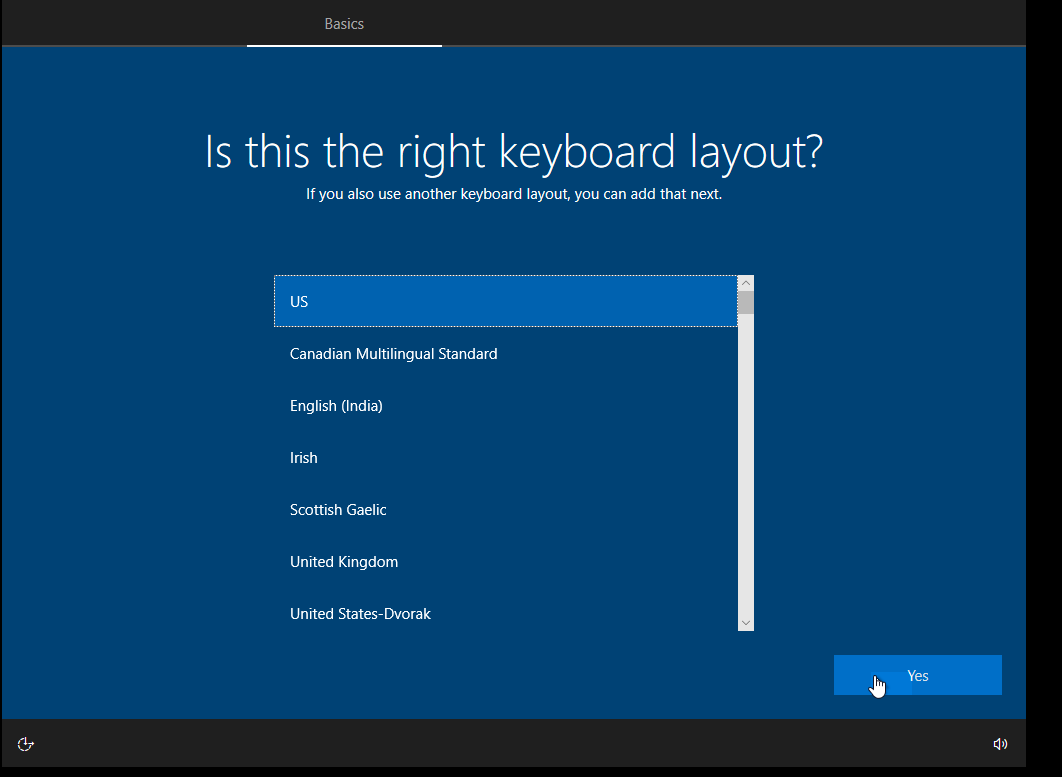
- Use the option
domain joined instead, rather than using online accounts.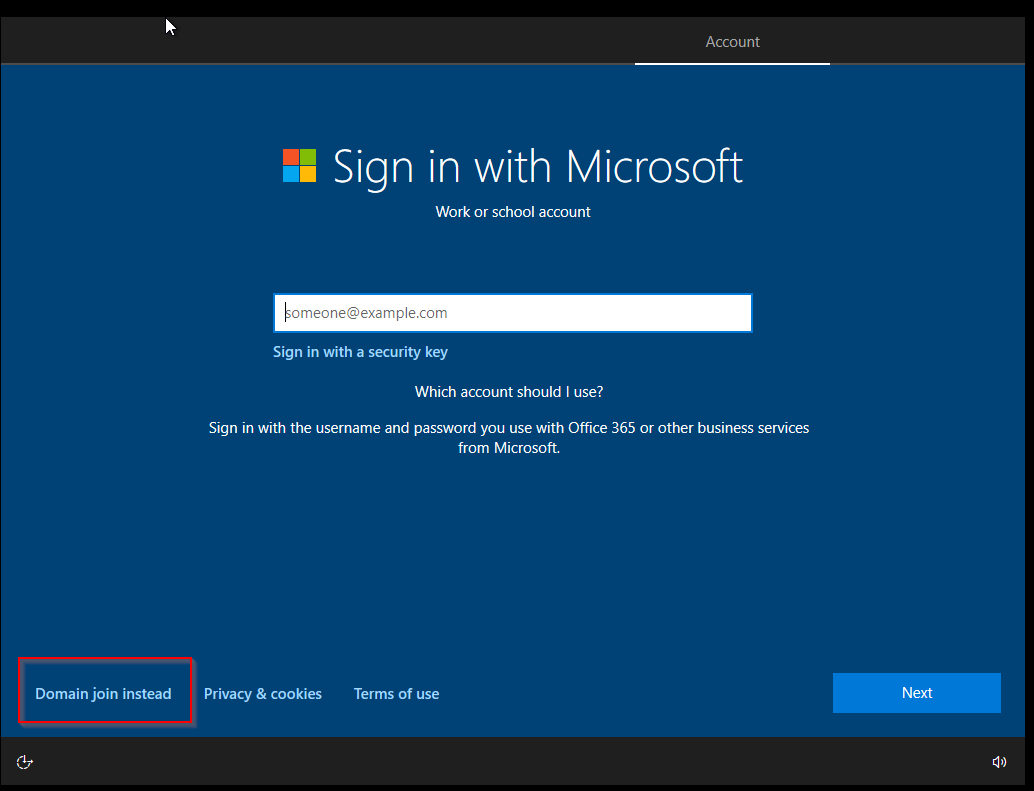
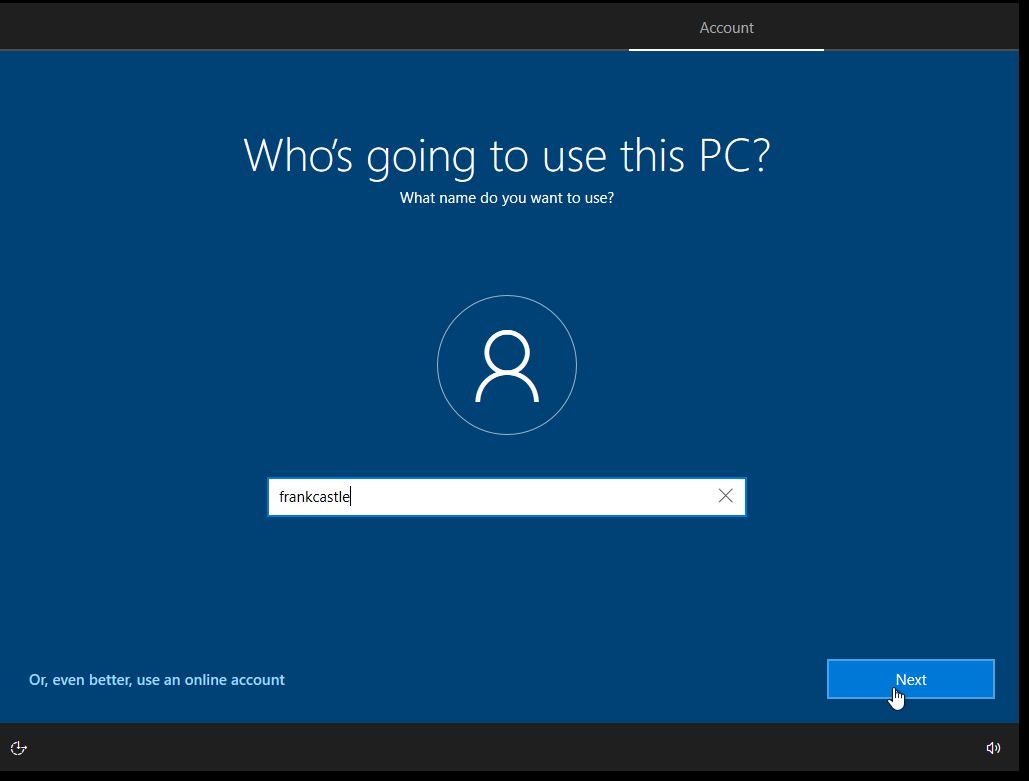
 4. Name
 THEPUNISHER vm’s user as frankcastle with password Password1 , and SPIDERMAN vm’s user as peterparker with password Password1 ``
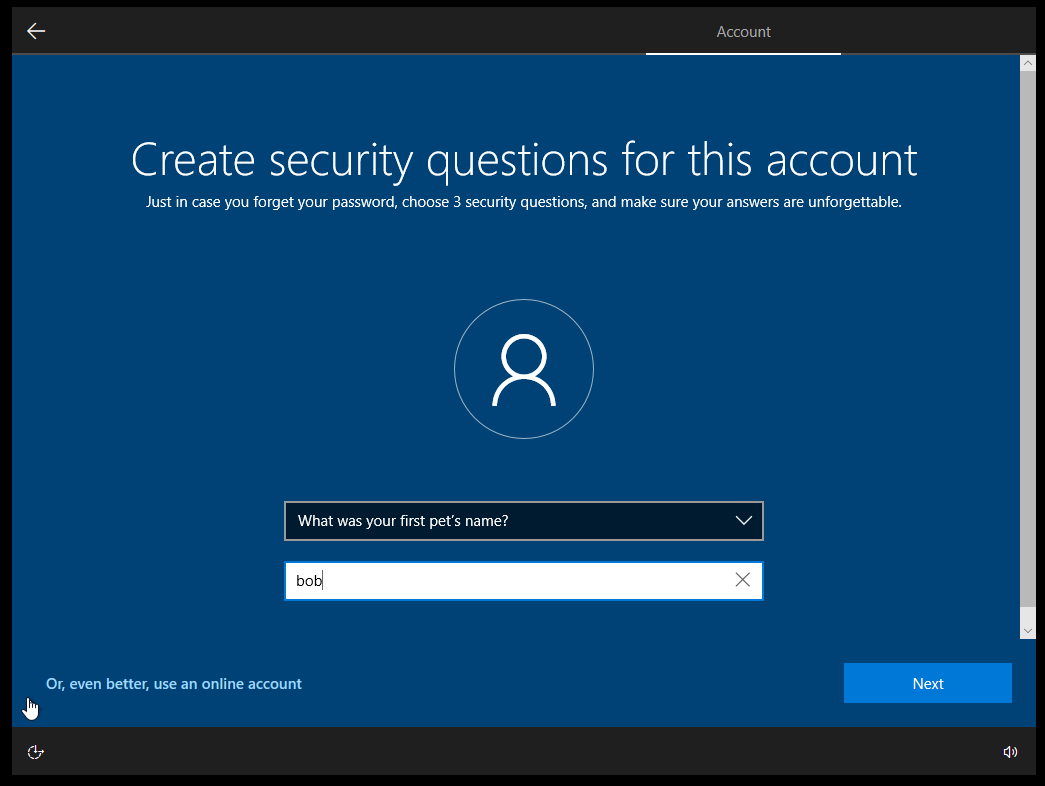
 5. Select the security questions and answer them as
 bob for every single one of them in both the machines.
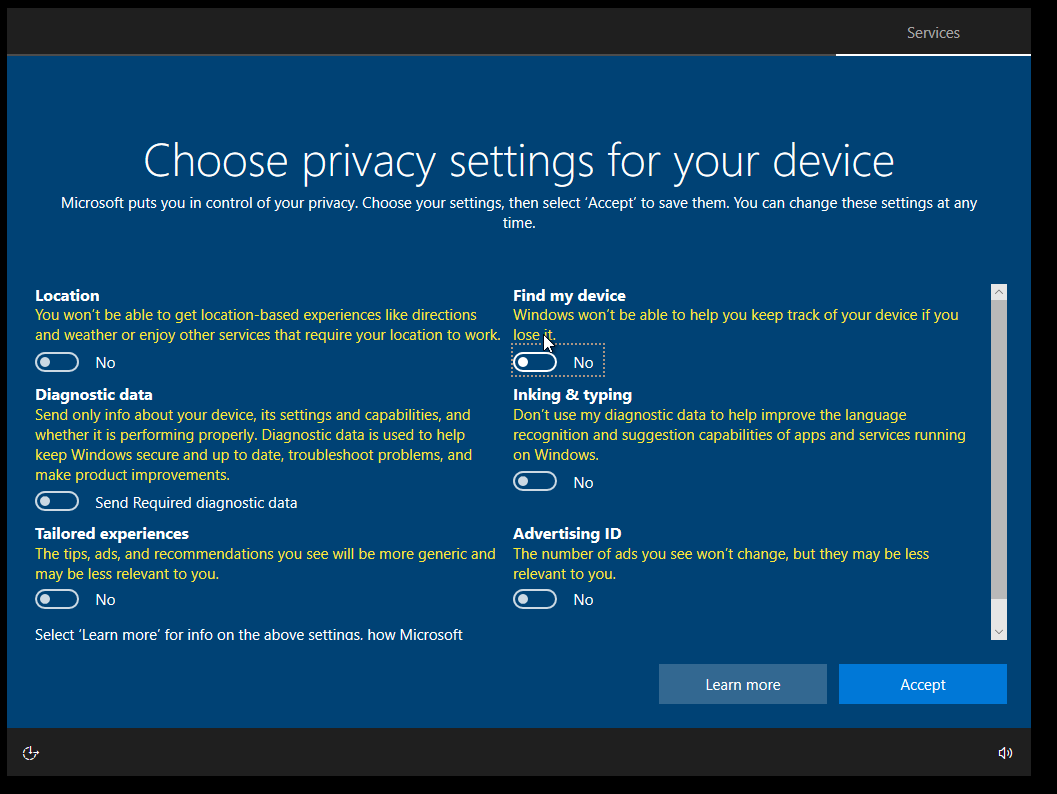
 6. Turn off all the privacy settings, we don’t want to send any data to
 Microsoft
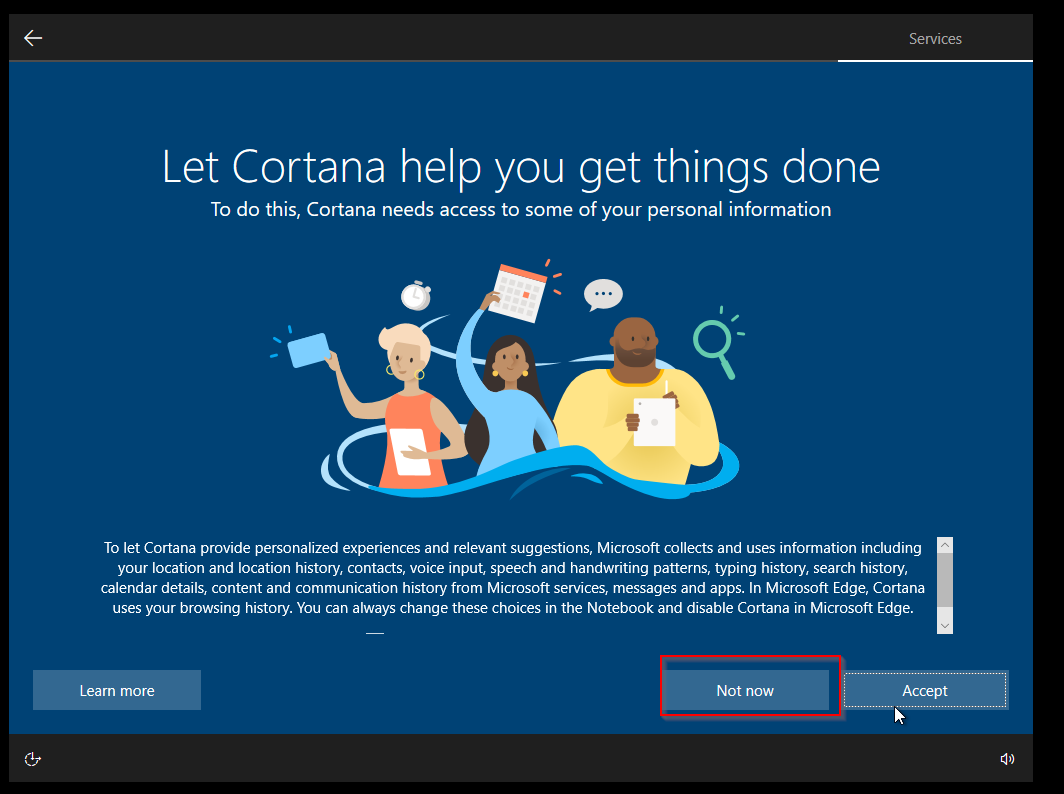
 7. Don’t accept crotana
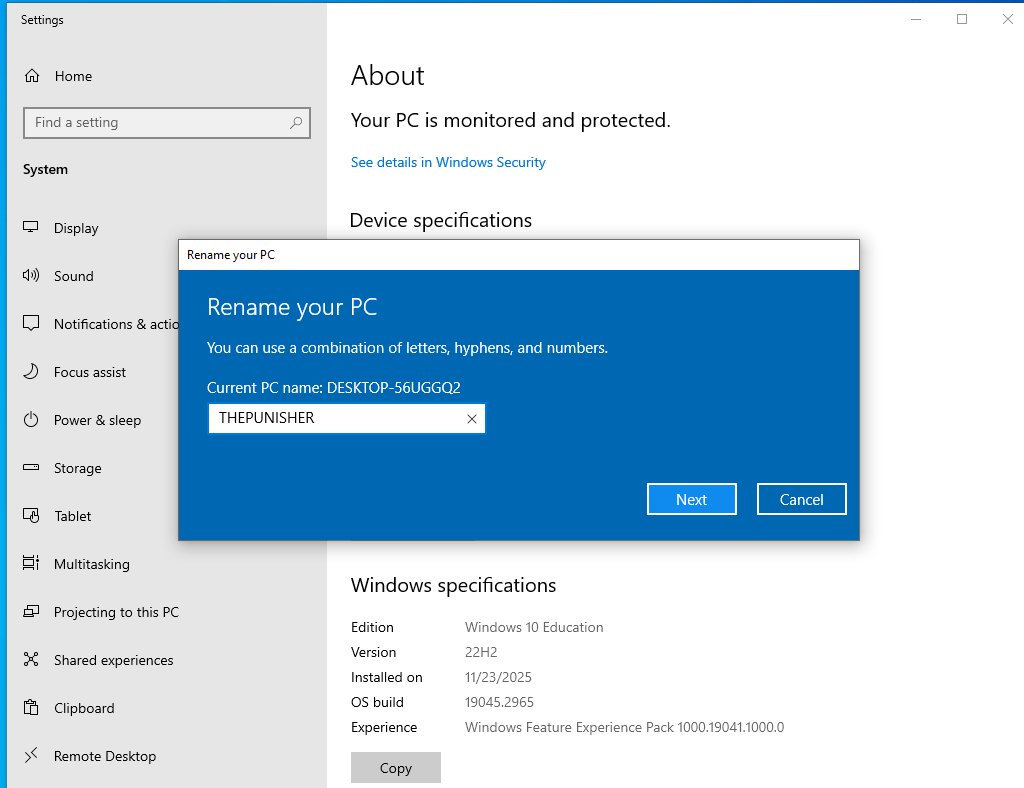
 8. After doing the complete setup , it will automatically boot up the machines, then rename these two machines as
 THEPUNISHER, SPIDERMAN respectively . Then restart again.
Setting up GPO(Groups, Policies and Users):
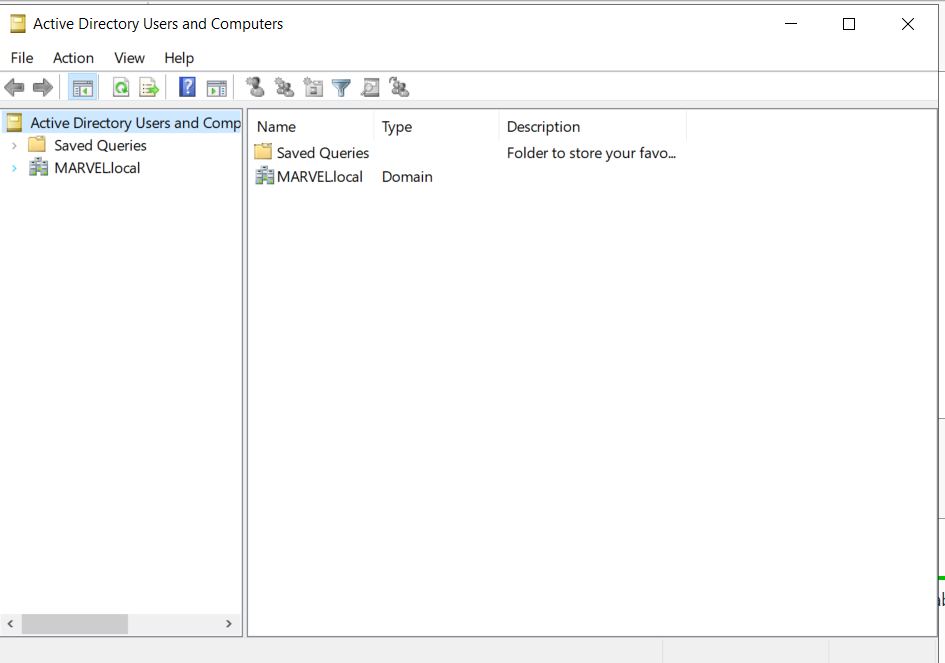
Open up the
Domain controllerOn
server manager-> Click ontools->Active Directory users and computersThis page should load up:
Separating the groups from users:
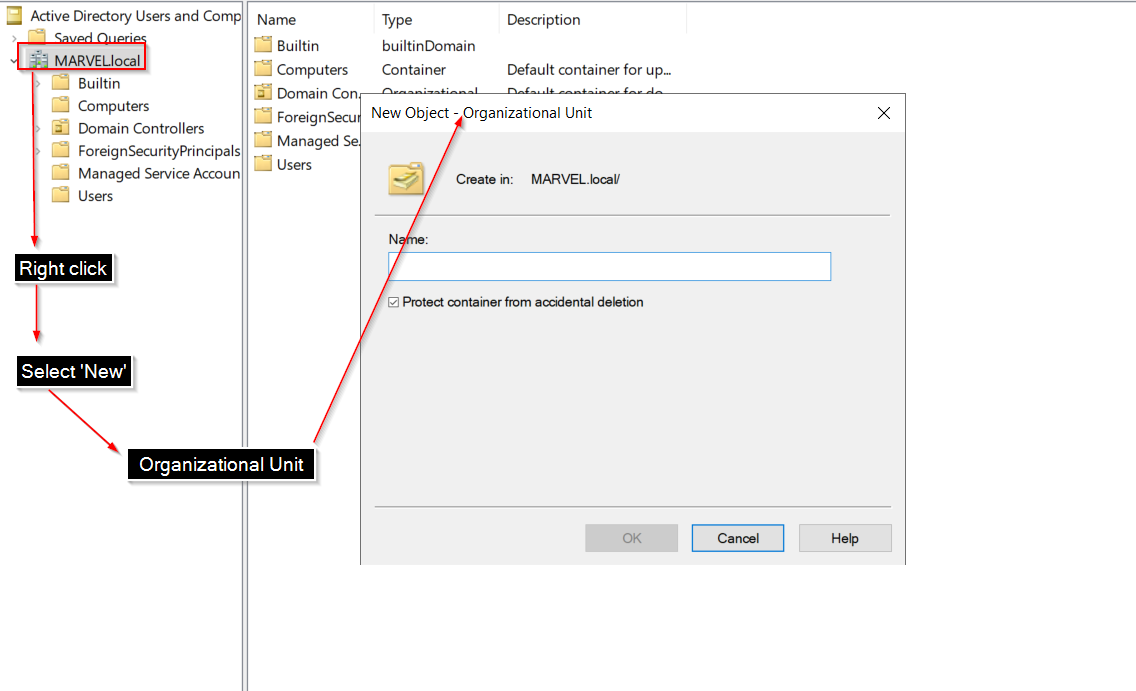
Give the name as
GroupsGrab all the groups from the
userstab and move them toGroupsexceptAdministrator and Guestuser.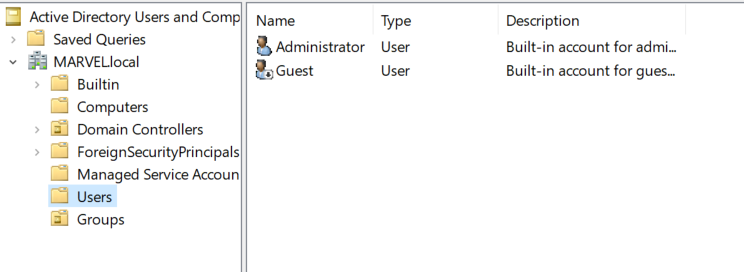
Making Domain admin:
- Right click on the
Administratoruser -> Copy -> Fill the following information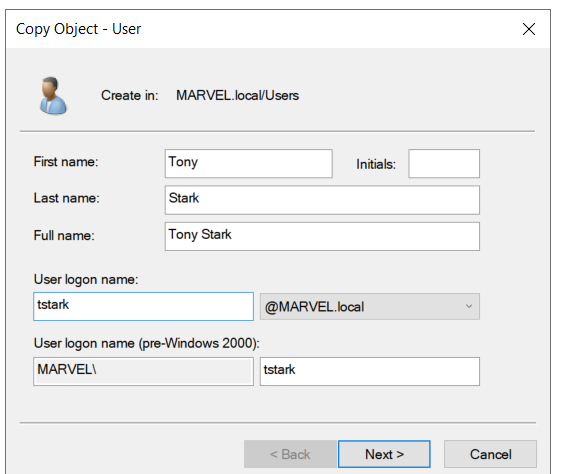
- Give the password as :
Password12345!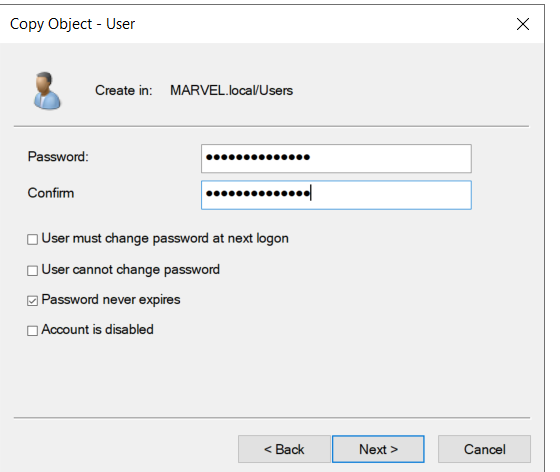
- Click
nextand hitfinish
- Right click on the
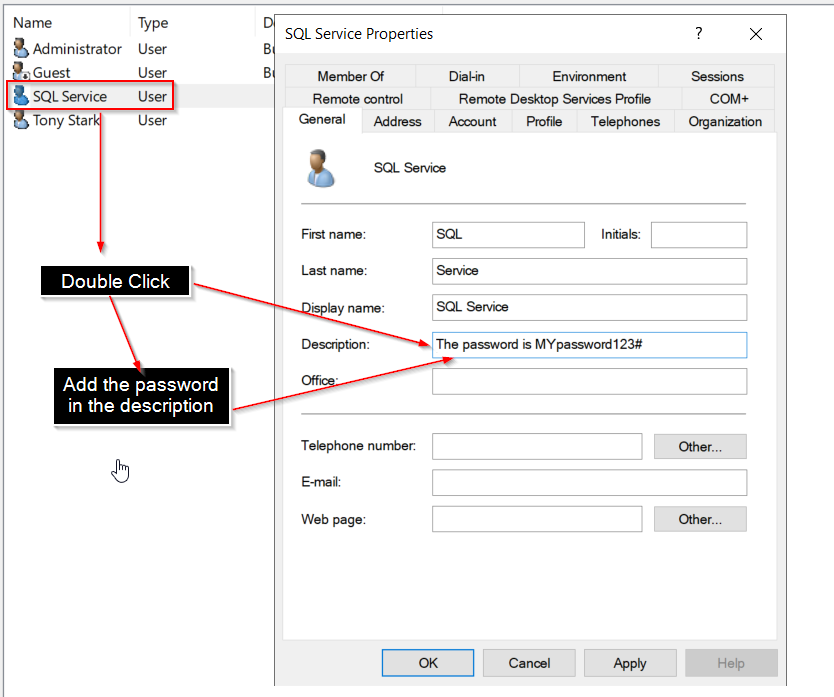
Making a service account which will be our another
Domain admin:- Again copy from the
Administratoraccount and use the following info: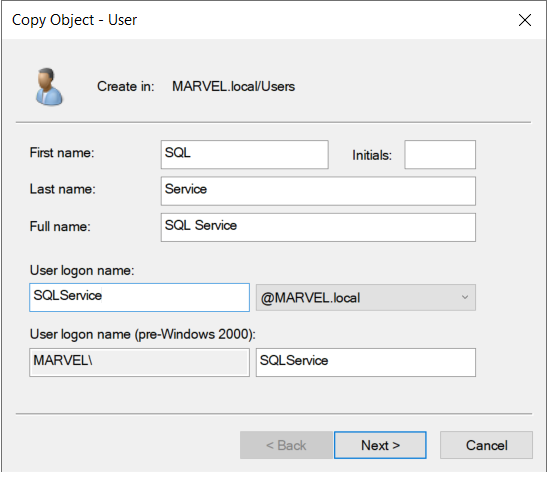
- Give the password as
MYpassword123# - Then do this step:
- Again copy from the
Making some low level users which will part of our
Domain usersgroup:- Use the following steps to open the wizard:
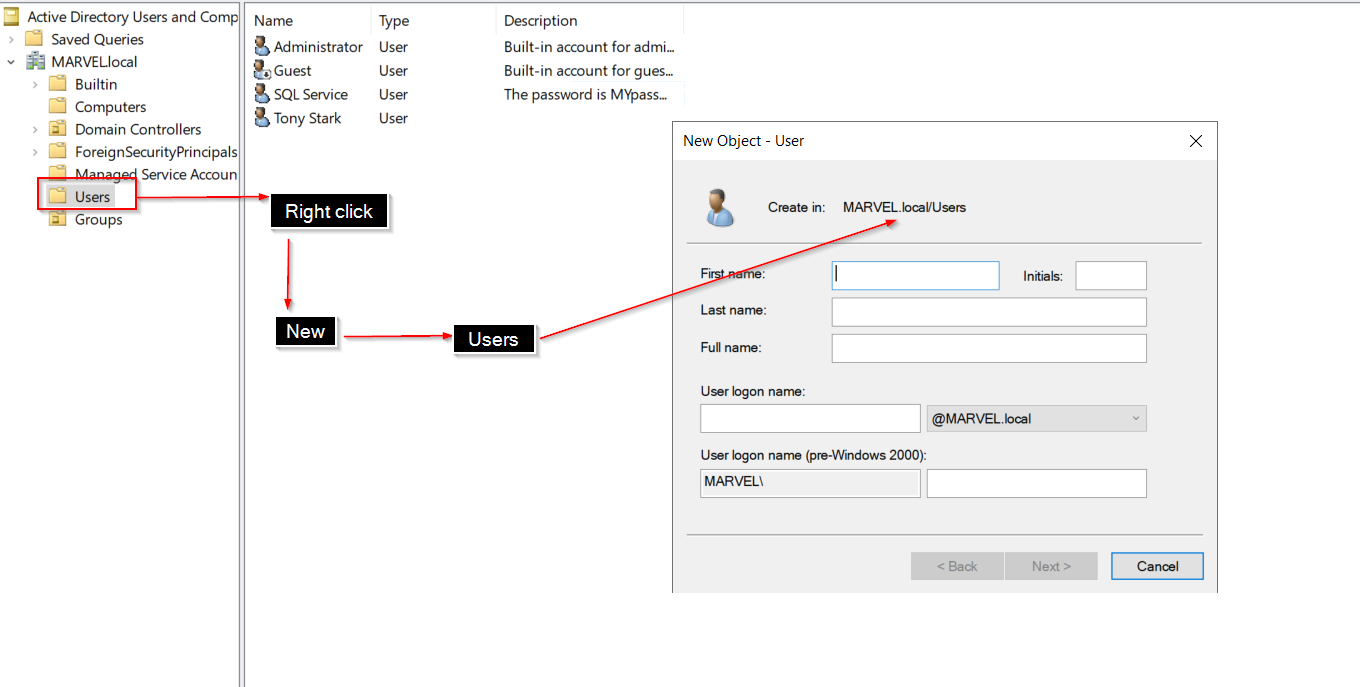
- Add the
frank castleuser: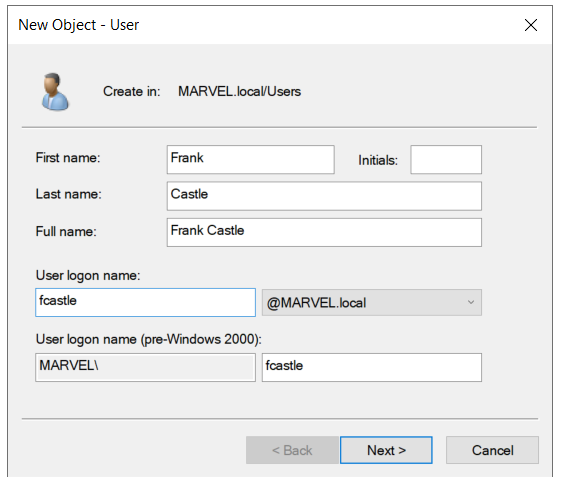
- Use the following checkboxes, and give the same password of
frankcastlewhich isPassword1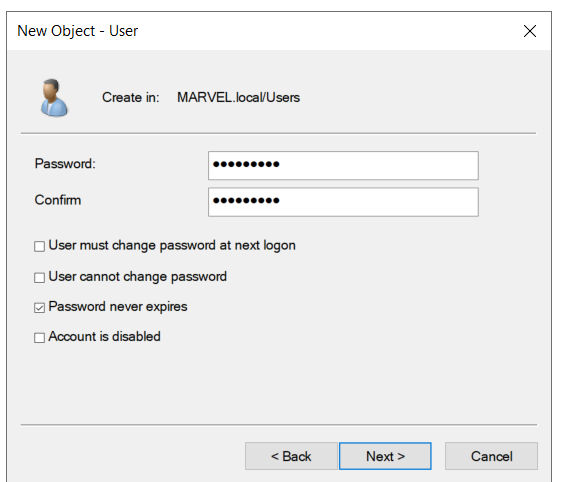
- Add
peterparkerusing the following steps: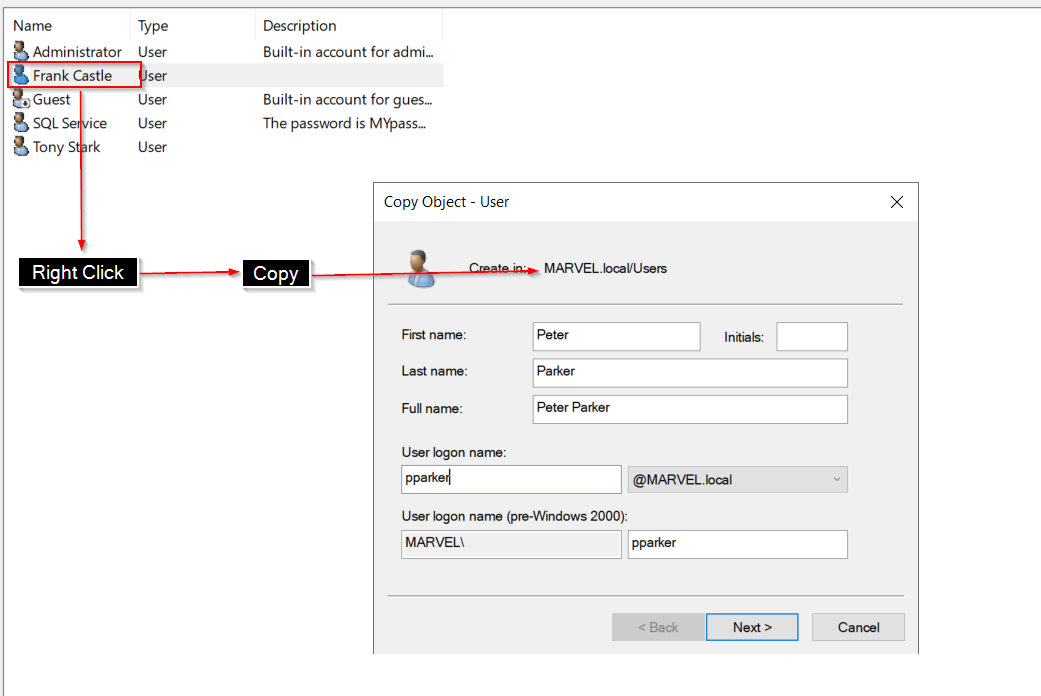
- We will give here his password as
Password2
- Use the following steps to open the wizard:
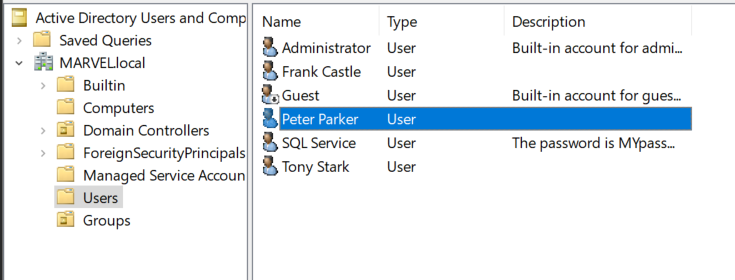
All users:
SETTING UP FILESHARE:
- Come to
server manager-> Click onFiles and storage services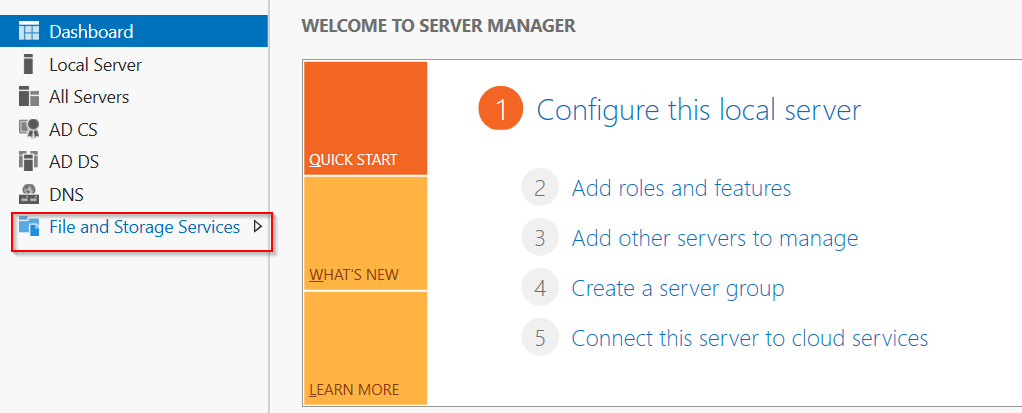
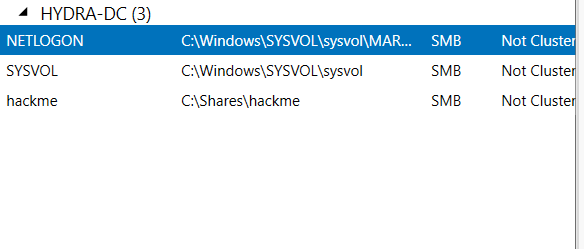
- Click on
Shares->Tasks->New share->SMB share quick-> click next -> Click next again -> give the share name ashackme-> click 2 times next -> hitcreate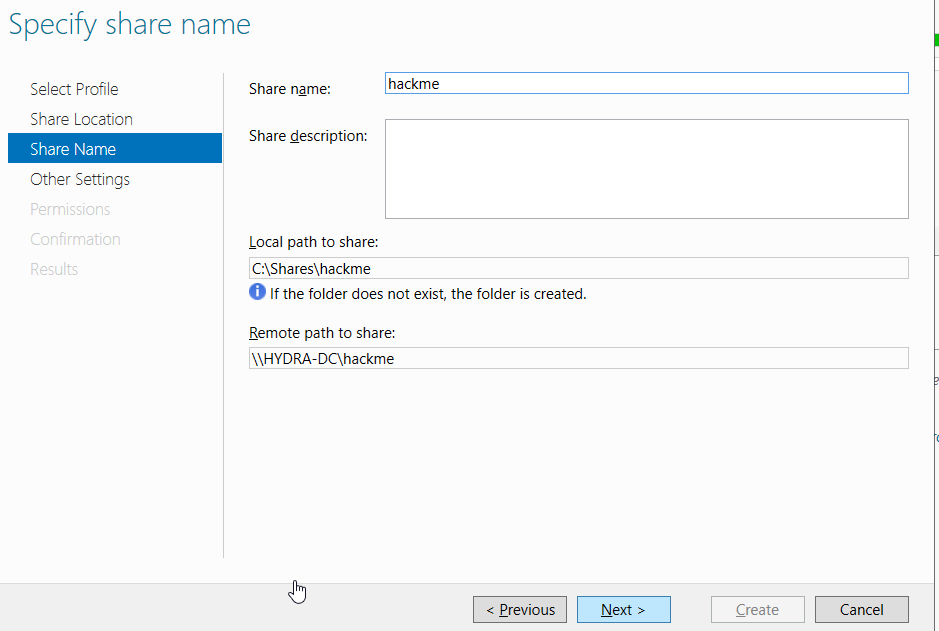
- Come to
Setting up the service account(SQL Service):
- Open
command promptasadministrator - use the following command:
setspn -a HYDRA-DC/SQLService.MARVEL.local:60111 MARVEL\SQLService 3. Verifying the changes using the following command by querying:
setspn -T MARVEL.local -Q */*- At the end of the command’s output we should see this result:

- Open
Setting up a group policy:
- On the start menu type
group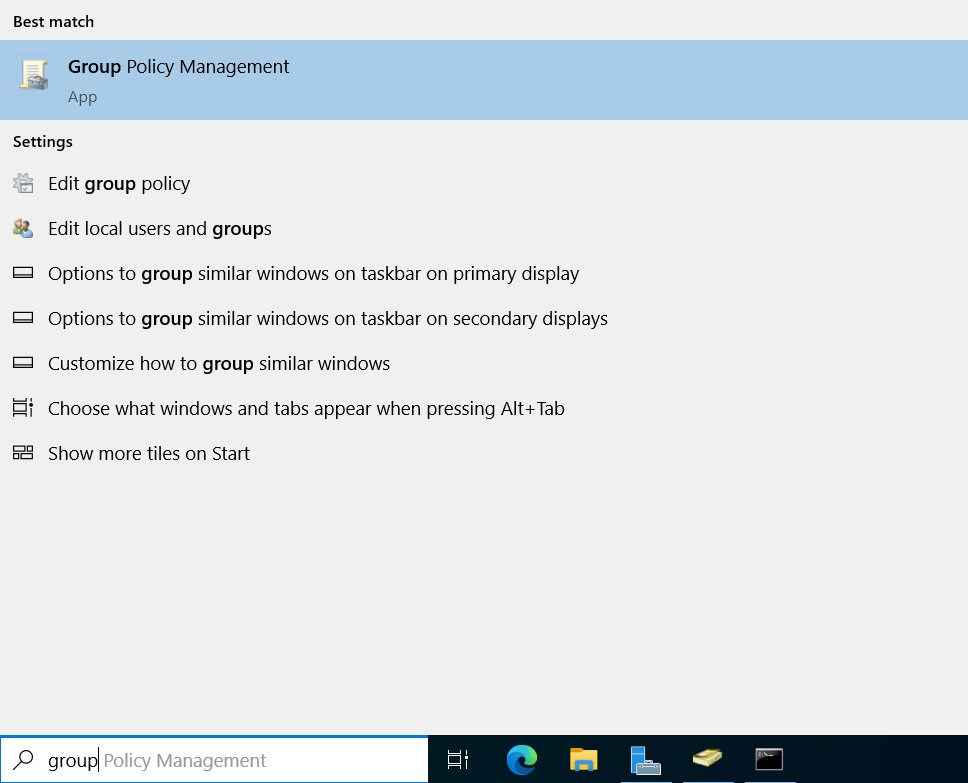
- Use the following options to create a new GPO:
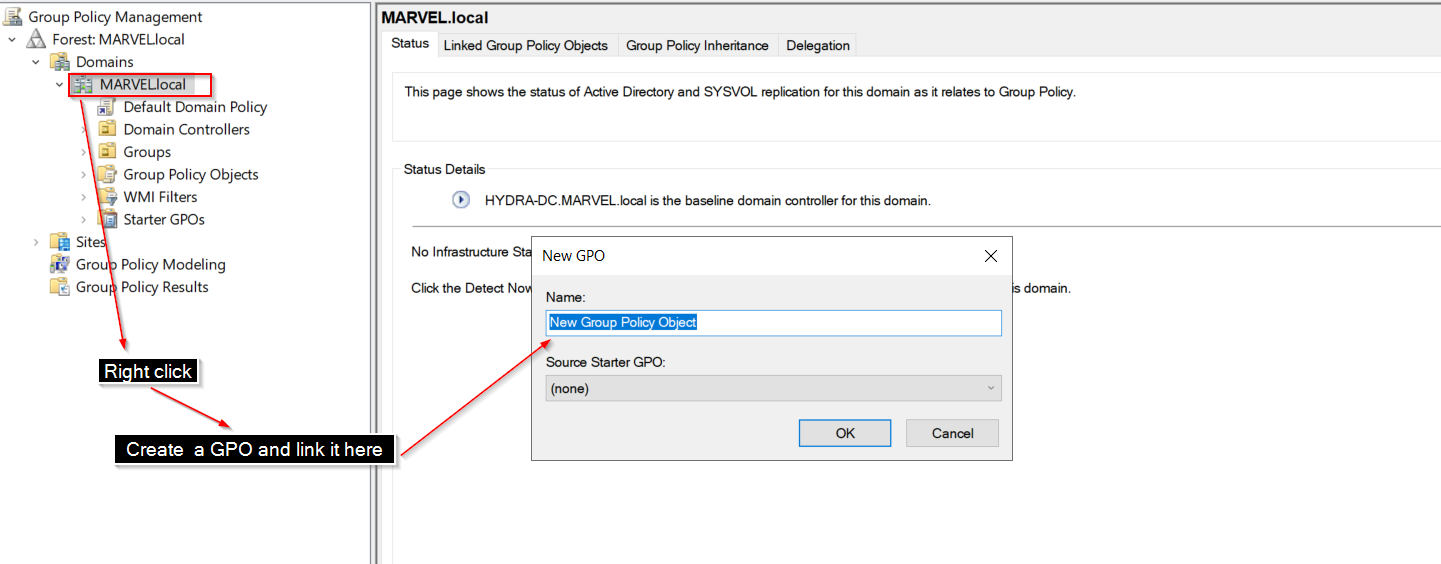
- Give this name:

- Our motive is to disable the
windows defender accross the whole domain, as we are not going to perform any moderndefender evasiontechniques. - Use the following steps for editing the
GPO: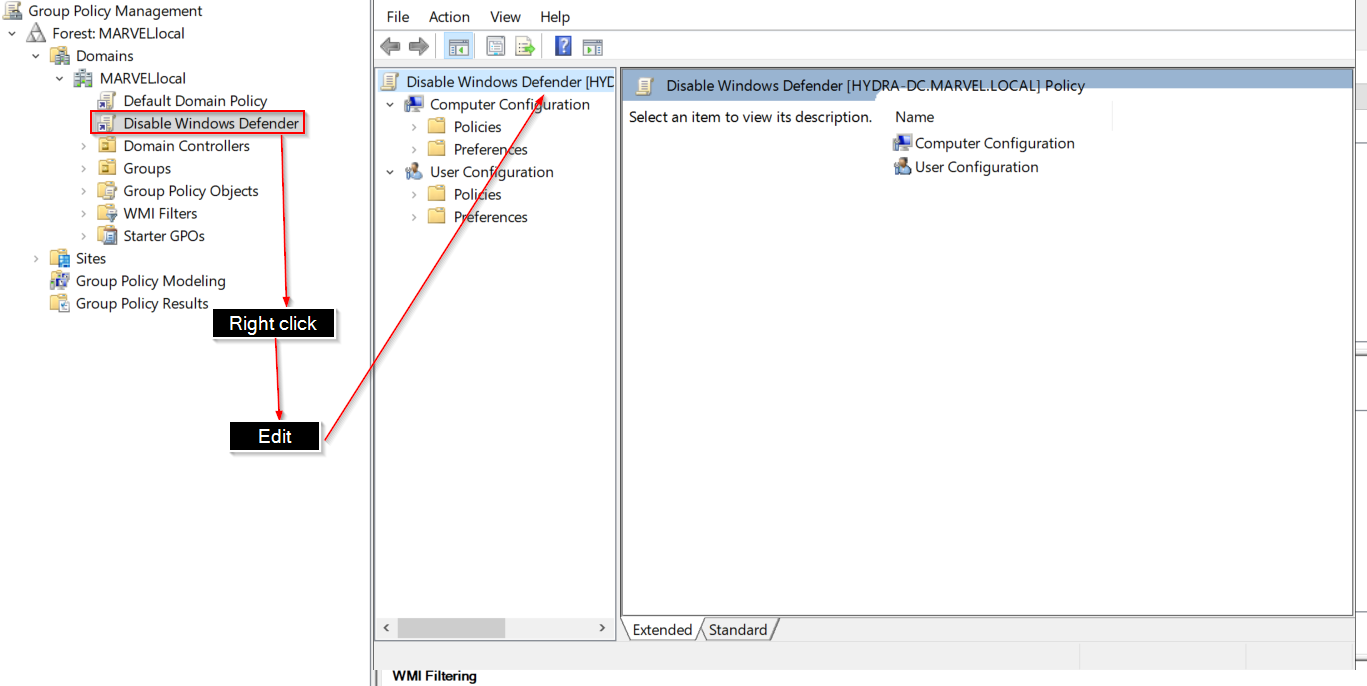
- Come to this column:
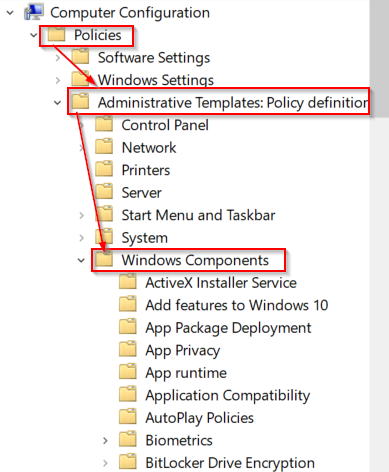
- Find
Microsoft Defender Antivirus-> and double click on thisturn offoption: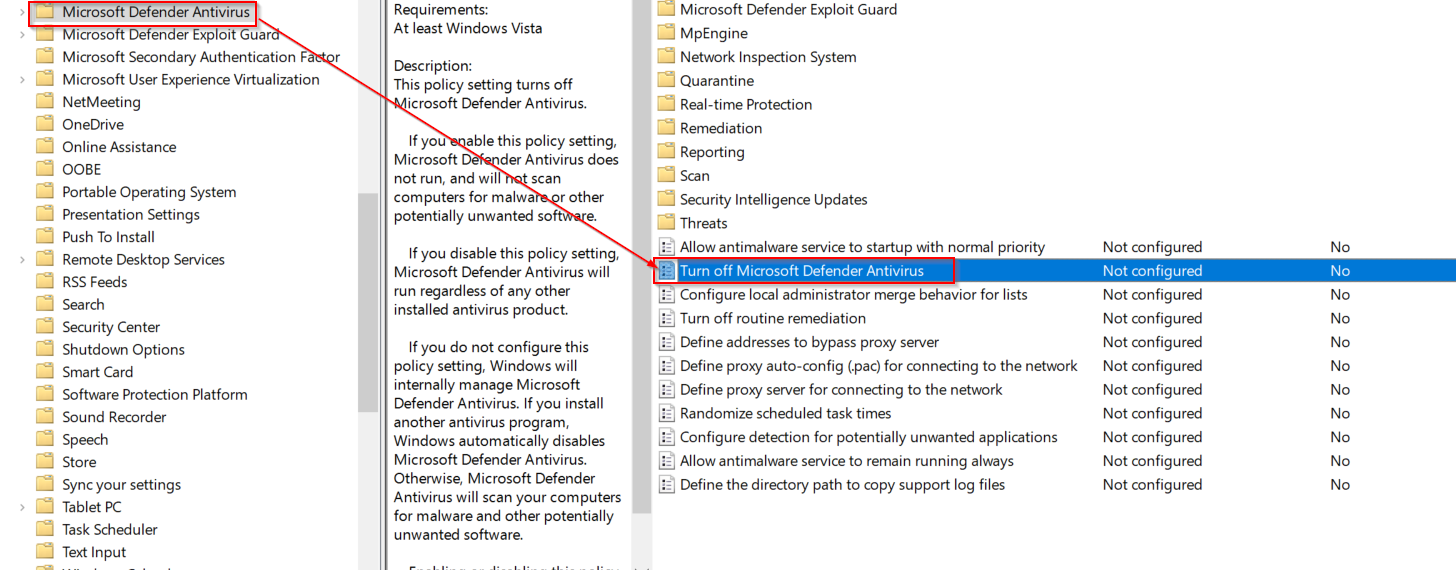
- A wizard should pop up -> click on
enabled->apply-> clickok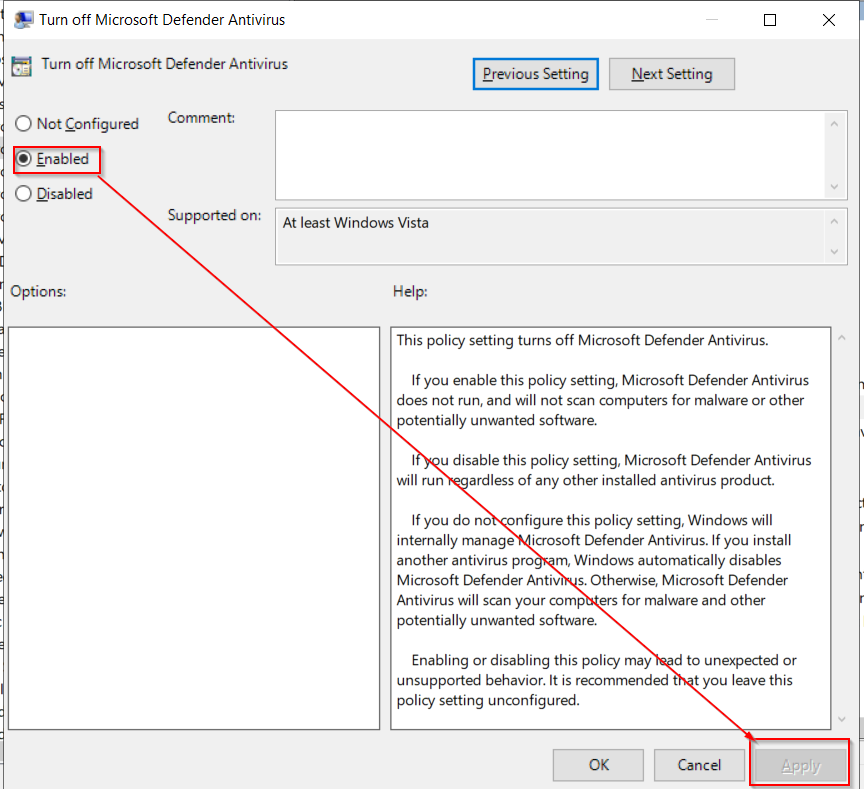
- Then again come back to the
GPO management tab->right click-> clickenforced
- On the start menu type
Then give the DC a static IP from the adapter settings, used
linux mintas the DNS server: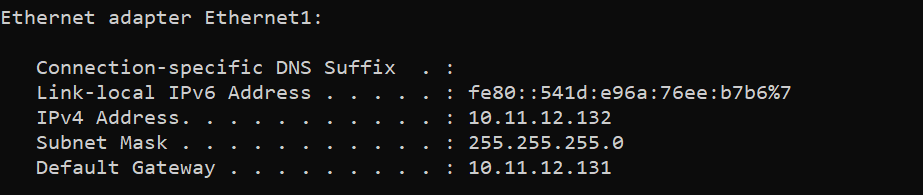
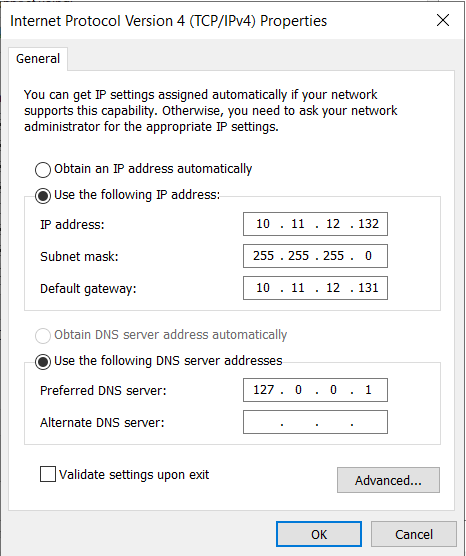 I have used linux mint as the gateway, if you are not using any intermediate os for acting as a router, don’t give any gateway(as no default gateway exists inside vmnet’s host only networks, in case if you are using the network segmentation). If you are using the
 NATonly setup give yourNAT'sdefault gateway. You can identify yourNAT'sdefault gateway throughVirtual Network Editor -> Change settings -> select the NAT network -> NAT settings.
Don’t get fooled by my lab result’s IP addresses. Your lab will be having different setup of IPs as well as NICs. Understand those carefully and then add accordingly throughout the lab setup as well as on practical demos.
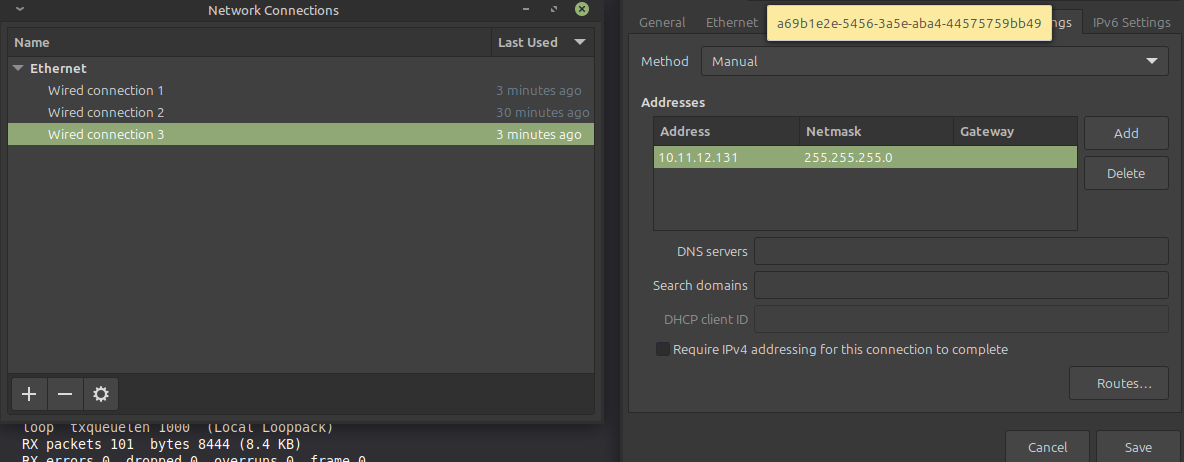
Setting up Linux mint as an intermediate router(optional):
For the advance lab setup
Set up static IP for both
wired connection 2 and 3in linux mint: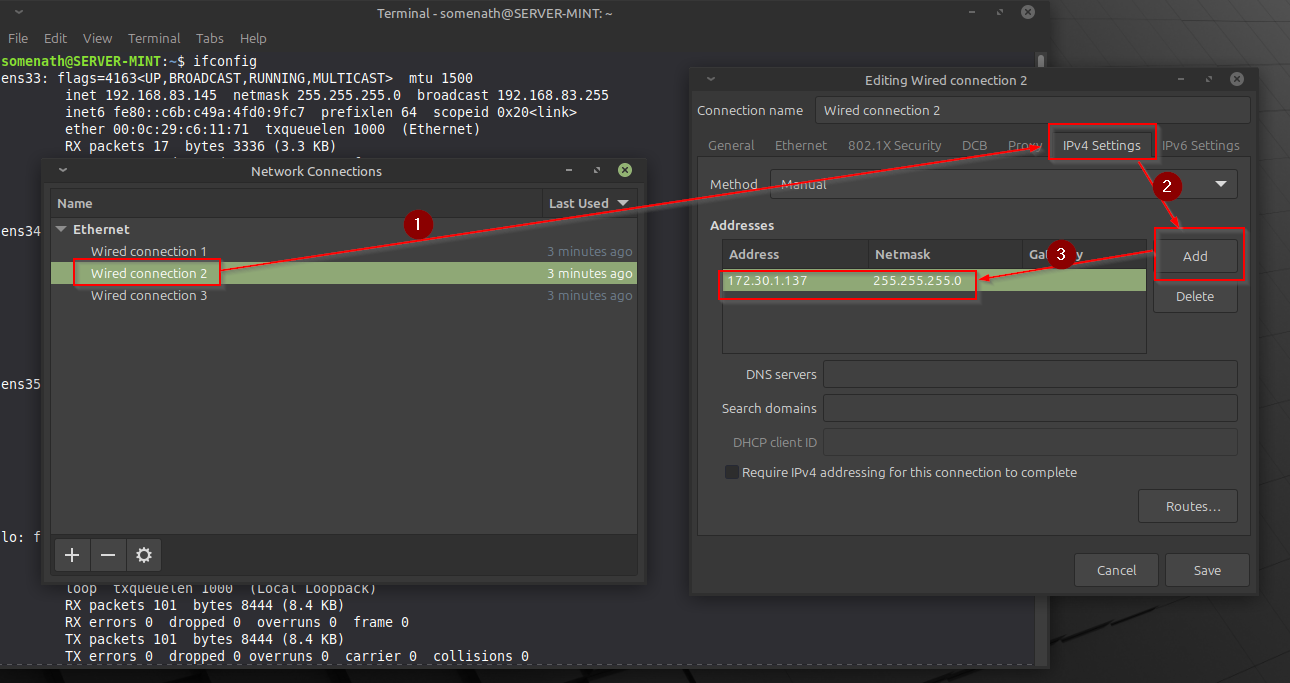
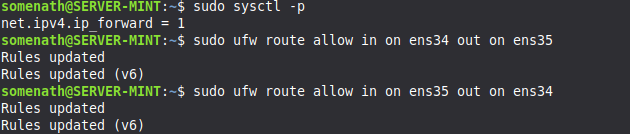
ENABLING IP FORWARDING:
# Turn on forwarding immediately
sudo sysctl -w net.ipv4.ip_forward=1

# Make it permanent (so it survives a reboot)
echo "net.ipv4.ip_forward=1" | sudo tee -a /etc/sysctl.conf

- FIXING THE FIREWALL BY ALLOWING ROUTING:
- Allow traffic from vmnet2 to go to vmnet3:
sudo ufw route allow in on ens34 out on ens35
- Allow traffic from vmnet3 to go to vmnet2:
sudo ufw route allow in on ens35 out on ens34
Joining the Machines to the Domain controller:
- Pointing those machines to our
Domain controller:- If you have followed the
linux mintone this one is for you:- Our motive is to point
SPIDERMANto route it’s traffic tolinux minttoDomain controllerand vise versa. - To do so use the following settings in your
vmnet 2adapter onSPIDERMAN: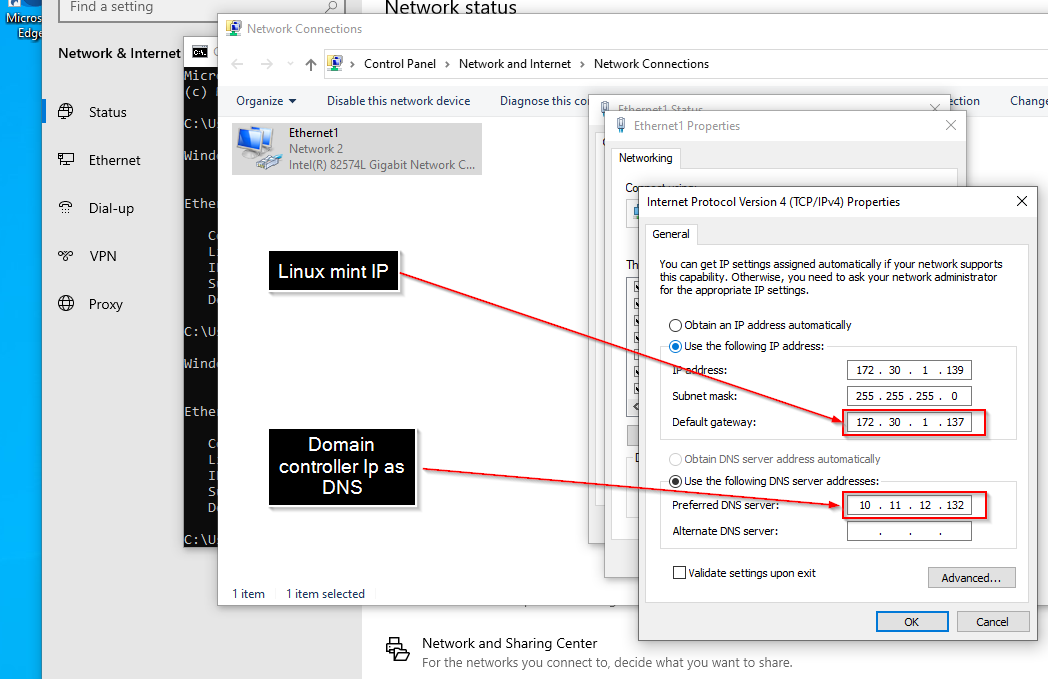
- Onto
THEPUNISHERmachine use the following settings forvmnet 2: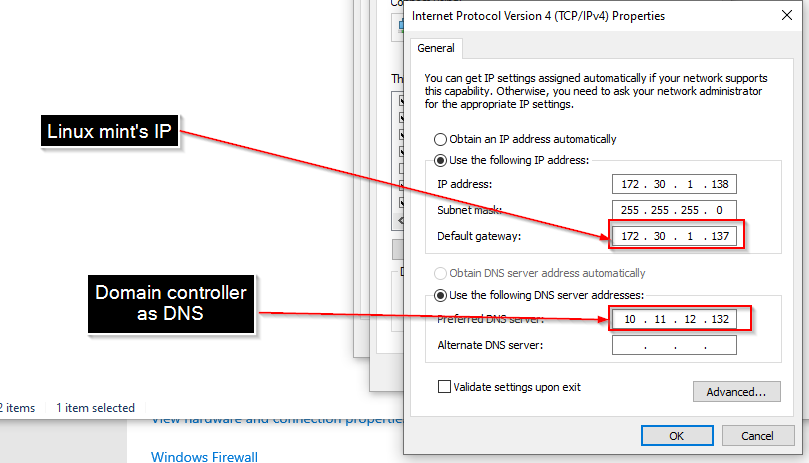
- Settings for
vmnet 3onTHEPUNISHERmachine: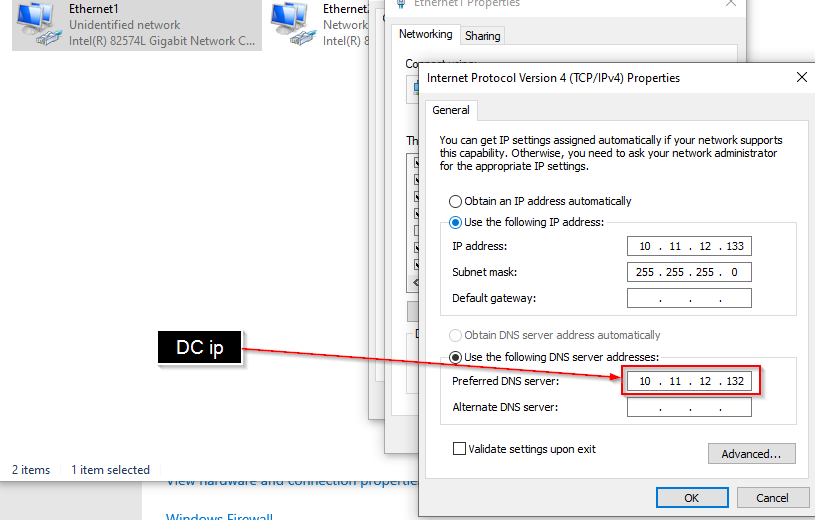
- Our motive is to point
- If you are doing the
NATonly setup:- Give the default gateway of your
NATnetwork for both of the machine. - Give the
Domain controller'sIP asDNSfor both the machine.
- Give the default gateway of your
- If you have followed the
- Testing the connections:
- Ping
SPIDERMANtoLinux mint, thenSPIDERMANtoTHEPUNISHER - Ping
THEPUNISHERtolinu mintand then toSPIDERMAN - Ping
Domain controllerfromSpidermanandTHEPUNISHERmachine both and vise versa. - If you face
request timeoutissue, turn offwindows firewall fullyon both thePUNISHER and SPIDERMANmachine. Then try again.
- Ping
- Joining the domain from THEPUNISHER machine:
- Click on the start button -> type
Domainand access this option: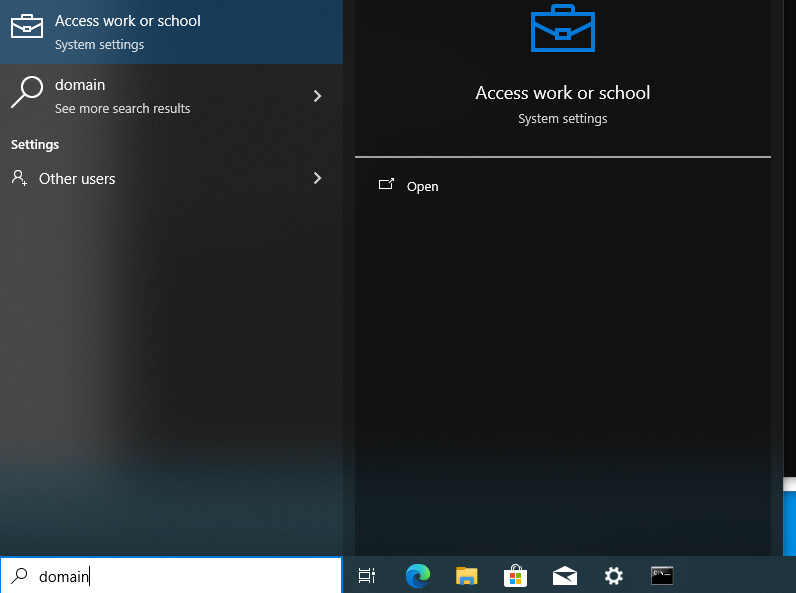
- Click on
connect-> and click onjoin this device to a local AD domain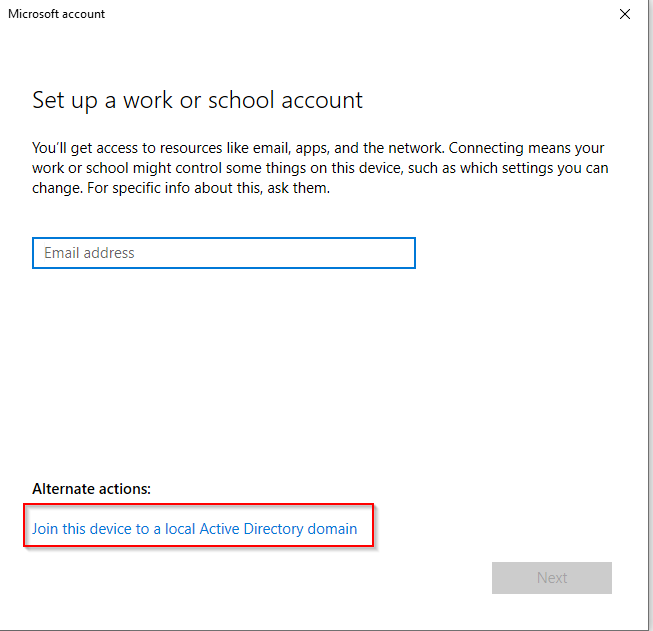
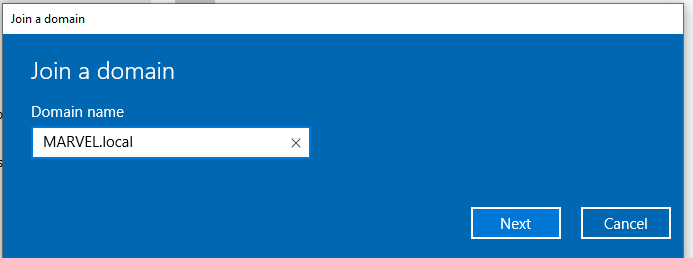
- Give your local domain name and hit next:
- If this windows loads up that’s mean your lab setup is successful:
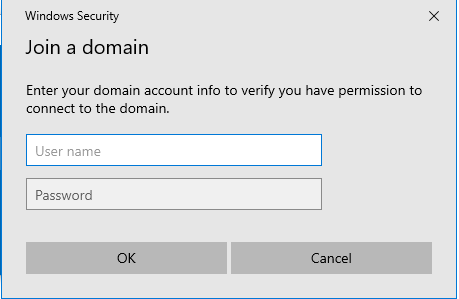
- Give username as
administratorand password asP@$$w0rd!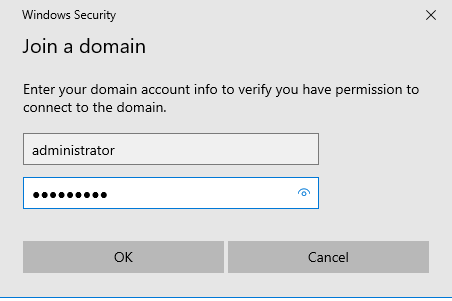
- Then on this pop up, select account type as
Administrator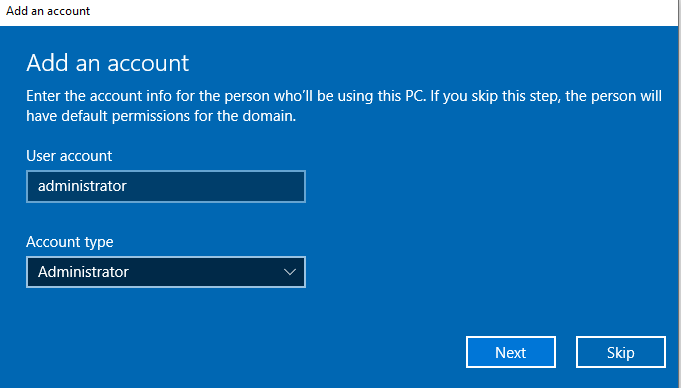
- Click on the start button -> type
- Joining domain for SPIDERMAN machine:
- Do the exact same stuff we did for
THEPUNISHERmachine.
- Do the exact same stuff we did for
- Let those machines reboot, come to the
DC->server manager->Active Directory users and computers-> Under your local domain -> selectComputers. You should see your two Windows 10 workstations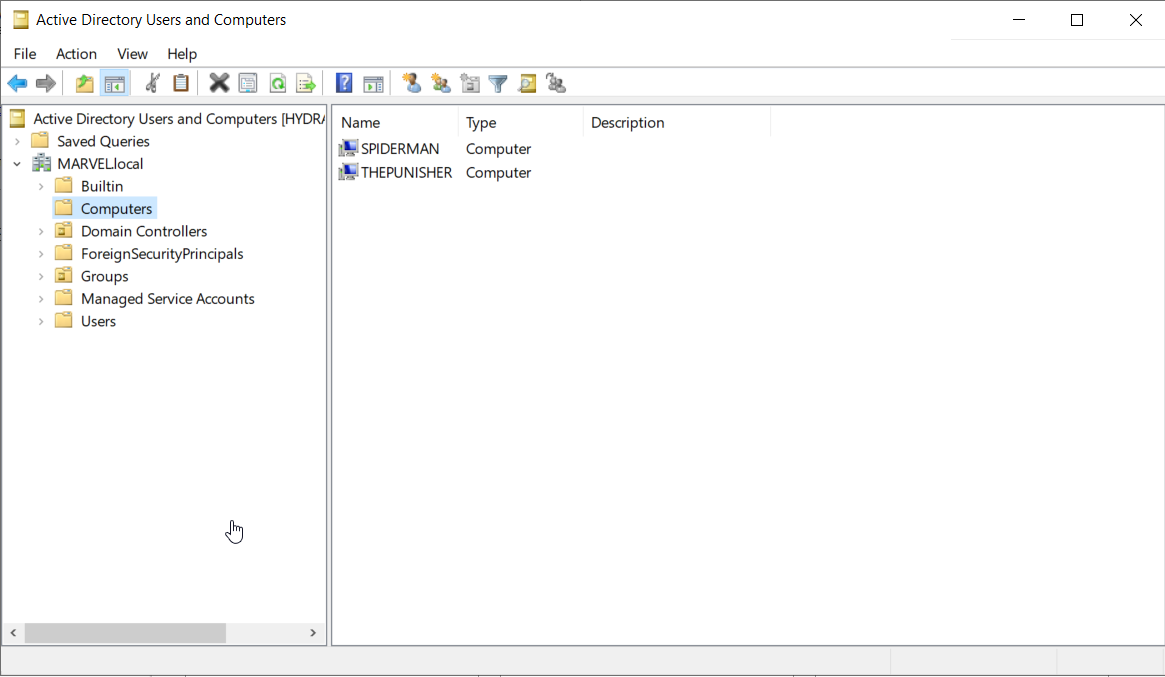
- Now login onto both the workstations as
MARVEL\administratorusing theDC'sadmin password which isP@$$w0rd! - Now adding local admins inside THEPUNISHER machine:
- click on the start button -> type
usersand go to the settingsEdit local groups and users:
- or you can press
win + rand typelusrmgr.msc - Come to the
userstab -> right click onAdministrator-> then set a password -> give this passwordPassword1! - Enable this account by double clicking it -> and disabling the checkbox telling
Account is disabled
- Adding
fcastlewhich we made inside theDCinsideTHEPUNISHERmachine’sAdministratorgroups: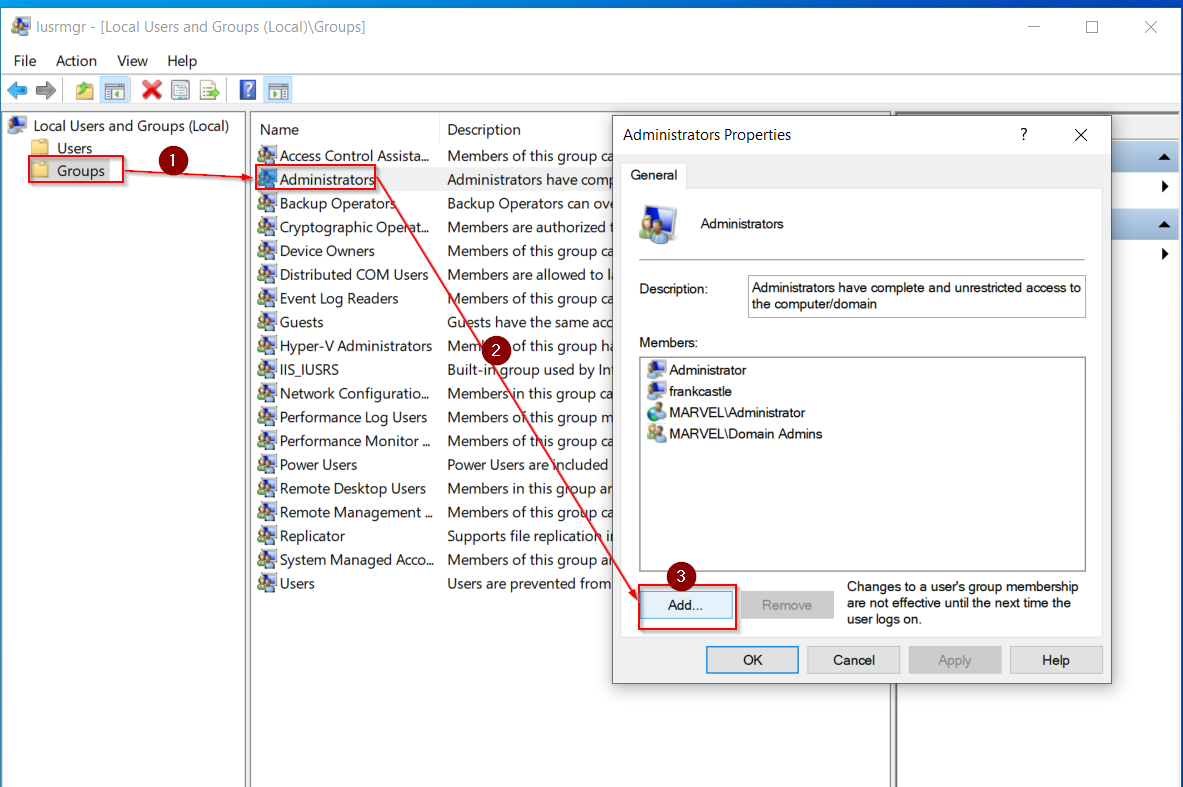
- Click on
Add-> typefcastle-> click oncheck namesand this should appear: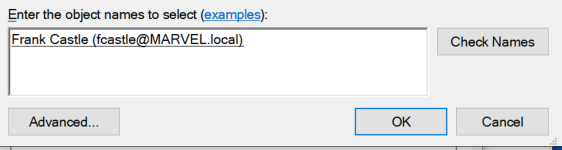
- Hit apply and ok
- Then enable
Network discoveryby going into thenetwork folder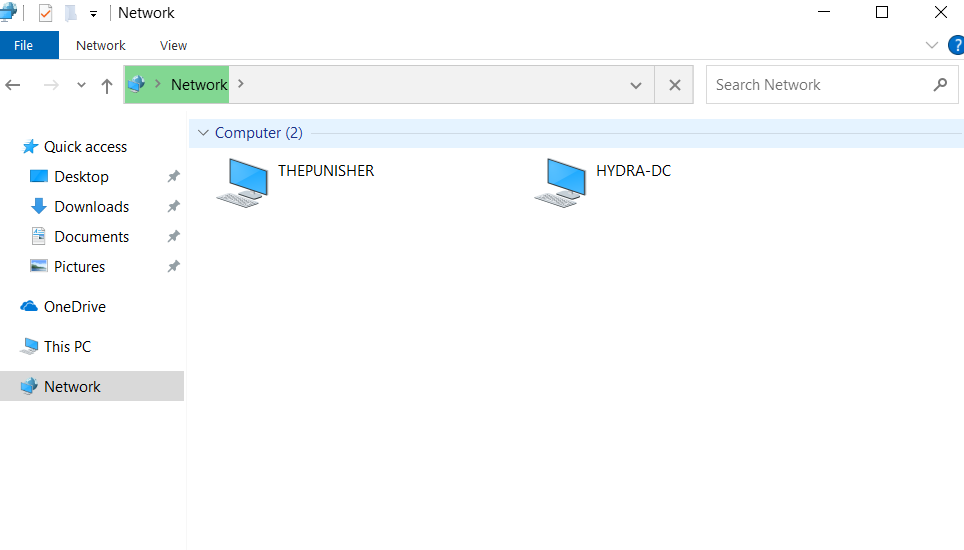
- click on the start button -> type
- Adding local admins inside SPIDERMAN machine:
- Do the same steps as
THEPUNISHER'sstep number 4 - Then add 2 accounts into the
administratorsgroup using the following steps: - Write
pparkerand click check names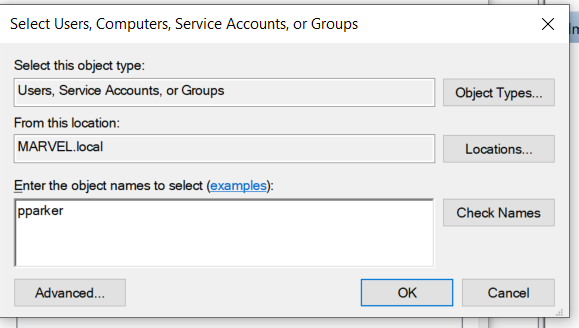
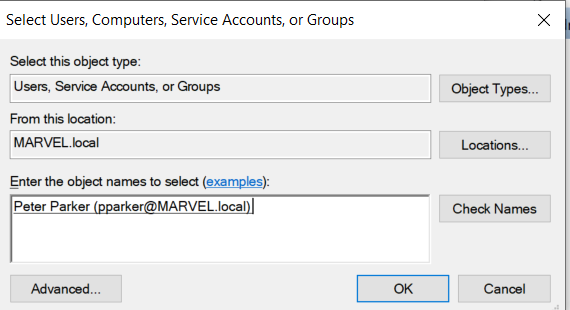
- add
fcastlethe same way we did it insideTHEPUNISHER - Now
peterparkerandfrankcastleboth aslocal adminsinsideSPIDERMANmachine - Enable network sharing by clicking the option
click to change->turn on network discovery and file sharing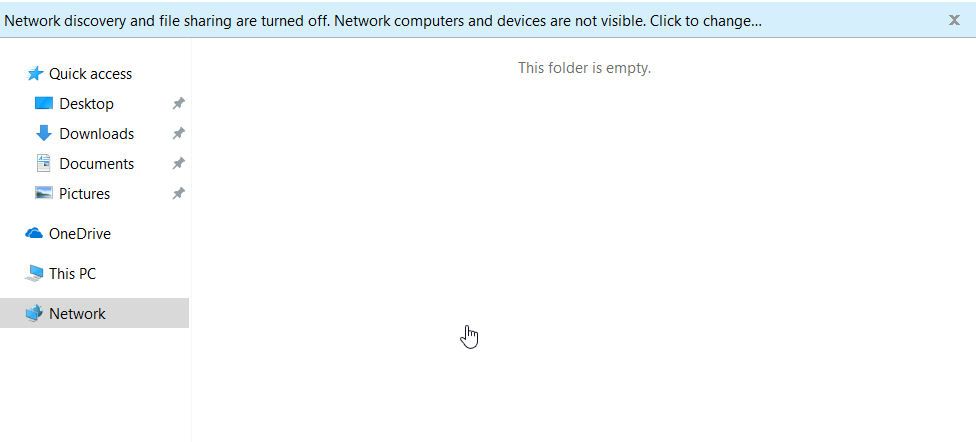
- Restart your computer and login as peterparker like this:
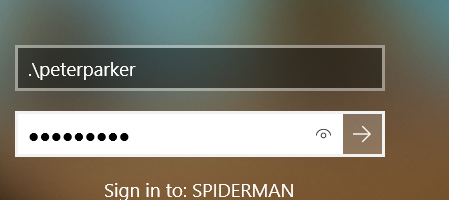
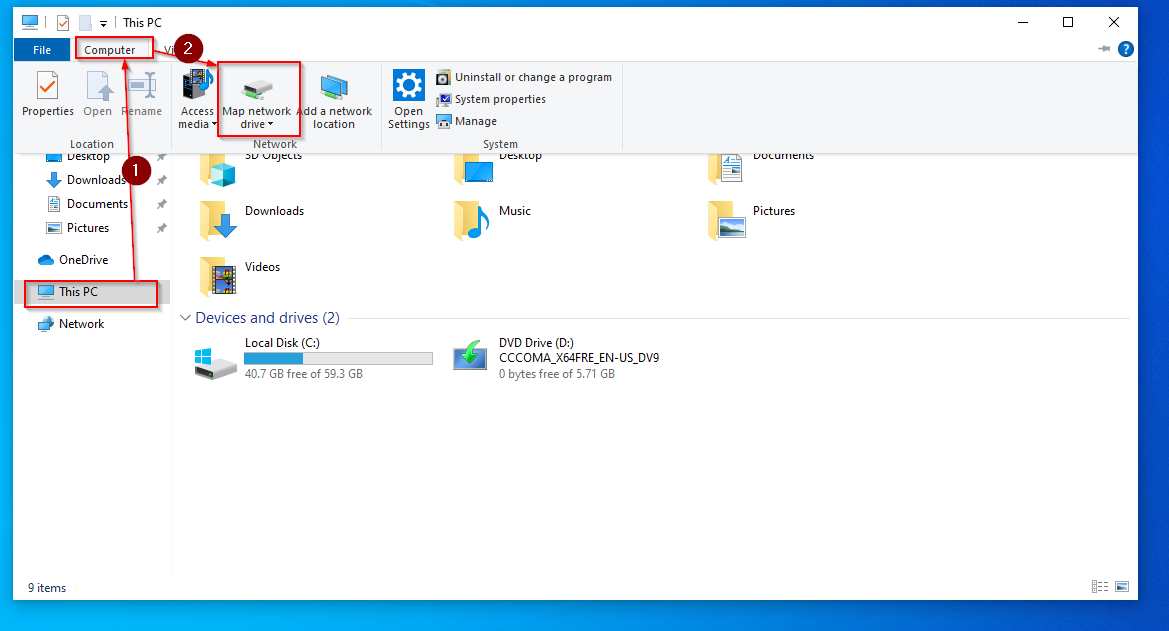
- Now we will map the network drive
- Follow these steps:
- Type
\\HYDRA-DC\hackmeand check both the boxes: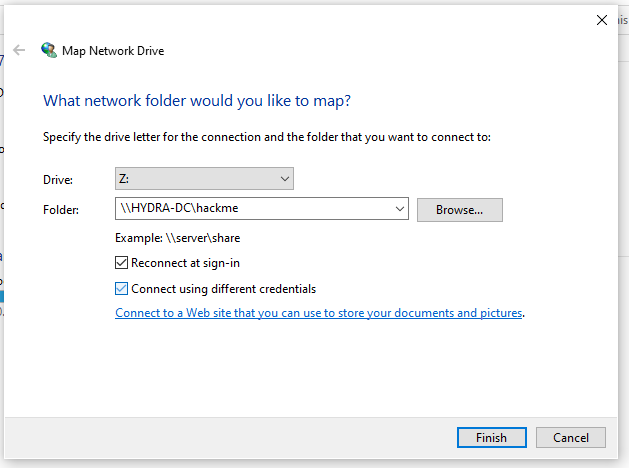
- Use the domain admin credentials
administrator and P@$$w0rd!
- Now we should access the shared drive:

- Do the same steps as
CONGRATS WE HAVE COMPLETED THE LAB SETUP !! Let’s start hacking.