What is ftk imager?
FTK Imager is a free, forensic tool used to create a bit-by-bit copy, or “image,” of a storage device to preserve it as evidence without altering the original data. It is used by digital investigators to collect and analyze electronic evidence from various sources like hard drives, mobile devices, and removable media. A key feature is its ability to perform integrity checks using hashing algorithms to ensure the forensic image is an accurate and authentic copy, which is crucial for legal admissibility.
Real-World Applications of FTK Imager:
FTK Imager finds extensive use in various domains within digital forensics:
1. Digital Crime Investigations:
- FTK Imager assists in collecting evidence for criminal cases, helping investigators build strong cases based on accurate and comprehensive forensic images.
2. Incident Response:
- During incident response activities, FTK Imager aids in analyzing compromised systems, identifying potential threats, and providing valuable insights into the nature of the incident.
3. E-Discovery:
- FTK Imager plays a crucial role in e-discovery, allowing for the extraction and analysis of electronic data for legal purposes. This enables organizations to comply with legal requirements and uncover relevant evidence.
4. Data Recovery:
- In cases involving data loss or deletion, FTK Imager helps retrieve lost or deleted files, providing investigators with critical information for their examinations.
Practical Demo:
partition creation -> Transferring any file into that partition -> removing it -> creating an image of that partition -> opening it through ftk imager again and seeing if we can see the deleted data or not.
Creating a separate partition for the practical:
- Open
file manager-> click onThis pc-> You may have multiple partition / may not. - Now click on the
windowsbutton, search fordisk management, and open it:
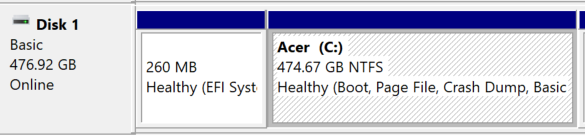
- You should see your primary partition, right click on it
- Then select the option
shrink volume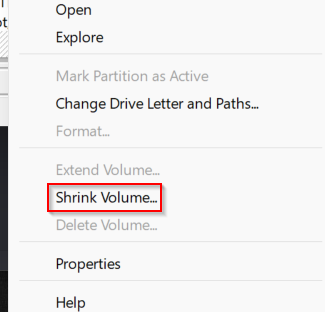
- We only need 1 gb for the partition, to do so write
1024into this column , and then click onshrink: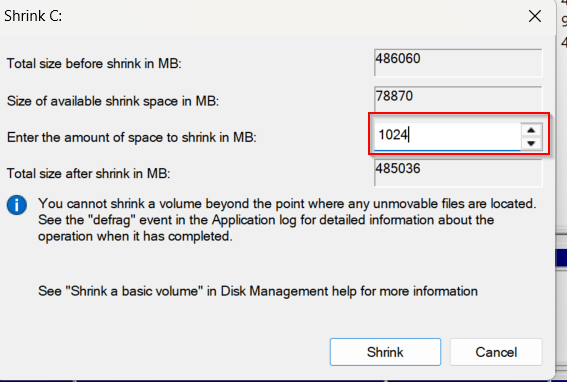
- There should be a new
unallocatedvolume created:
- Again right click on that newly created volume and select the option
New simple volume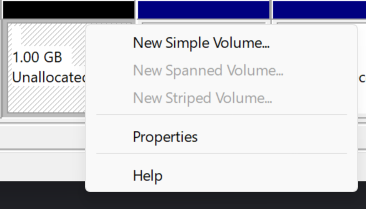
- A wizard like this will pop up, click on
next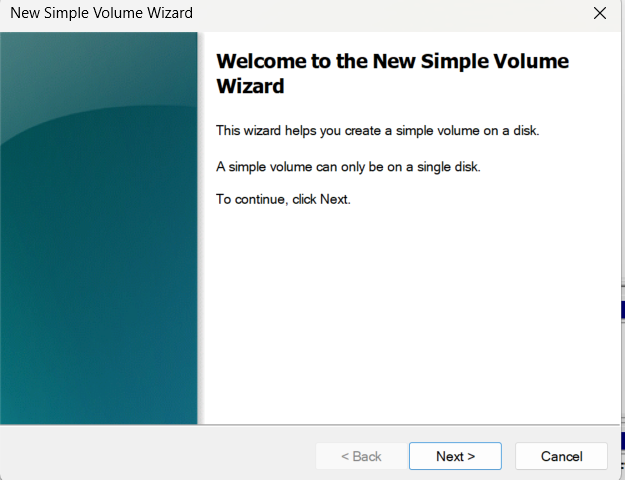
- select the default stuffs, and give it a name accordingly, i have given the name
FTK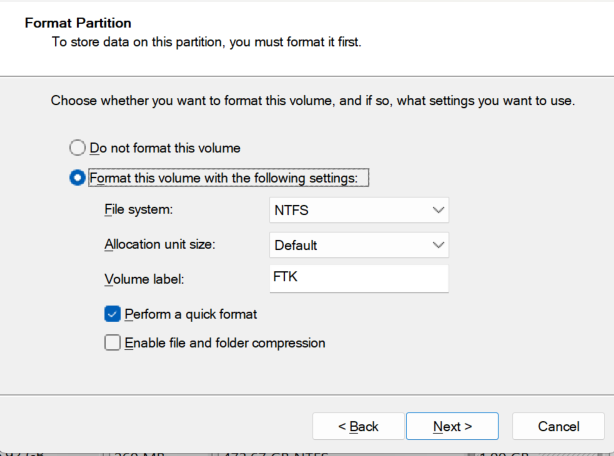
- Then click on finish
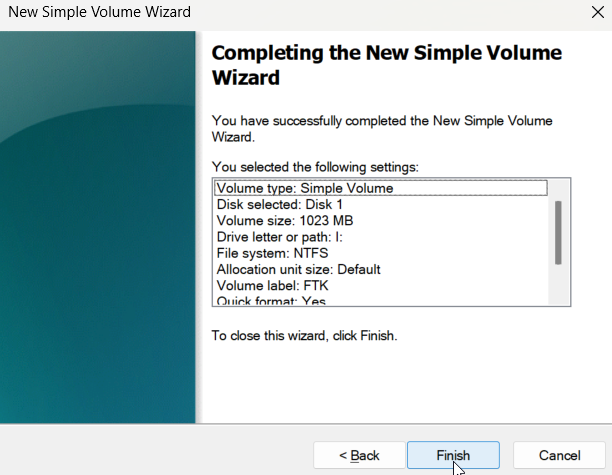
- The new partition will appear.

Installing ftk imager:
- Search for ftk imager download, come to this following website and click on
free download
- Install the application first on your own.
Now let’s start the actual practical:
Select any image of your choice from your any folder, copy and paste that image into the newly created partition you just made for the practical. After pasting delete it immediately.
Now open
ftk imager application-> Click onfileand select the optioncreate disk image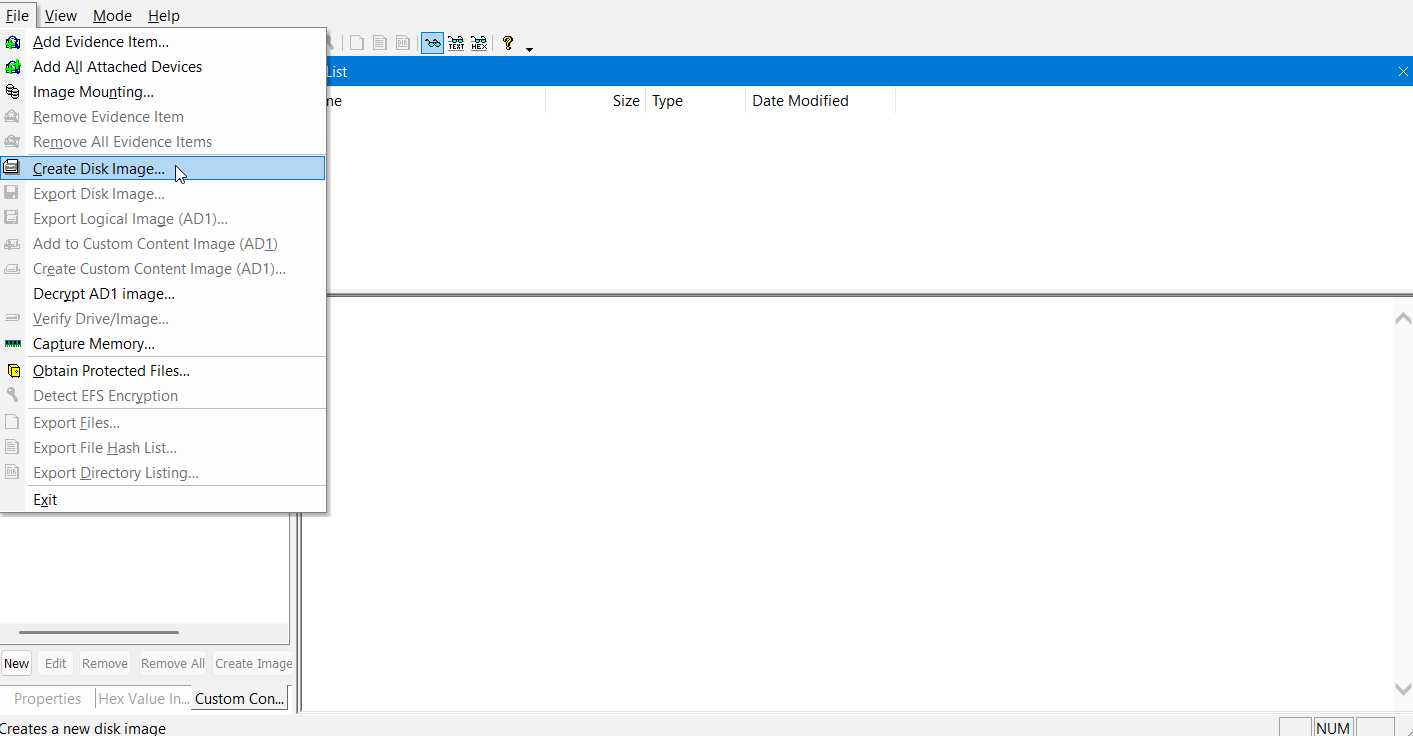
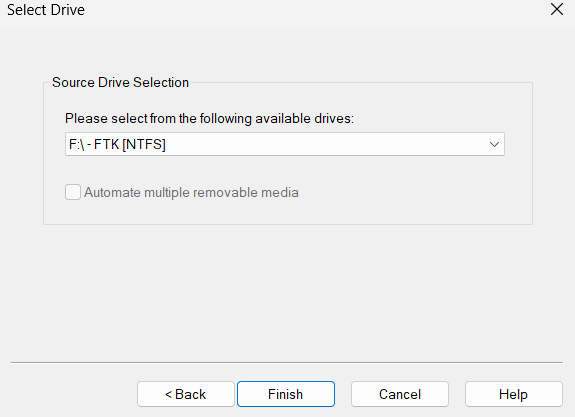
Then select
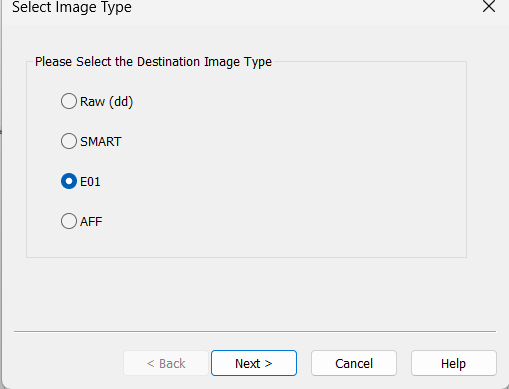
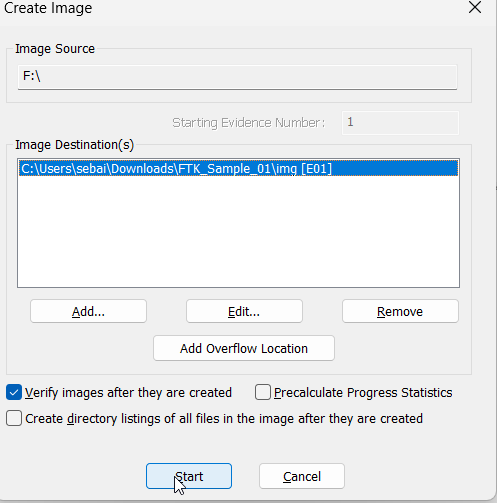
logical dirve-> then select the drive you want to make an image of , then another wizard will pop up after finishing the previous step, click onaddoption. Then select the optionE01, then give a basic description as you need.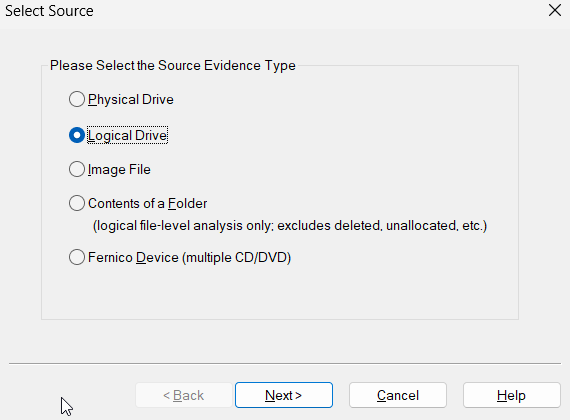
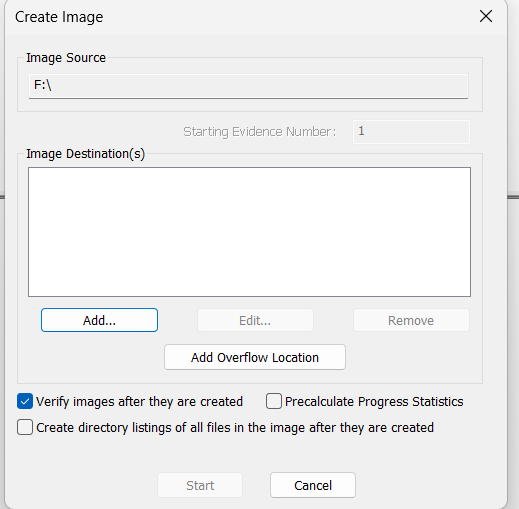
Then select a destination folder to store the img file:
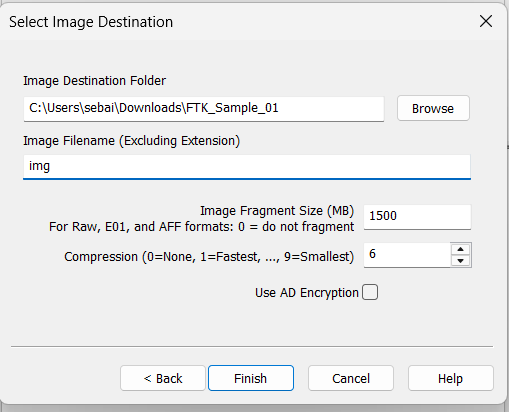
After that click on start:
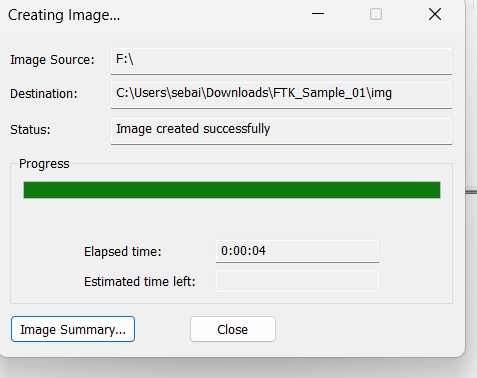
The image will be created:
Go to the destination location, we can see two files are there:
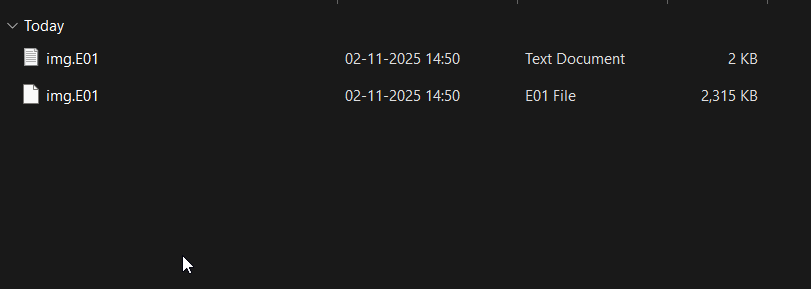
First one is a text doc, which will provide us basic info of the case
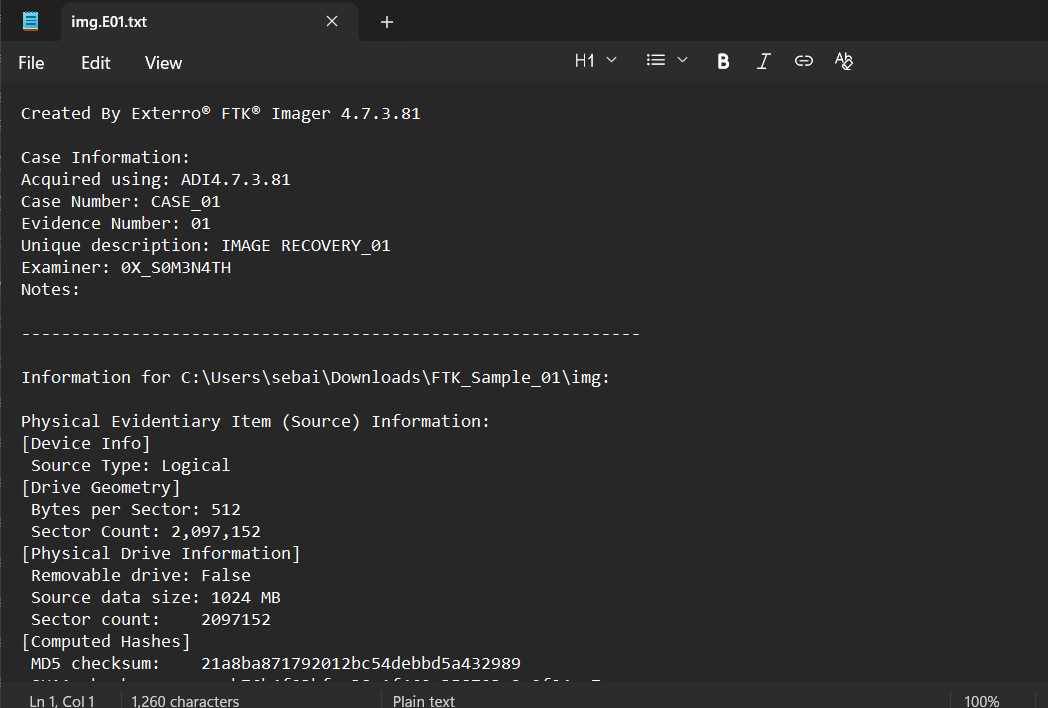
Second one is the actual image the
EO1file .
KEY FEATURES OF EO1 FILE:
When you create the .E01 file, you are embedding several critical pieces of data directly into the file itself.
- Case Metadata (The Label):
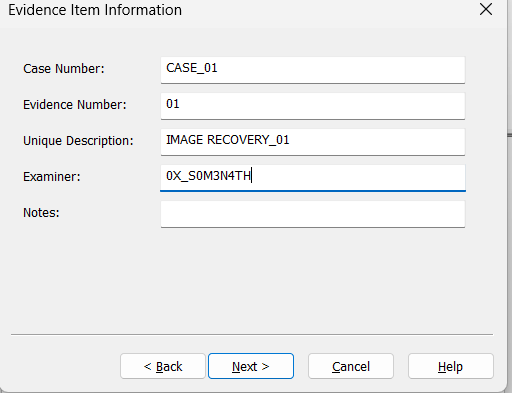
At the start of the process, FTK Imager asks you for “Evidence Item Information.”
This includes Case Number, Examiner Name, Notes, Evidence Number, etc.
All this information is written into the .E01 file’s header. This is a core part of the Chain of Custody—it proves who collected the evidence, when, and why.
- Built-in Verification (The Tamper-Proof Seal):
This is the most important feature.
The .E01 format saves
MD5and/orSHA1hashes for the entire evidence source.When you “verify” the image (or when another tool opens it), it re-calculates the hash of the data and compares it to the original hash stored in the file.
If they match: You can state in court that your forensic copy is a perfect, unaltered duplicate of the original drive.
If they don’t match: The evidence is considered “tampered” or “corrupted.”
- Compression (To Save Space):
The raw data inside the
.E01container is compressed.This is why your 500 GB drive might result in a 200 GB .E01 file. It intelligently skips empty space and compresses the rest.
- File Segmentation (Chunking):
The E01 format automatically splits the image into smaller, manageable “chunks.”
You will see files like
image.E01, image.E02, image.E03, etc.This was originally done because many file systems (like
FAT32) couldn’t handle single files larger than 4 GB. This standard just continued.The
.E01file is the “main” file that holds the headers, metadata, and the first chunk of data.
Image analysis:
- Come to
ftk imager app-> selectadd evidence item-> this time use the optionimage file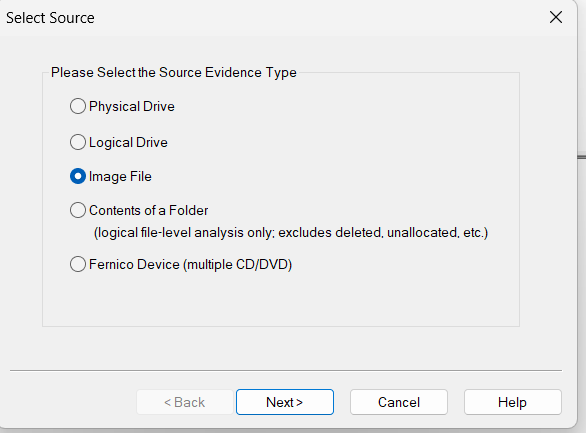
- select the
image filefrom the source location:
- On finishing the step and
evidence treewill appear on the left pane. Click through the tree until you find the optionRecycle Bin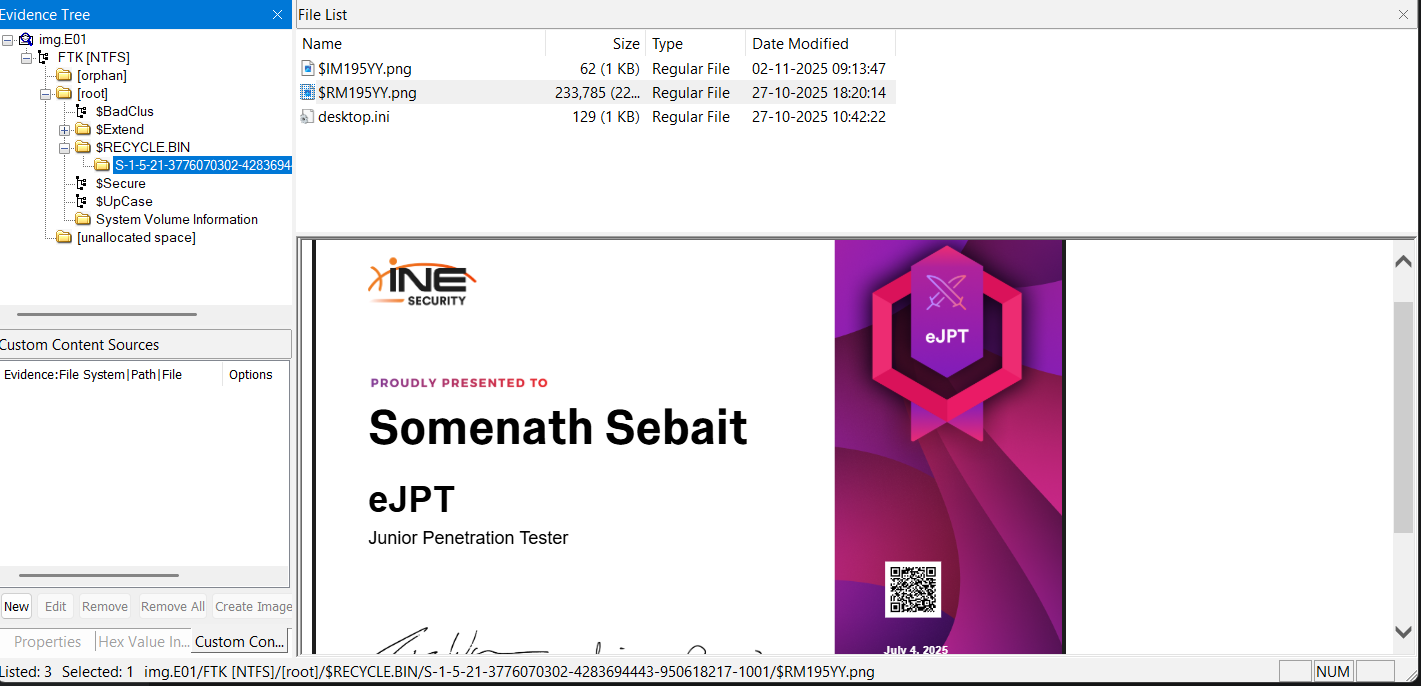
- And we can see the image file we previously deleted.