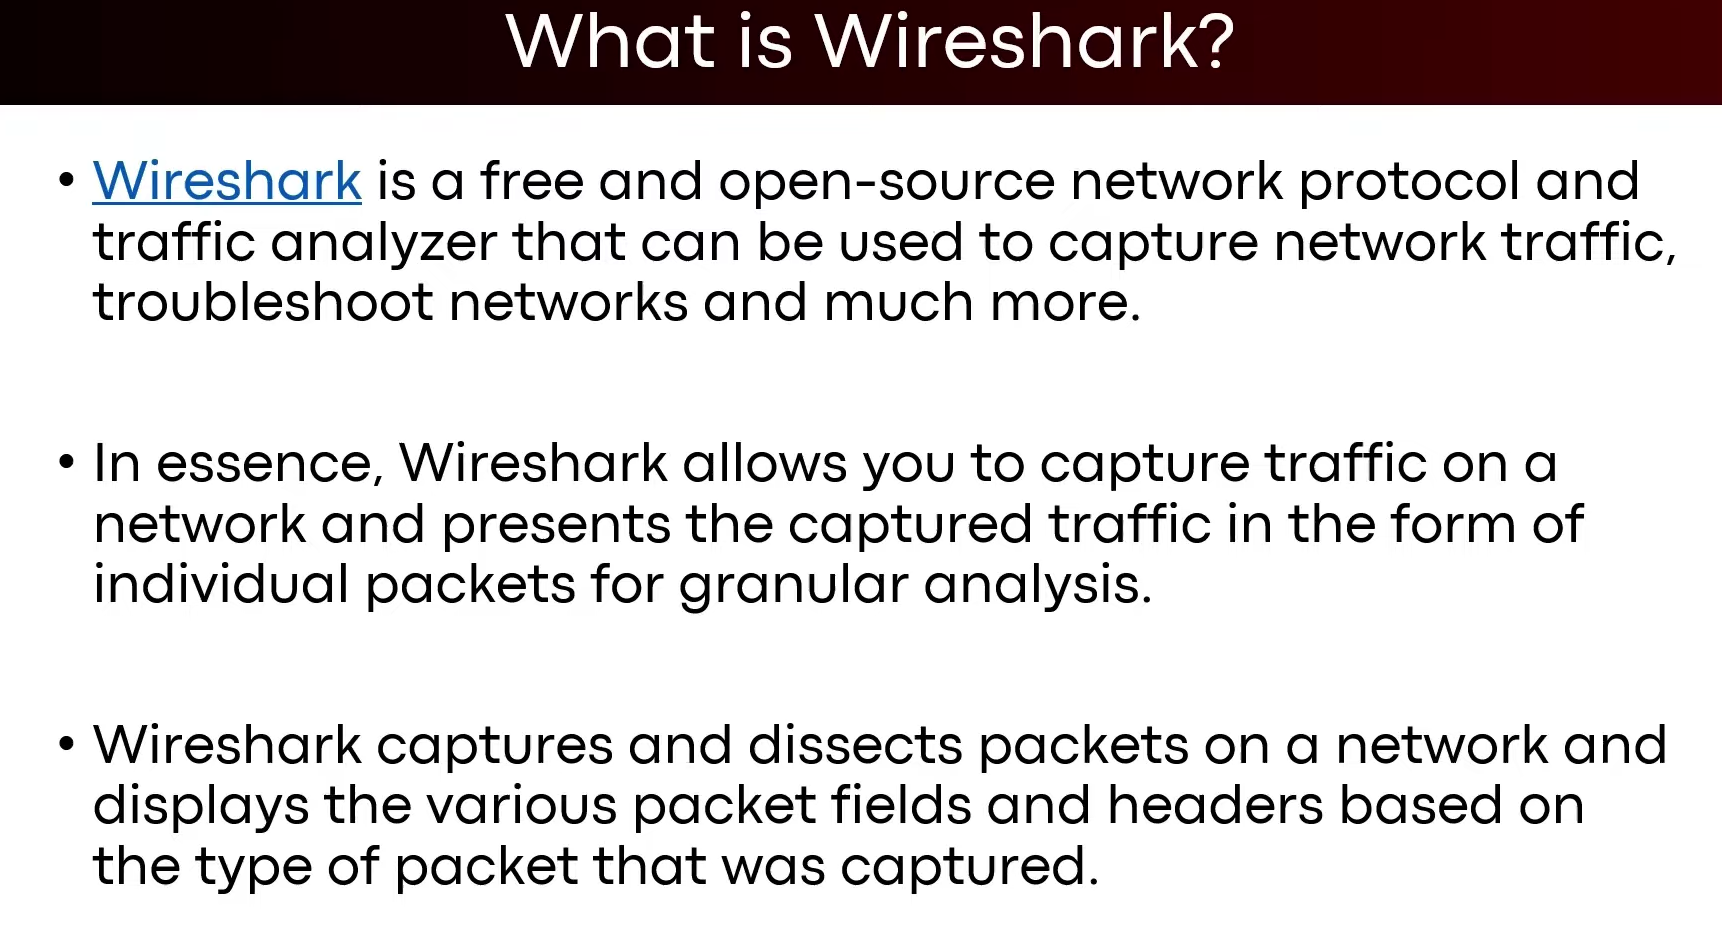
Wireshark:
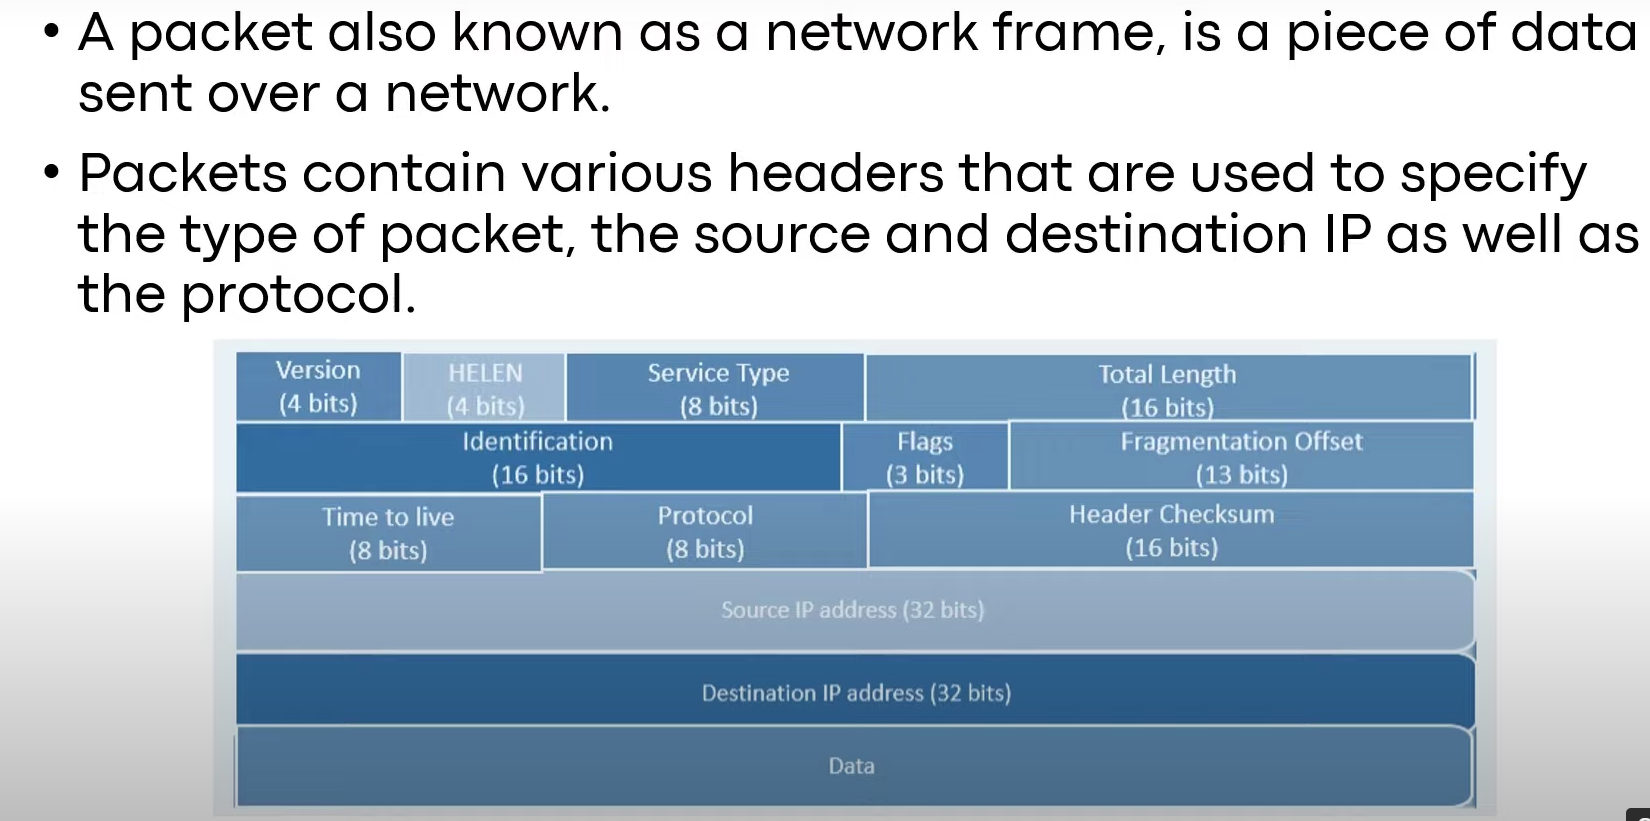
Packets:
In a real world blue team operation usually the threat analysts are given with ‘PCAP’ files to analyze which systems are getting affected by the malware / what is the C2 server of the attacker/ where did the malware spread from which time, what’s the IP of those infected systems etc. . .
What are PCAP files? -> PCAP file is a exported format of the captured data from Layer 2-7 of the OSI model by wireshark. We can share that captured data to anyone to analyze what happened within this timeframe in the network.
Practical DEMO:
- Install the PCAP file from this page: PCAP_FILE
- Open up wireshark ->
sudo wireshark - Display filters:
- Filtering
http requests-> {http.request} - Source IP filtering ->
ip.src==IP_ADDR - HTTP,DNS,FTP,ICMP capture filter ->
http,ftp,dns,icmp ip.addr == IP_ADDR && http.request.method == "POST/GET"http.host =="HOST_NAME"eth.addr==MAC_ADDR- We can filter out services using port number also ->
tcp.port==80/21/22/23/25/3306/445/139
- Filtering
- Analyzing a PCAP file of infections regarding ‘dridex’ malware ->
tls.handshake.type eq 1
- right click on TLSv1.2 -> follow -> TCP stream ->
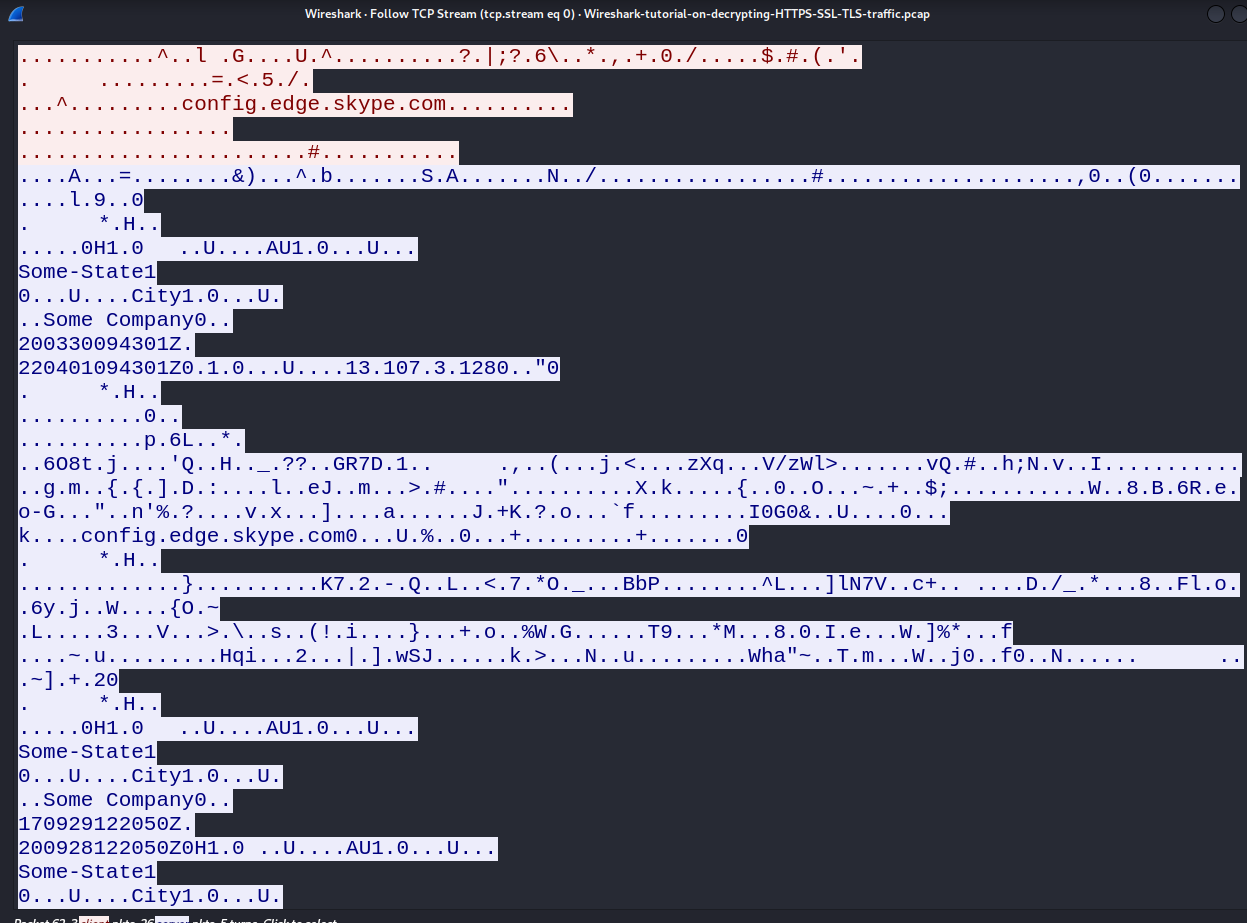
- Everything is encrypted here.
- Command used to identify the connections made from the client to execute the actual DLL ->
(http.request or tls.handshake.type eq 1) and !(ssdp) - We are having the TLS keys to decrypt them
- Identified the actual dll file ->
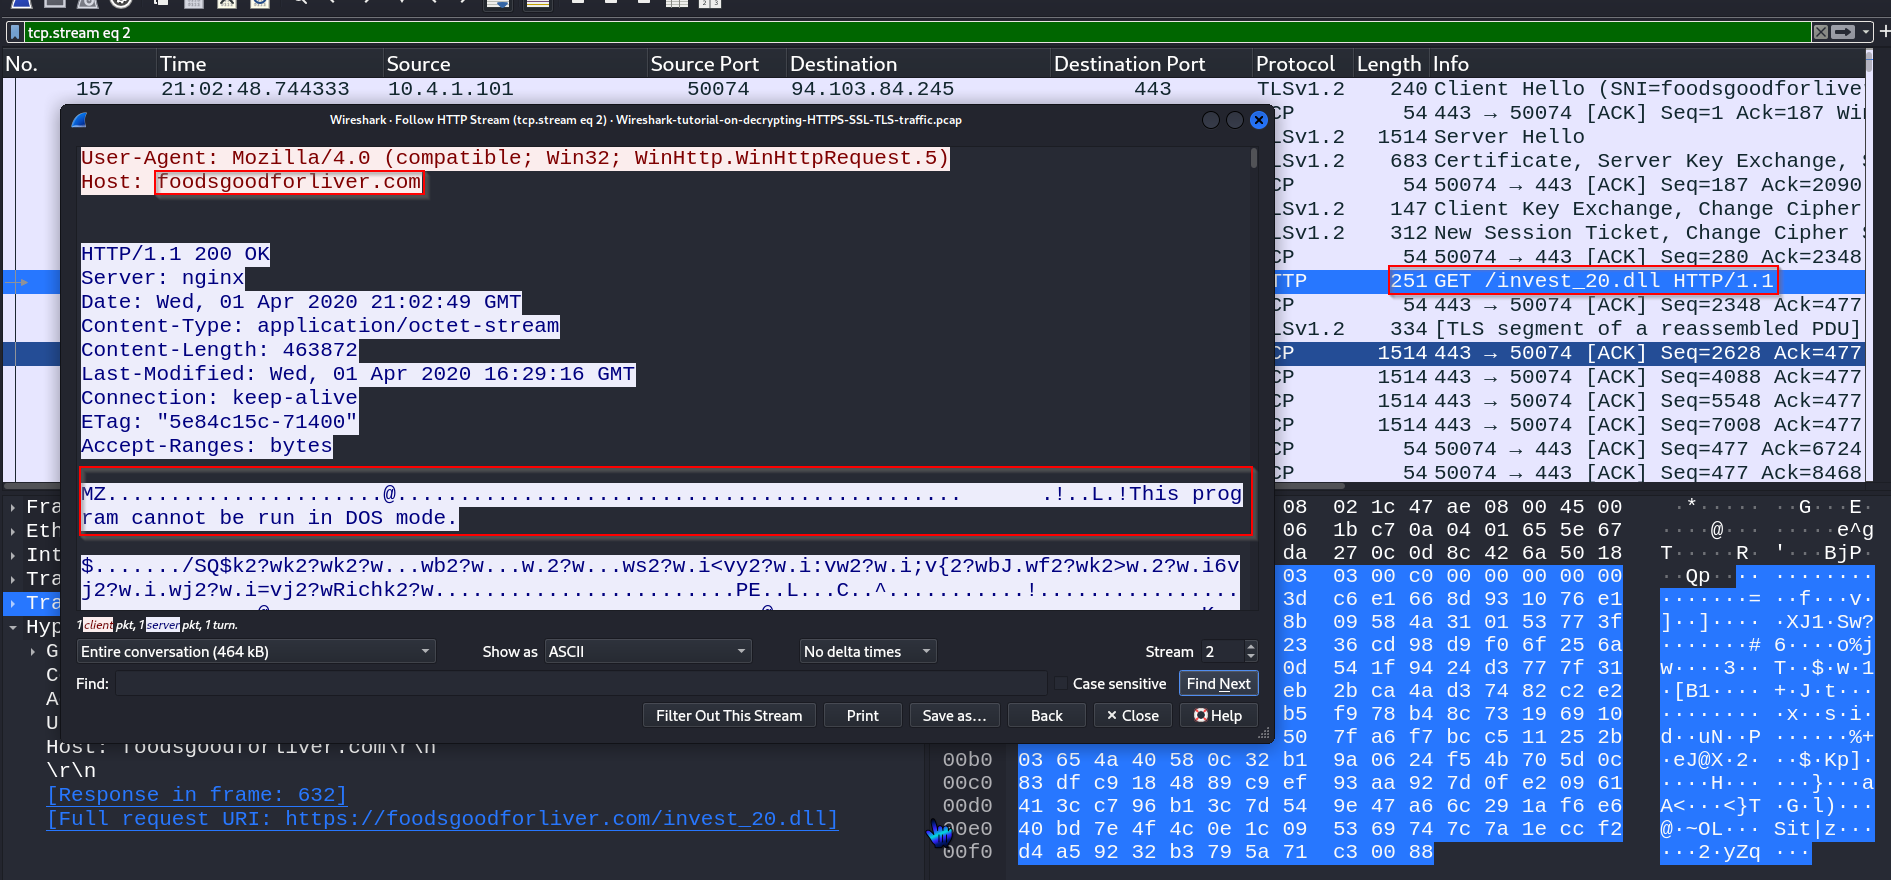
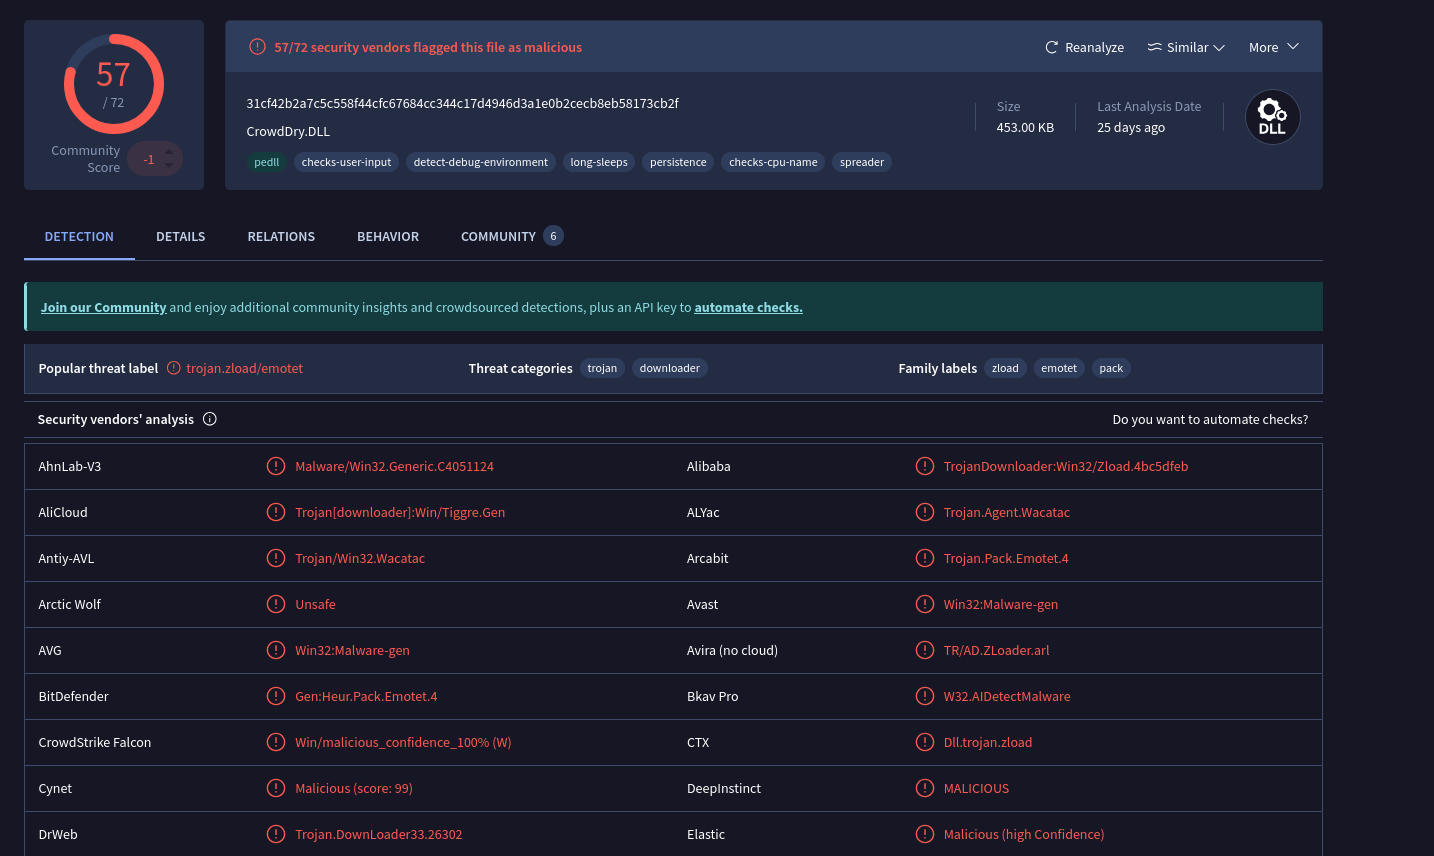
- We will export this file as an object file and then upload it on virus total ->
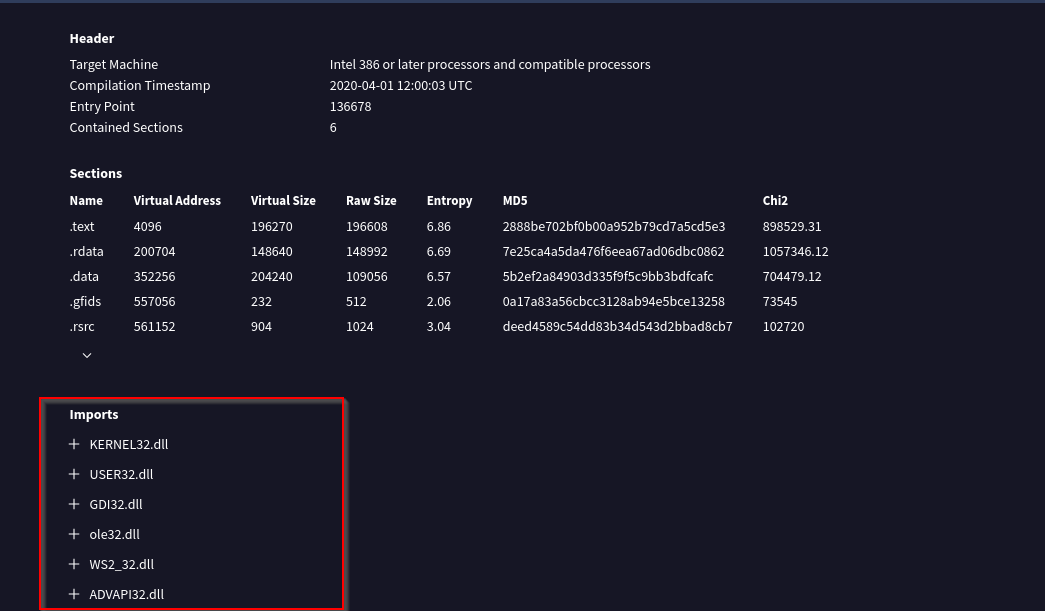
- Importing system32 files :
- Identified the C2 server ->
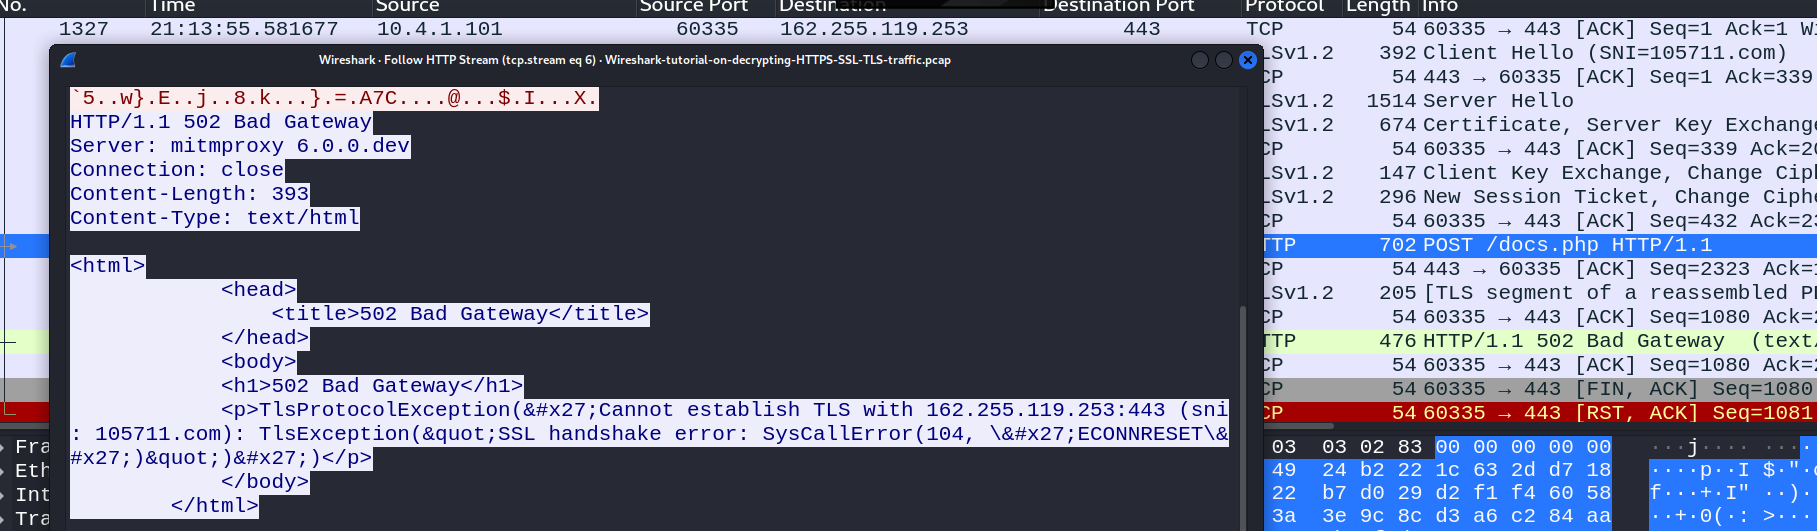
- After executing the malware the client is acutally getting connected with the C2 server of the attacker.
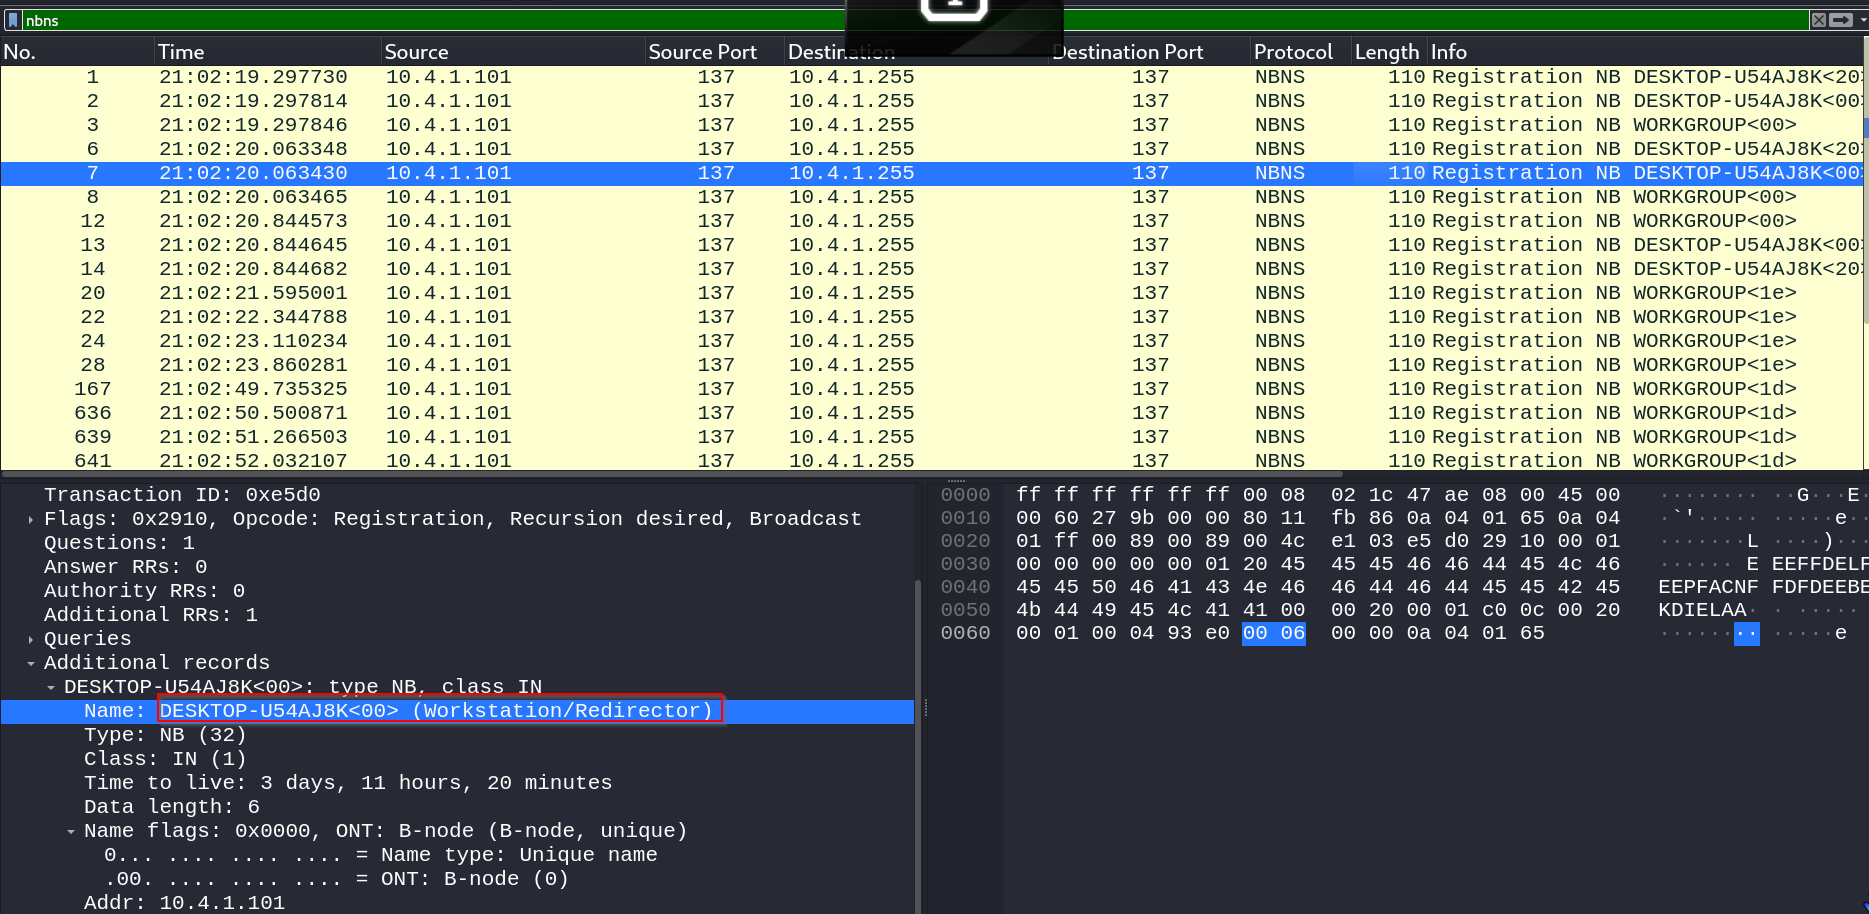
- Device identification using
nbns{NetBios Name Service} ->